




Creating your own cannabis fertilizer can help reduce costs, recycle organic materials, and give you more control over plant nutrition. Homemade cannabis fertilizer often uses ingredients like worm castings, compost, and kelp meal to supply essential nutrients. However, making fertilizer for cannabis requires careful preparation, proper dilution, and attention to plant growth stages. Unlike commercial products, homemade mixes vary in strength and nutrient balance. This guide explains how to make, apply, and manage DIY cannabis fertilizer safely while avoiding common mistakes and supporting healthy plant growth.
Key Takeaways
- Homemade cannabis fertilizer is best treated as a variable soil supplement rather than a precisely measured replacement for commercial nutrients.
- Cannabis plants need different nutrient balances during vegetative growth and flowering, so ingredients should be selected for the correct stage.
- Worm castings, mature compost, and kelp meal are among the most beginner-friendly ingredients for making natural fertilizer for cannabis.
- Always begin with a mild dilution, test the fertilizer on one plant, and wait several days before applying it more widely.
- Record every ingredient, measurement, dilution, feeding date, and plant response so successful DIY cannabis fertilizer recipes can be repeated safely.
- What Is Homemade Cannabis Fertilizer?
- Understanding the Nutrients Cannabis Plants Need
- The Best Natural Ingredients for Homemade Cannabis Fertilizer
- How to Make Your Own Cannabis Fertilizer Step by Step
- Beginner Homemade Cannabis Fertilizer Recipes
- How to Use Homemade Fertilizer for Cannabis Plants Safely
- Conclusion
- Frequently Asked Questions
What Is Homemade Cannabis Fertilizer?
Homemade cannabis fertilizer is a nutrient mix made from natural or household ingredients rather than a pre-formulated bottled feed. Growers may use compost, worm castings, seaweed, bone meal, banana peels, coffee grounds, or other organic materials to supply the essential cannabis nutrients plants need throughout their life cycle.
How Homemade Cannabis Fertilizer Differs from Commercial Nutrients
Commercial cannabis fertilizer usually contains measured concentrations of nitrogen, phosphorus, potassium, and trace minerals. Our guide to the best nutrients for cannabis plants explains how feeding requirements differ between soil, coco, and hydroponic systems. Homemade fertilizer for cannabis plants is less standardized because its nutrient content depends on the ingredients, preparation method, and decomposition time. This makes DIY cannabis fertilizer cheaper and more flexible, but also harder to measure accurately.
The Benefits and Drawbacks of Making Your Own Cannabis Fertilizer
The main benefits are lower costs, reduced waste, and greater control over the ingredients used. A well-made organic cannabis fertilizer can improve soil structure, encourage microbial activity, and release nutrients gradually.
The drawback is inconsistency. In our experience reviewing grower feeding problems, homemade mixtures are often applied too strongly or before the ingredients have fully broken down. This can cause nutrient burn, unstable pH, unpleasant odors, or nutrient deficiencies.
Is DIY Cannabis Fertilizer Suitable for Beginner Growers?
Beginners can make their own cannabis fertilizer, but simple recipes are safest. Growers starting with beginner-friendly cannabis strains may also find it easier to judge how plants respond to gradual changes in feeding strength. Growers who are new to natural feeding may also benefit from our beginner’s guide to growing organic cannabis before creating a complete nutrient plan. Start with fully composted materials, mild dilution rates, and one nutrient source at a time. Avoid combining several untested ingredients into a concentrated mix. Monitor leaf color, growth rate, and soil pH after feeding, and increase strength only when the plant responds well.
Understanding the Nutrients Cannabis Plants Need
Cannabis plants require a balanced supply of macronutrients and micronutrients to develop healthy roots, foliage, stems, and flowers. When making homemade cannabis fertilizer, the goal is not simply to add more nutrients, but to provide the right nutrients at the correct stage of growth.

What Nitrogen, Phosphorus and Potassium Do for Cannabis Plants
Nitrogen, phosphorus, and potassium are the three primary nutrients shown in a cannabis NPK fertilizer ratio.
| Nutrient | Main role | Deficiency signs |
| Nitrogen (N) | Supports leaf, stem, and chlorophyll development | Older leaves turn pale or yellow |
| Phosphorus (P) | Supports roots, energy transfer, and flower formation | Slow growth and dark or discolored leaves |
| Potassium (K) | Regulates water uptake, plant strength, and flower development | Brown leaf edges and weak growth |
Understanding Cannabis NPK Fertilizer Ratios
An NPK ratio shows the relative percentage of nitrogen, phosphorus, and potassium in a fertilizer. Our guide to the best cannabis NPK ratio for each growth stage explains how this balance should change as plants mature. Homemade mixtures rarely have an exact NPK value, so beginners should avoid assuming that ingredients such as banana peels or coffee grounds provide a complete fertilizer for cannabis.
How Cannabis Nutrient Requirements Change During Vegetative Growth and Flowering
During vegetative growth, cannabis generally needs more nitrogen to produce healthy green foliage. Autoflowering plants move into bloom according to age, so growers using high yield autoflower seeds should introduce feeding changes gradually rather than making a sudden switch to a strong flowering fertilizer. Avoid removing nitrogen completely, as flowering plants still require a small amount.
Secondary Nutrients and Micronutrients Cannabis Plants Need
Cannabis also needs calcium, magnesium, sulfur, iron, zinc, manganese, copper, boron, and molybdenum. Learning to recognize common cannabis nutrient deficiencies can help you identify which element may be missing before changing the fertilizer recipe. In our experience, homemade cannabis nutrient plans fail when growers focus only on NPK. Use compost, worm castings, kelp, and mineral-rich amendments to provide a broader nutrient range, and always monitor soil pH because unsuitable pH can prevent roots from absorbing nutrients that are already present.
The Best Natural Ingredients for Homemade Cannabis Fertilizer
The best homemade cannabis fertilizer ingredients supply nutrients gradually and improve the soil rather than creating a sudden spike in feeding strength. Beginners should start with well-decomposed materials because fresh household waste can be difficult to measure and may attract pests.
Nitrogen-Rich Ingredients for Vegetative Growth
Worm castings, mature compost, alfalfa meal, and well-composted manure can provide nitrogen for healthy leaf and stem development. Before adding more, check that the plant is showing genuine signs of nitrogen deficiency in cannabis rather than normal late-stage fading. Coffee grounds contain some nitrogen, but they should be composted before use rather than spread heavily around cannabis plants.
Phosphorus-Rich Ingredients for Root and Flower Development
Bone meal, fish bone meal, and some types of bat guano can supply phosphorus gradually. Do not add them simply because flowering has started; first rule out pH problems and look for recognizable signs of phosphorus deficiency in cannabis plants. These amendments release nutrients slowly, so they are better mixed into soil before planting than used as a quick treatment for an existing deficiency.
Potassium-Rich Ingredients for Flowering and Plant Health
Kelp meal, wood ash, and composted banana peels can contribute potassium, although their strength and release rate vary. Before increasing the amount, learn how to distinguish potassium deficiency in cannabis plants from nutrient burn or pH-related lockout. Wood ash is highly alkaline and concentrated, making it unsuitable for frequent or unmeasured applications.
| Ingredient | Main contribution | Beginner guidance |
| Worm castings | Nitrogen and microbes | Gentle and easy to use |
| Bone meal | Phosphorus and calcium | Mix into soil sparingly |
| Kelp meal | Potassium and trace minerals | Use at low rates |
| Wood ash | Potassium and calcium | Use cautiously due to high pH |
Compost, Worm Castings and Other Complete Organic Cannabis Fertilizers
Compost and worm castings are among the most beginner-friendly organic amendments because they contribute nutrients, organic matter, and microbial activity. However, the results also depend on choosing the best soil for growing cannabis and maintaining suitable drainage.
Household Ingredients Beginners Should Use with Caution
Avoid applying raw eggshells, banana peels, coffee grounds, or Epsom salt directly without understanding their effect. In our experience, DIY cannabis fertilizer problems usually occur when growers combine several unmeasured ingredients, creating excess nutrients or unstable soil pH.
How to Make Your Own Cannabis Fertilizer Step by Step
The simplest way for a beginner to make homemade cannabis fertilizer is to create a mild liquid extract from finished compost or worm castings. Unlike commercial cannabis fertilizer, homemade mixtures do not have a guaranteed NPK analysis. Their nutrient strength varies with the ingredients, so start weak and judge the results by the plant’s response.
This recipe makes approximately 1 gallon (3.8 liters) of natural fertilizer for cannabis grown in soil.
Step 1: Decide Whether You Need a Vegetative or Flowering Fertilizer
Cannabis plants generally require more nitrogen during vegetative growth, while flowering plants need less nitrogen and a suitable balance of phosphorus and potassium.
For vegetative growth, use worm castings or mature plant-based compost as the main ingredient. Worm castings provide a mild mixture of plant nutrients and beneficial organic matter, but their exact NPK ratio varies depending on the feedstock and production method.
For flowering, use mature compost with a small amount of kelp meal. Do not rely on banana peels or wood ash as complete flowering cannabis nutrients. Their composition is inconsistent, and wood ash can raise soil pH rapidly.
Step 2: Gather the Ingredients and Equipment
You will need:
- 1 gallon (3.8 liters) of clean water
- 1 cup (approximately 240 ml) of finished compost or worm castings
- A clean bucket
- A mesh bag or fine strainer
- A measuring cup
- A stirring utensil
- A pH meter or test kit
Use dark, crumbly, fully decomposed compost with an earthy smell. Unfinished compost may contain unstable organic matter or unwanted pathogens.
Grower tip: Use rainwater, filtered water, or tap water that does not contain chloramine. Letting tap water sit may reduce free chlorine, but it will not reliably remove chloramine.
Step 3: Measure and Prepare the Ingredients
Place 1 cup of worm castings or finished compost into the mesh bag, then suspend it in 1 gallon of water. This creates an ingredient-to-water ratio of approximately 1:16 by volume.
For a vegetative variation, add no extra amendments for the first batch. This makes it easier to assess how the plant responds.
For an early-flowering variation, add no more than 1 teaspoon of kelp meal per gallon. Avoid adding several phosphorus- and potassium-rich ingredients at once because the final nutrient strength cannot be calculated accurately without laboratory testing.
Step 4: Steep or Aerate the Fertilizer
For a simple non-aerated extract, steep the mixture for 24 hours and stir it several times. Longer soaking does not automatically produce a better fertilizer and may encourage low-oxygen conditions.
For an aerated variation, place an aquarium air stone in the bucket and run the pump continuously for 24–36 hours. Aeration increases dissolved oxygen and favors microorganisms that tolerate oxygen-rich conditions.
The finished DIY cannabis fertilizer should smell earthy. Discard it if it develops a rotten, sewage-like, or strongly sour odor.
Grower tip: Do not add molasses to a beginner recipe. Sugar can stimulate microbial growth, but an inadequately aerated mixture may become oxygen-depleted quickly.
Step 5: Strain and Dilute the Fertilizer
Remove the mesh bag and strain out remaining particles. For established, healthy soil-grown plants, begin by diluting one part fertilizer with one part water.
For seedlings, recently transplanted plants, or sensitive cultivars, use one part fertilizer to three parts water. Homemade fertilizer for cannabis plants should be treated as a mild supplement rather than a precisely measured replacement for a complete feeding program.
Step 6: Test the Fertilizer on One Plant
Apply the diluted fertilizer to one healthy plant first. Use enough to moisten the root zone without leaving the growing medium waterlogged. Wait three to five days before applying it to the rest of the crop.
Check for dark, clawed leaves, burnt tips, drooping, or slowed growth. These symptoms may indicate that the organic cannabis fertilizer is too strong or that the root zone was already sufficiently fertile.
Step 7: Apply the Fertilizer and Monitor the Plant’s Response
Apply the mixture as a soil drench when the growing medium is ready for watering. Start with one application every two weeks rather than feeding at every watering. Use the brewed mixture promptly, especially if it was aerated, because its microbial population changes once oxygenation stops.
Check the root-zone pH and record the ingredients, dilution rate, plant stage, and response after every application. In practical cultivation, changing one variable at a time makes nutrient problems much easier to diagnose.
A homemade cannabis fertilizer can contribute organic matter, microbes, and a modest supply of cannabis nutrients, but its exact NPK content remains unknown. Growers who need precise control over nutrient strength should use a labeled fertilizer for cannabis or have their compost professionally analyzed.
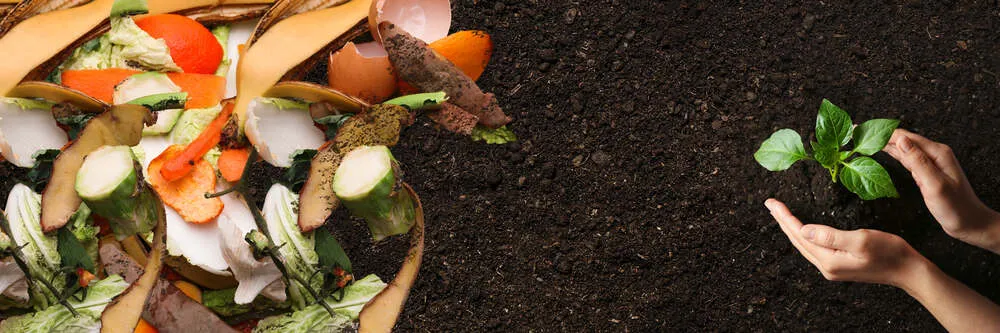
Banana skins can boost the potassium component of marijuana fertilizer. Bananas are extremely rich in potassium, and their skins are, too. Banana skins will give your compost an added boost. They also have calcium and other nutrients that can help strengthen plants.
Bananas aren’t the only produce that can be beneficial to plants. Citrus peels great, contain all three of the major nutrients plants need. They can also be a great deterrent for pests. Many insects and mites find the smell of citrus unappealing. This can also contribute to the growth of healthy plants.
Beginner Homemade Cannabis Fertilizer Recipes
These beginner recipes use mild, fully decomposed ingredients that are less likely to damage roots than concentrated household waste. Because homemade cannabis fertilizer does not carry a guaranteed nutrient analysis, each recipe should be tested on one plant before being applied across the entire crop.
The quantities below make approximately 1 gallon (3.8 liters) of fertilizer for cannabis grown in soil.
| Recipe | Best growth stage | Main ingredient | Starting dilution |
| Worm casting extract | Vegetative growth | Worm castings | 1 part extract to 1 part water |
| Compost and kelp extract | Early to mid-flowering | Mature compost and kelp meal | 1 part extract to 1 part water |
| Aerated compost tea | Vegetative growth or early flowering | Mature compost | 1 part tea to 1 part water |
Simple DIY Cannabis Fertilizer for Vegetative Growth
This mild DIY cannabis fertilizer uses worm castings to provide organic matter, beneficial microorganisms, and a variable mixture of plant nutrients. Growers who want to avoid animal-derived inputs can also explore the principles behind growing veganic cannabis. Vermicompost can contain more nitrogen than conventionally produced compost, although its actual nutrient content depends on the original materials and production process.
You will need:
- 1 cup, or approximately 240 ml, of finished worm castings
- 1 gallon, or 3.8 liters, of clean water
- One bucket
- A mesh bag or fine strainer
- A stirring utensil
Place the worm castings in the mesh bag and suspend it in the water. Steep the mixture for 24 hours, stirring it several times. Remove the bag and strain the liquid before use.
Dilute one part extract with one part water for an established plant. For seedlings, recently transplanted plants, or cultivars that are sensitive to feeding, use one part extract with three parts water.
Apply it as a soil drench when the growing medium is ready for watering. Begin with one application every two weeks and monitor the new growth before increasing the frequency.
Grower tip: Do not add coffee grounds to the liquid. Coffee grounds are better added to a composting system, where they can decompose before reaching the root zone. Fresh organic materials may continue breaking down in the soil and temporarily affect nutrient availability.
Homemade Fertilizer for Flowering Cannabis Plants
This natural fertilizer for cannabis combines finished compost with a small amount of kelp meal. It can supplement the soil during early or mid-flowering, but it should not be presented as a complete or precisely balanced cannabis NPK fertilizer.
You will need:
- 1 cup of dark, mature compost
- 1 teaspoon of kelp meal
- 1 gallon of clean water
- A bucket, mesh bag, and strainer
Place the compost and kelp meal inside the mesh bag. Suspend it in the water and steep for 24 hours, stirring several times. Strain the liquid and dilute it at a ratio of one part extract to one part water before the first application.
Apply the mixture to moist soil rather than completely dry growing media. As harvest approaches, review when to stop feeding cannabis nutrients rather than continuing the same fertilizer schedule until the final day.
Compost releases nutrients gradually and generally has a lower fertilizer value than concentrated mineral fertilizers. Its greater value is often in improving soil structure, water retention, and biological activity.
Grower tip: Do not increase the kelp meal simply because flowering plants need potassium. Excess amendments can raise soluble salt levels or move the root-zone pH outside the plant’s preferred range. Compost composition should ideally be confirmed through analysis when growers need precise nutrition.
Avoid using wood ash in this beginner recipe. It can provide potassium and calcium, but it is alkaline and may raise soil pH quickly. Banana peels are also unsuitable as an immediate flowering fertilizer because their nutrients are not instantly available and their NPK content is inconsistent.
Beginner Compost Tea Recipe for Cannabis Plants
A simple compost extract and an aerated compost tea are not exactly the same. Our complete guide to making organic compost tea for cannabis plants examines brewing equipment, aeration, ingredients, and application in more detail. Aeration increases dissolved oxygen and encourages microorganisms that tolerate oxygen-rich conditions.
To make a beginner aerated compost tea, you will need:
- 1 cup of mature, high-quality compost
- 1 gallon of clean water
- A bucket
- A mesh bag
- An aquarium air pump, tubing, and air stone
Place the compost in the mesh bag and suspend it in the water. Position the air stone at the bottom of the bucket and run the pump continuously for 24–36 hours. The surface should remain active, and the finished tea should smell earthy rather than sour or rotten.
Do not add molasses to your first batch. Although some compost tea methods use sugar to stimulate microbial growth, it also introduces another variable and may allow undesirable organisms to multiply when aeration, temperature, or sanitation is poorly controlled. Compost teas made from manure-based materials can also present pathogen risks, so use mature plant-based compost from a trusted source.
Dilute the finished tea one part to one part water and apply it to the soil. Begin with one treatment every two weeks. Compost tea should support an existing soil-feeding program rather than replace every cannabis nutrient the plant requires.
Grower tip: Keep the air pump running until you are ready to apply the tea. Once aeration stops, the microbial community and oxygen level begin changing.
How to Store Homemade Cannabis Fertilizer Safely
Use liquid homemade fertilizer for cannabis plants promptly after it is prepared. Aerated compost tea is best applied immediately after brewing rather than bottled and stored. Never seal an actively fermenting or aerated mixture inside an airtight container because gas can accumulate and the microbial population can change.
Discard any liquid that develops:
- A rotten, sewage-like, or strongly sour smell
- Visible mold growth
- A slimy surface
- Unexpected pressure inside the container
Clean buckets, strainers, tubing, and air stones after every batch. Keep fertilizer-making equipment separate from anything used to prepare food.
Dry ingredients such as worm castings, mature compost, and kelp meal can be stored in their original packaging or clean, labeled containers. Keep them cool, dry, and protected from pests and excess moisture. Do not store homemade cannabis nutrients where children or pets can reach them.
From a practical growing perspective, smaller fresh batches are safer than producing several gallons at once. Record every ingredient, measurement, preparation time, dilution ratio, and plant response. This makes it easier to repeat a successful organic cannabis fertilizer recipe and identify the cause if signs of nutrient burn or deficiency appear.
How to Use Homemade Fertilizer for Cannabis Plants Safely
Homemade cannabis fertilizer has no guaranteed nutrient strength, so safe use depends on dilution, observation, and gradual adjustments. Treat it as a soil supplement rather than assuming it provides every cannabis nutrient the plant needs.
How Much Homemade Cannabis Fertilizer Should You Apply?
Begin with a diluted mixture. For established plants, use one part fertilizer to one part water. For seedlings, transplants, or sensitive plants, use one part fertilizer to three parts water. Apply enough to moisten the root zone without leaving the soil waterlogged.
How Often Should You Feed Cannabis Plants?
Start with one application every two weeks. Do not apply DIY cannabis fertilizer at every watering. Feed only when the soil is ready for water, then observe the plant for several days before repeating the treatment.
How to Check Soil pH Before and After Feeding
Test the water and fertilizer mixture before application, then monitor the root-zone pH after feeding. For soil-grown cannabis, aim to keep the root zone around pH 6.0–7.0. An unsuitable root-zone pH can prevent nutrient uptake even when fertilizer is present, leading to nutrient lockout in cannabis and symptoms that resemble a genuine deficiency.
Signs Your Homemade Fertilizer Is Too Strong
Watch for burnt leaf tips, very dark green foliage, downward-clawing leaves, brown edges, drooping, or suddenly slowed growth. Stop feeding and use plain, correctly pH-adjusted water if these symptoms appear.
Common DIY Fertilizer Mistakes and How to Avoid Them
Common mistakes include combining too many ingredients, using unfinished compost, feeding dry soil, and increasing the concentration too quickly. In our experience, changing one variable at a time and recording each dilution, feeding date, and plant response is the safest way to improve an organic cannabis fertilizer routine.
Conclusion
Making homemade cannabis fertilizer can be a cost-effective way to recycle organic materials, support soil health, and gain more control over what goes into your grow. The key is to keep recipes simple, use fully decomposed ingredients, and avoid treating homemade mixtures like precisely measured commercial cannabis nutrients.
Start with mild dilutions, test each batch on one plant, and monitor leaf color, growth rate, soil moisture, and root-zone pH. Because homemade fertilizer for cannabis plants can vary in strength, gradual adjustments are safer than strong or frequent applications.
For beginner growers, worm castings, mature compost, and small amounts of kelp meal are among the easiest ingredients to work with. Keep accurate notes on every recipe, dilution ratio, and plant response so you can repeat successful results and avoid the same mistakes in future grows.
Frequently Asked Questions
Can homemade cannabis fertilizer replace commercial nutrients?
Homemade fertilizer can support a biologically active soil grow, but it may not provide every nutrient in a precise or predictable amount. Growers who need more control can compare the best cannabis nutrients for soil, coco, and hydro before selecting a feeding program. Commercial cannabis fertilizer is usually more consistent because its NPK ratio and application rate are clearly labeled.
What is the easiest DIY cannabis fertilizer for beginners?
A mild worm casting or finished compost extract is one of the simplest options. Mix one cup of mature material with one gallon of water, steep for 24 hours, strain, dilute, and test it on one plant before wider use.
Can I use banana peels as fertilizer for cannabis plants?
Banana peels contain potassium and other minerals, but they do not release nutrients immediately. Compost them first rather than placing fresh peels directly into pots, where they may attract pests, smell, or decompose unevenly.
How often should I apply homemade cannabis fertilizer?
Begin with one diluted application every two weeks. Observe the plant for several days before feeding again. Reduce the frequency if the soil is already nutrient-rich or if the leaves become very dark, clawed, or burnt at the tips.
How can I tell if my homemade fertilizer is too strong?
Common signs include burnt leaf tips, dark green foliage, downward-curling leaves, brown edges, drooping, and slower growth. Stop feeding, allow the soil to dry appropriately, and use plain water at the correct pH until the plant begins to recover.


