




Growing organic cannabis means maintaining a biologically active soil that releases nutrients as compost, worm castings, and other natural amendments break down. Instead of relying mainly on fast-acting mineral feeds, the grower supports the root-zone ecosystem throughout the plant’s life cycle.
This beginner’s guide explains how to build organic soil, germinate seeds, manage vegetative growth, adjust nutrition during flowering, and prevent common watering, pest, and nutrient problems. It also compares living soil with coco and hydroponics and explains the differences between starting from seeds and clones.
The key to growing cannabis organically is consistency. Monitor the plant, keep the soil evenly hydrated, and make measured changes rather than adding several products at once.
Key Takeaways
- Organic cannabis growing relies on healthy soil biology, mature compost, worm castings, and balanced amendments.
- Premixed living soil is often the simplest starting point for beginners.
- Water according to soil moisture and container weight rather than a fixed schedule.
- Inspect plant growth before feeding because organic amendments release nutrients gradually.
- Make one adjustment at a time so watering, feeding, pest, and environmental problems are easier to identify.
- What Does Growing Cannabis Organically Mean?
- How to Build Organic Soil for Cannabis
- The First 7 Days of an Organic Cannabis Grow
- How to Grow Organic Cannabis During the Vegetative Stage
- How to Grow Organic Cannabis During the Flowering Stage
- Maintaining a Healthy Organic Cannabis Grow
- Tips for Growing Organic Cannabis Outdoors
- Conclusion.
- Frequently Asked Questions
What Does Growing Cannabis Organically Mean?
Growing cannabis organically means supporting a biologically active soil that releases nutrients as organic matter breaks down. Rather than feeding the roots with immediately available mineral salts, the grower maintains a soil ecosystem containing compost, microorganisms and natural amendments.
This is often described as feeding the soil rather than feeding the plant. It does not mean leaving the plant unattended. Organic cannabis growing still requires balanced moisture, suitable environmental conditions and careful observation because natural fertilizers can also cause nutrient burn or imbalances when overused.
Organic Cannabis Growing vs Synthetic Nutrient Programs
Organic and synthetic programs can both produce healthy cannabis, but they deliver nutrients differently.
| Organic cannabis growing | Synthetic nutrient programs |
| Microorganisms gradually release nutrients | Mineral nutrients are immediately available |
| Focuses on maintaining the soil ecosystem | Focuses on directly feeding the root zone |
| Nutritional changes take longer to appear | Feeding can be adjusted more quickly |
| Soil may be reused and improved | Media are commonly reset between grows |
Neither method guarantees stronger flowers. Genetics, lighting, temperature, plant health, harvest timing, drying and curing have a greater influence on final potency and quality than the word “organic” alone.
How Living Soil Supports Cannabis Plants
Living soil contains bacteria, fungi, protozoa, nematodes and other organisms that help break down organic material. Bacteria release nutrients from compost and amendments, while fungi can increase the area from which roots access moisture and minerals.
For the grower, the practical goal is to protect this biological activity. Soil should remain lightly moist and well aerated rather than saturated or repeatedly allowed to become completely dry.
Benefits and Limitations of an Organic Cannabis Grow
Organic cultivation can reduce dependence on bottled mineral fertilizers, make use of compost and worm castings, and allow soil to be reused across several grows. Once a balanced soil has established, it may provide steady nutrition with fewer feedings.
The trade-off is speed. Organic amendments take time to break down, so deficiencies are harder to correct immediately. In practical grows, one of the easiest mistakes is adding more fertilizer before the previous application has become available. Beginners should start with a proven soil mix, choose beginner cannabis seeds suited to straightforward cultivation, and make one measured adjustment at a time.
How to Build Organic Soil for Cannabis
Organic cannabis soil needs three things: a moisture-retentive base, mature organic matter, and enough aeration to keep oxygen around the roots. The aim is not to create the richest possible mix, but one that releases nutrients steadily without staying wet or overwhelming young plants.
Premixed Living Soil vs Homemade Organic Soil
Premixed living soil is usually the simplest choice for a first grow, although the best soil for growing weed still needs enough aeration, drainage and nutrient capacity for the container size. It arrives with the base material, amendments, and biological ingredients already balanced, although some mixes are too strong for seedlings stage.
Homemade soil gives the grower more control but requires accurate measurements and time to prepare. Start with a quality organic base, then add finished compost or worm castings and an aeration material. Any extra dry amendments should follow a tested recipe. Growers making homemade cannabis fertilizer should measure each ingredient rather than adding it by eye.
| Soil option | Best for | Main drawback |
| Premixed living soil | Beginners wanting a ready-to-use mix | Higher cost and may be too rich for seedlings |
| Homemade organic soil | Growers wanting control over ingredients | Requires measuring, preparation, and resting time |
Compost, Worm Castings and Aeration Materials
Finished compost supplies decomposed organic matter and helps support microbial activity. Worm castings add mild nutrition and improve moisture retention, but too much can make the mix heavy and slow draining.
Perlite, pumice, and rice hulls create air spaces that help roots breathe and allow excess water to drain. A common mistake when mixing organic soil is using plenty of compost but not enough aeration, leaving the container wet for several days.
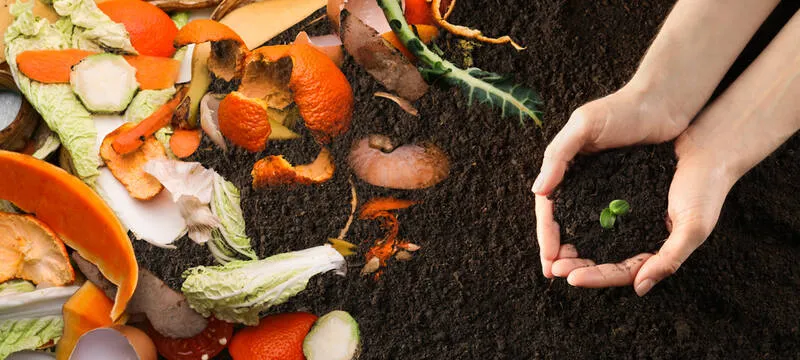
Only use mature compost with an earthy smell and uniform texture. Fresh kitchen waste or partly decomposed material should not be added directly to a cannabis pot.
Choosing Containers and Preparing the Soil Before Planting
Larger containers provide more root space, soil, moisture, and available nutrition, making an organic grow easier to manage. Fabric pots offer greater airflow but usually dry faster than plastic containers.
Mix all ingredients evenly, moisten the soil, and let it rest for the period stated in the recipe or amendment instructions. Before planting, create a small pocket of lightly amended soil in the center of the container. This gives the seedling a mild starting zone before its roots reach the richer soil surrounding it.
The First 7 Days of an Organic Cannabis Grow
The first week is about establishing the taproot and helping the seedling produce its first true leaves. During this stage, warmth, moisture, oxygen, and gentle light matter more than feeding. A properly prepared organic soil should contain enough nutrition for early growth, so avoid adding fertilizer during the first seven days.
| Days | What to do | What healthy progress looks like |
| 1–2 | Germinate the seed in warm, moist conditions | The shell opens and a white taproot appears |
| 3–4 | Plant into lightly amended soil | The shoot begins moving toward the surface |
| 5–7 | Provide gentle light and careful watering | Cotyledons open and the first true leaves develop |
Days 1–2: Germinating Organic Cannabis Seeds
- Moisten two plain paper towels with clean water. They should feel damp but should not drip when squeezed.
- Place the seed between the towels and put them inside a partially closed container or between two plates.
- Keep the seed in a dark place at approximately 70–78°F. Check it every 12–24 hours and lightly remoisten the towel if it begins to dry.
- Plant the seed once the shell opens and the taproot reaches around 0.25–0.5 inches. Handle it by the shell and avoid touching the root.
Do not wait for the taproot to grow several inches. Longer roots are easier to damage and may begin attaching themselves to the paper towel. Fertilizer, compost tea, and rooting products are also unnecessary at this stage.
Days 3–4: Planting Seeds in Lightly Amended Soil
- Fill a small container with seed-starting soil, or create a mild pocket approximately 3–4 inches wide in the center of a richer final pot.
- Moisten the planting area before adding the seed. The soil should feel evenly damp but not saturated.
- Make a hole approximately 0.25–0.5 inches deep. Place the taproot downward, or lay the seed on its side if the root is curved.
- Cover it loosely without pressing down the soil.
- Place the container under gentle lighting and keep the soil warm. Do not dig into the surface to check whether the seed is developing.
Only moisten the immediate planting area. Saturating a large container before the roots have spread can reduce oxygen around the seed and slow emergence.
Days 5–7: Supporting Healthy Seedling Development
Once the seedling appears, provide an 18/6 light schedule, temperatures around 68–77°F, and relative humidity of approximately 65–75%. Use gentle airflow, but do not aim a strong fan directly at the young plant.
Check the soil daily and add a small amount of water only when the surface begins to dry. Apply it in a narrow circle around the seedling rather than against the stem. This encourages the roots to expand outward.
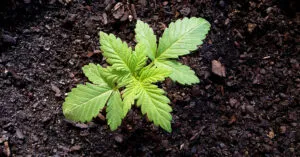
Healthy seedlings should stand upright as the cotyledons open and the first serrated leaves begin growing. Persistent drooping usually means the soil is staying too wet, while a tall, thin stem suggests that the light is too weak or too far away.
A useful grower rule during the first week is to correct moisture, light, and temperature before reaching for nutrients. Seedlings in organic soil rarely stall because they need more fertilizer this early.
How to Grow Organic Cannabis During the Vegetative Stage
During the vegetative stage, organic cannabis plants focus on building roots, branches, and enough leaf growth to support flowering. The grower’s job is to maintain steady conditions, shape the canopy, and replace nutrients only when the plant or soil shows that additional feeding is needed.
Step 1: Move the Plant Into Vegetative Growth
Begin vegetative-stage care once the plant has several sets of true leaves and is producing consistent new growth. Healthy plants should have an upright stem, expanding leaves, and no persistent drooping or discoloration.
Indoors, use an 18/6 light schedule and increase intensity gradually as the plant becomes established. Sudden exposure to powerful lighting can stress young foliage, while insufficient light often produces weak, stretched growth.
As the canopy expands, widen the area you water so moisture reaches the developing root zone rather than remaining concentrated around the stem. Full watering guidance is covered later in this guide, but the important change at this stage is matching the watering area to the growing plant.
Step 2: Shape the Plant Without Slowing Growth
Begin low-stress training only when the plant is growing steadily. Bend the main stem gradually and secure it without sharply folding or crushing the tissue. This opens the canopy and helps more branches receive direct light.
Topping can also encourage several main branches, but it should be performed only on a healthy plant with enough established growth to recover. Avoid topping, transplanting, and heavy pruning at the same time.
In practice, plants respond more predictably when one major change is made at a time. Allow several days of healthy new growth before introducing another training technique or altering the feeding program.
Step 3: Apply Organic Vegetative Nutrients When Needed
Inspect the newest growth, lower leaves, and leaf tips before adding fertilizer.
| What you see | Possible cause | What to do |
| Steady growth and evenly green leaves | Nutrition is adequate | Do not feed yet |
| Pale lower leaves with slower growth | Available nitrogen may be declining | Apply a measured vegetative top dressing |
| Very dark leaves with downward-curving tips | The soil may be too rich | Stop feeding and observe new growth |
| Burnt tips after an application | Excess amendment | Do not add more nutrients |
When feeding is necessary:
- Choose mature compost, worm castings, or one balanced organic vegetative amendment.
- Measure the amount using the product label or tested soil recipe.
- Spread it evenly across the soil surface, leaving space around the main stem.
- Lightly work it into the upper layer without damaging roots.
- Water slowly to moisten the amendment.
- Monitor the newest leaves before feeding again.
Organic amendments release nutrients gradually, so visible improvement may take time. One of the most common mistakes during vegetative growth is applying another product before the previous top dressing has started working.
How to Grow Organic Cannabis During the Flowering Stage
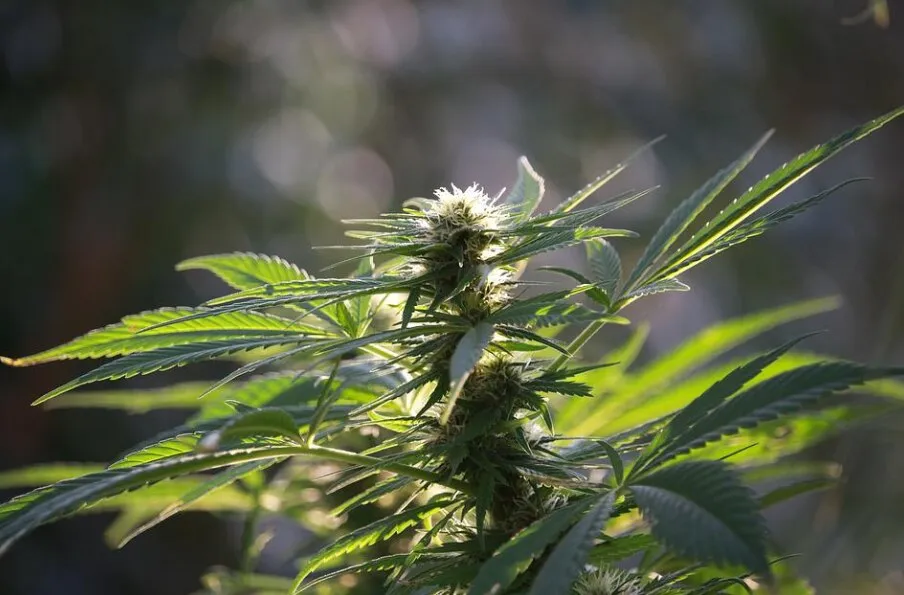
During the flowering stage, cannabis shifts its energy from producing stems and leaves to forming and maturing flowers. Organic growers need to plan feeding earlier than growers using mineral nutrients because compost and dry amendments take time to break down. The aim is to maintain balanced nutrition without repeatedly adding products or forcing flower development.
Because dry amendments continue releasing nutrients, deciding when to stop feeding cannabis should be based on the product, soil condition and expected harvest window rather than a fixed date.
Step 1: Identify the Start of Flowering
Photoperiod plants begin flowering after the light schedule changes, while autoflowers transition according to age. Look for a rapid increase in pistils, shorter spacing between new flower sites, and the start of the flowering stretch.
Before adding nutrients:
- Inspect the newest leaves, lower foliage, leaf tips, and overall color.
- Check whether the plant is still growing strongly or beginning to slow.
- Review when the soil was last amended.
- Confirm that watering and environmental conditions are stable.
Do not remove nitrogen completely. Cannabis still uses nitrogen during early flowering, but excessive amounts can produce dark, leafy growth and slow flower development.
Step 2: Adjust Organic Nutrition During Early and Mid Flowering
If the soil is running low, apply flowering support near the beginning of the stage so microorganisms have time to release the nutrients.
- Choose one balanced organic flowering amendment or top dressing.
- Measure the amount according to the product label and container size.
- Spread it evenly across the soil surface, leaving a gap around the stem.
- Lightly work it into the upper layer without disturbing roots.
- Water the amendment in slowly.
- Monitor new growth and flower development before feeding again.
A flowering amendment should provide more than phosphorus and potassium alone. Plants still need nitrogen, calcium, magnesium, sulfur, and micronutrients throughout bloom.
From a practical grower’s perspective, heavy bloom feeding is one of the easiest ways to upset an otherwise healthy organic soil. More phosphorus or potassium does not automatically create larger flowers. Balanced nutrition and stable conditions are more important than repeatedly increasing the feed rate.
Step 3: Maintain Flower and Soil Health Through Late Flowering
| Flowering stage | Main priority | Avoid |
| Early flowering | Apply any required amendments before deficiencies develop | Removing all nitrogen |
| Mid flowering | Monitor flower growth and maintain stable conditions | Repeated heavy feeding |
| Late flowering | Protect mature flowers and keep the plant steady | Last-minute top dressings |
Continue using the soil-moisture checks explained later in this guide, but expect water use to increase as flowers and leaf mass develop.
Inspect the inner canopy and dense flowers several times a week. Look for trapped moisture, damaged leaves, pests, or early mold. Maintain airflow through the plant without directing a strong fan at the flowers.
Avoid heavy top dressings late in bloom because they may not break down before harvest. Do not deliberately starve the plant or assume every organic cannabis grow requires a fixed two-week flush. Keep conditions stable and allow the flowers to mature naturally.
Harvest timing should be judged separately using flower development and trichome maturity, not yellowing leaves alone.
Maintaining a Healthy Organic Cannabis Grow
A healthy organic grow depends on balanced root-zone moisture, early detection, and avoiding unnecessary changes. Check plants regularly so minor issues can be corrected before flowering.
Watering, Water Quality and Root-Zone Moisture
Living soil should stay evenly moist without remaining saturated. Too much water reduces oxygen around the roots, while allowing the medium to dry completely can slow microbial activity and nutrient release.
Before watering, lift the container and check the upper inch of soil. If the pot feels heavy and the surface remains wet, wait. When it feels lighter, water slowly across the full root zone rather than beside the stem. Pause between pours so the soil absorbs moisture evenly, then remove runoff.
Most tap water will not automatically damage living soil. However, high sodium, alkalinity, or mineral levels can affect nutrient availability. If plants show unexplained symptoms, test the source water and root-zone pH before changing the nutrient program.
Preventing Pests, Mold and Soil-Borne Problems
Inspect leaf undersides, new growth, shaded canopy areas, and the soil surface twice a week. Remove fallen leaves, maintain airflow, and avoid keeping the upper soil permanently wet. Yellow sticky traps can reveal flying pests before populations increase.
Regular inspections make common cannabis pests and diseases easier to identify before they spread through the canopy.
| Problem | Early warning sign | First action |
| Fungus gnats | Small flies near wet soil | Let the surface dry and use sticky traps |
| Spider mites | Pale speckling beneath leaves | Isolate the plant and inspect nearby foliage |
| Powdery mildew | White patches on leaves | Reduce humidity and improve airflow |
| Root problems | Drooping in wet soil | Pause watering and check drainage |
Natural treatments can still damage cannabis. Use products suitable for the growth stage and follow the stated dilution rate.
Diagnosing Nutrient Burn, Deficiencies and Slow Growth
Check the root zone before adding fertilizer. Confirm the soil is not staying wet, inspect new and lower leaves, review the last top dressing, and check heat, light, and airflow.
Very dark leaves, burnt tips and downward curling often indicate nutrient burn rather than a need for additional feeding. Pale lower leaves with slowing growth may indicate declining nitrogen availability. A safe response to an unclear symptom is to pause feeding, correct one likely cause, and monitor new growth. Organic amendments keep releasing nutrients after application, so repeated feeding can turn a minor imbalance into a larger problem.
Tips for Growing Organic Cannabis Outdoors
Choose a secure location that receives at least six to eight hours of direct sunlight, has access to water, and allows airflow around mature plants. Avoid low areas where rain collects, as waterlogged soil restricts oxygen and can damage roots.
Choose outdoor cannabis seeds suited to your local climate. Faster-finishing varieties are useful in cooler regions with short summers, while heat-tolerant strains are better suited to hot, dry conditions.
Test native soil before adding amendments. Improve suitable ground with mature compost and aeration material, but measure worm castings, kelp meal, and other fertilizers according to a tested recipe or product instructions. Adding several strong amendments without measuring can make the soil too rich.
Use raised beds or large containers where drainage is poor. Check moisture more often during hot or windy weather, but reduce watering after rain. Install stakes before flowering branches become heavy, and use temporary covers during severe rain, hail, or frost. Remove or ventilate covers once conditions improve to prevent excess humidity.
In practice, preparing drainage and supports early is much easier than correcting saturated soil or securing heavy branches during bad weather.
Can You Grow Cannabis Organically in Hydroponics?
Organically derived nutrients can be used in hydroponic systems, but they require more management than living soil. Many organic inputs contain suspended material that can collect in reservoirs, clog filters, or block narrow irrigation lines.
Media-based drip systems are generally easier to adapt than narrow-channel systems. Aquaponics is another biological option, but it requires fish, beneficial bacteria, filtration, and a properly cycled system.
Use nutrients specifically designed for hydroponic or soilless cultivation. Water-soluble does not automatically mean organic, and the nutrient program must still supply all essential macro- and micronutrients.
Monitor nutrient-solution pH, pumps, filters, and irrigation lines regularly. Clean the system between grows and remove plant debris before it decomposes in the reservoir. Growers new to reservoirs and nutrient solutions should first learn the basics of hydroponic growing for beginners before attempting an organic system.
Seeds vs Clones When Growing Organically
| Starting method | Main advantage | Main limitation |
| Seeds | Clean start and wider genetic choice | Some variation between plants |
| Feminized seeds | High chance of female plants | Structure can still vary |
| Clones | Consistent growth and known traits | May introduce pests or diseases |
Seeds are generally the easiest choice for beginners because they develop a fresh root system and are easier to inspect for pests. Autoflowering plants should also be started from seed because their short, age-controlled life cycle makes cloning impractical.
Clones provide predictable characteristics because they are genetically identical to the mother plant. Only accept them from a trusted source and quarantine them before placing them near established plants.
Tips for Growing Organic Cannabis in Coco Coir
Coco coir retains moisture while providing good airflow, but it contains little usable nutrition. Use pre-washed, buffered coco and hydrate compressed blocks fully before filling containers. Perlite can be added for drainage, but avoid loading coco with compost and multiple amendments unless following a proven recipe.
Use a complete nutrient program designed for coco or soilless growing. Adjust feeding according to plant size, growth stage, water quality, and plant response. Keep the medium evenly moist, monitor pH, and watch for nutrient accumulation.
Coco offers more control than living soil but requires closer management. Premixed living soil is usually the simpler option for a first organic cannabis grow.
Conclusion.
Growing cannabis organically is about creating a balanced system rather than relying on frequent nutrient applications. Healthy soil, suitable containers, careful watering, and gradual feeding support plants from germination through flowering.
Beginners often find premixed living soil easier than organic hydroponics or coco because it provides a stable root zone. Whatever method you choose, inspect plants regularly and make one adjustment at a time. Adding fertilizer before identifying a problem can worsen recovery.
With a proven soil mix, good genetics, and consistent environmental control, organic growing remains productive without being complicated. Focus on supporting soil health, monitoring new growth, and allowing time for plants to respond.
Patience and observation are key, as plants respond slowly to changes in their environment and soil biology over time. Avoid overfeeding and focus on consistency rather than intensity in nutrient management practices to maintain long term plant health and stable yields overall success.
Frequently Asked Questions
Is organic cannabis more potent than synthetically grown cannabis?
Organic cultivation does not automatically produce higher THC levels. Potency is influenced by genetics, light intensity, plant health, environmental conditions, harvest timing, and post-harvest handling. Organic growing focuses on supporting healthy soil biology rather than guaranteeing stronger flowers.
What is the best soil for growing organic cannabis?
Beginners will usually find a quality premixed living soil easiest to manage. It should contain mature organic matter, adequate aeration, and balanced nutrients without being too rich for seedlings. Homemade soil can also work well when it follows a tested recipe and is allowed to rest before planting.
How often should organic cannabis plants be fed?
There is no universal feeding schedule. Inspect the plant’s color, growth rate, and leaf tips before adding nutrients. Organic amendments release gradually, so wait for the plant to respond after top dressing rather than repeatedly feeding it.
Do I need to adjust pH when growing cannabis organically?
Living soil can buffer moderate pH changes, but it cannot correct every water or soil problem. Test the water and root zone when plants show persistent nutrient symptoms, particularly if the water has high alkalinity, sodium, or dissolved mineral levels.
Can cannabis be grown organically in coco or hydroponics?
Organic-derived nutrients can be used in coco and some hydroponic systems, but these methods require closer control of pH, irrigation, nutrient concentration, and system cleanliness. Beginners generally find premixed living soil simpler and more forgiving.


