




Sea of Green, usually shortened to SOG, is a growing method that uses several smaller cannabis plants to create a full, even canopy rather than relying on a few larger plants to fill the available space. Autoflowers can be grown using the same principle, but there is one important difference: you cannot control when they begin flowering by changing the light cycle. A successful autoflower SOG therefore depends on choosing compact, consistent plants, planning your spacing carefully and maintaining good light and airflow across the canopy. In this guide, we’ll explain how autoflower SOG works, how to set it up and the potential drawbacks to consider.
Key Takeaways
- Autoflower SOG works differently from traditional SOG. Autoflowers begin flowering according to their own lifecycle, so you cannot shorten the vegetative stage by switching the light schedule.
- The goal is an even, productive canopy. SOG uses several relatively small plants to fill the available growing area and distribute light across multiple flowering tops.
- Plant choice makes a big difference. Compact autoflowers with similar growth habits, manageable side branching and a prominent central cola are easier to arrange into a uniform SOG canopy.
- Spacing and airflow need to be planned together. Packing more plants into the room is not automatically better. Each plant needs enough room to develop while allowing air to move through the canopy.
- Keep training and plant stress under control. Autoflowers have limited vegetative time to recover from setbacks, so any LST, defoliation or other training should be kept measured and purposeful.
What Is the sea of green (SOG) method?
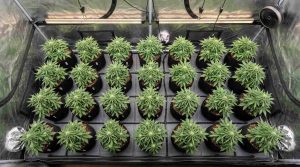
You can grow a few larger plants or use a higher number of compact plants to fill the available canopy. If you’re planning a SOG with autoflower seeds, look for genetics that stay relatively compact and develop with a consistent structure. The SOG method is my personal favorite way to grow cannabis indoors.
Instead of using big pots and allowing your plants to get big enough to fill the tent before flowering, a SOG setup allows you to use smaller-sized pots and ensure the entire room is filled with shorter-sized uniform plants.
So instead of having, for example, 2-4 large-sized plants that required a vegetation period of 8 weeks, you would have 9-12 smaller-sized plants that would be ready to flower after 10-14 days and be ready to harvest much sooner.
- I have found that the best pots to use for a SOG are 7.5 L
- Plants have an even spread of light, so they do not fight for light
- Photoperiods only require a vegetation time of 10-14 days at most
- Using photoperiod clones will produce the best results
Below highlights the benefits of the SOG method and why SOG is different for autos, compared to photoperiods.
What are the benefits of growing an autoflower SOG
I always recommend that growing autos or photoperiods in a SOG setup is the most efficient way to maximise your growing space, as well as harvesting in the fastest time possible, especially using photoperiods and clones. Below are the benefits of growing an autoflower in a Sea of Green.
- Plants grow together without fighting for light
- The grow room will be full from side to side with colas
- Autos keep a medium height, making them perfect for SOG
- SOG is optimal for growers who want to lower electricity bills
- SOG is recommended for growers who want a fast turnaround time
- Home growers with limited space can benefit from a SOG set-up
Why the SOG method is different for autoflowers
Photoperiod cannabis plants respond to long hours of light (18/6) by vegetating. When the daylight hours fall shorter, they respond by flowering. Autos are very different, and after 4 weeks from the day your seedling sprouts, it will automatically transition to flower.
Autoflowers do not need a switch to 12/12 to begin flowering, so growers commonly maintain a longer light cycle throughout the grow. Our guide to the best light schedule for autoflowers explains the different options in more detail. I do not recommend giving your autos 24 hours of light due to high electricity bills and hot temperatures.
| Factor | Autoflower SOG | Photoperiod SOG |
| Flowering trigger | Begins automatically as the plant matures | Triggered by changing the light cycle |
| Vegetative period | Fixed by the plant’s natural life cycle | Can be shortened by the grower |
| Typical light schedule | Often kept at 18/6 or 20/4 throughout the grow | Vegetative lighting followed by 12/12 for flowering |
| Clones | Autoflowers are normally grown from seed | Clones can be used to create a very uniform canopy |
| Canopy uniformity | Depends heavily on choosing consistent genetics | Clones can make plant height and structure easier to match |
| Main SOG benefit | Efficient use of floor space and canopy coverage | Efficient space use plus greater control over when flowering begins |
Setting up a successful autoflower SOG grow
The SOG growing style may seem simple and easy to set up, which is true; however, you must calculate your growing space, pot size, and position in advance to achieve the best results possible. Below breaks down what to think about as far as your floor plan, lighting and airflow are concerned.
Choosing the best autoflower strain for SOG
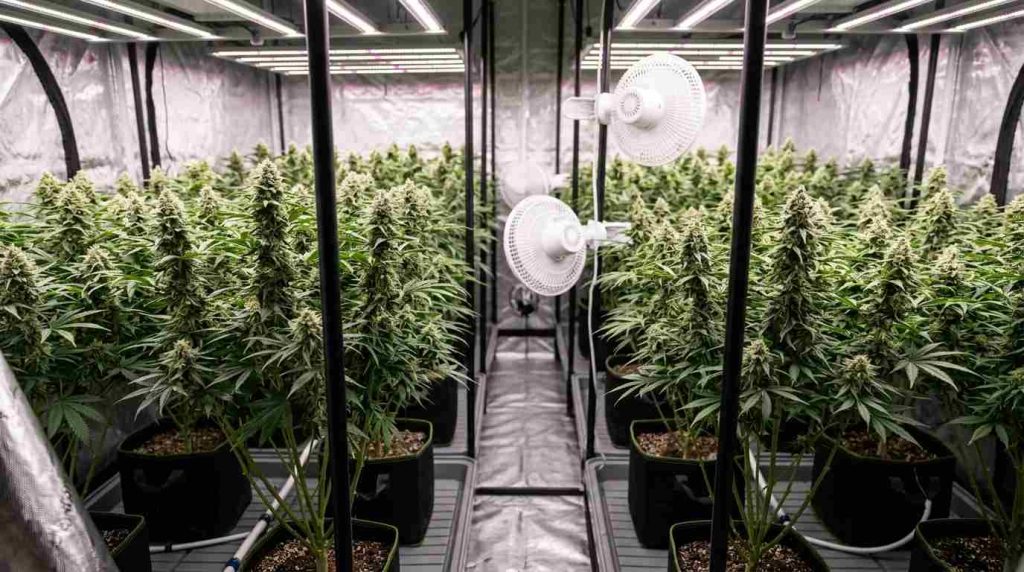
When choosing indoor autoflowers for a SOG setup, look for relatively compact plants with similar final heights and manageable side branching When it comes to autoflowering cannabis plants, there will be a high percentage that are ideal candidates for Sea of Green, due to the fact they grow with one main central cola and a cluster of short side branches full of buds.
- Fast-flowering autos with 10 weeks or less are recommended
- Avoid long flowering sativa-dominant autos
- Autos with a high calyx to leaf ratio are best
| Trait | Why It Helps in a SOG Setup |
| Compact plant structure | Makes it easier to fit multiple plants into the available floor space |
| Similar final height | Helps maintain a more even canopy beneath the grow light |
| Short side branches | Reduces overcrowding between neighboring plants |
| Prominent central cola | Suits the SOG aim of producing multiple upright flowering tops across the canopy |
| Short lifecycle | Keeps the crop moving quickly from seed to harvest |
| High calyx-to-leaf ratio | Can make the finished canopy easier to manage and trim |
| Consistent genetics | Reduces large differences in height and structure between seed-grown plants |
The ideal spacing and pot size
Container size affects how much root space each plant has and how many plants can comfortably fit into the growing area. Our guide to the best pot size for autoflowers explains how different container sizes affect plant development and layout. Below explains how many autos you can fit inside a grow space using this method. You also need enough space to water, inspect and reach every plant. If you’re deciding how many plants your setup can comfortably hold, our guide to how many autoflowers you can grow in a tent breaks this down by grow-tent size.
- 1m x 1m x 2m = 9 autos x 7.5 liter pots
- 2m x 2m x 2m = 16-18 autos x 7.5 liter pots
- 3m x 3m x 2m = 25-36 autos x 7.5 liter pots
| What to Plan | Why It Matters |
| Pot size | Smaller containers make it easier to fit multiple plants into the growing area without allowing individual plants to become unnecessarily large |
| Distance between pots | Consistent spacing helps produce more even canopy coverage |
| Expected plant width | Plants need enough room to develop without heavily overlapping neighboring plants |
| Access for watering | Dense layouts can make plants at the back of the tent difficult to reach |
| Space for maintenance | Leave enough room to inspect plants and move containers where necessary |
| Final plant height | Similar-sized plants help keep the canopy at a consistent distance from the light |
| Air movement between plants | A densely filled floor area needs sufficient airflow to prevent stagnant pockets around foliage and flowers |
Ensure lighting and airflow are suitable for an autoflower SOG grow
Whilst filling your grow space from side to side and creating a wave of green plants and frosty buds, there are several factors to take into consideration.
It does not matter if you are growing autos or photoperiods; good quality and consistent airflow are key to avoiding humidity spots and discouraging the spread of mold or powdery mildew.
The reason the SOG method is so effective at producing an almost identical crop of uniform plants is that there is a perfect amount of light spread for the seedlings until they are big enough to flower. As long as your plants are placed one plant per square foot, no plants will ever compete for light and try to outgrow the rest.
- Position the pots to make sure no plants can touch one another
- Set up oscillating fans at different levels and heights in the grow room
- Check there is always a fresh current of air circulating around the grow room
- Use a PAR meter to check PPFD across different parts of the canopy. Our autoflower lighting guide explains how PAR, PPFD and DLI relate to the different stages of an autoflower grow.
- Check and monitor the buds daily for signs of mold
- Use a digital hygrometer to check the temperature and humidity
A step-by-step guide on the sea of green method for autoflowers
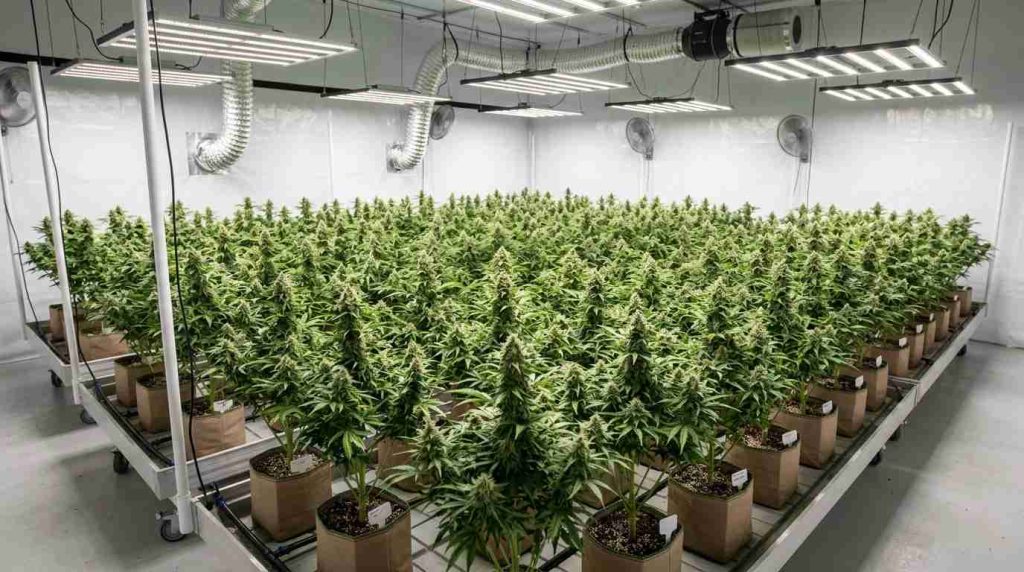
Growing autoflowers in a Sea of Green is less about forcing plants to stay small and more about managing several compact plants as a single canopy. The goal is to use the available floor space efficiently while keeping the tops at a reasonably similar height so light can reach the crop evenly.
This is where autoflower SOG differs from the traditional photoperiod method. Autoflowers are genetically photoperiod-insensitive, which means flowering begins as the plant matures rather than being triggered by changing the light schedule to 12/12. You therefore have less control over the length of the vegetative period and less time to correct major setbacks before flowering progresses.
For a new grower, the best approach is to keep the setup straightforward. Start with suitable genetics, establish healthy plants, maintain consistent spacing and make only the canopy adjustments that are actually needed.
Step 1: Choose suitable autoflowers before you start
A successful SOG begins with the plants you choose. Look for autoflowers described as relatively compact and consistent in structure, rather than varieties expected to become particularly tall, wide or heavily branched.
Uniformity matters because all of the plants will share the same light. If one grows considerably taller than its neighbours, you may have to raise the fixture to accommodate it, which can reduce the amount of light reaching the shorter plants.
Seed-grown plants will still show some natural variation, so the objective is not to make every plant identical. You are trying to start with genetics that give you a realistic chance of creating a broadly even canopy.
Step 2: Plan your pots and spacing before germination
Set out the containers before planting so you know how the finished SOG will fit into the available area.
Avoid working from the idea that more plants automatically means more production. Cannabis research shows that increasing planting density can improve flower yield per unit of growing area, but it can also increase shading and reduce production from individual plants. The right density therefore depends on plant structure, container size, lighting and the space available.
Leave enough room for:
- neighbouring plants to develop without becoming heavily tangled;
- air to move through the canopy;
- access for watering and inspections;
- fans and other equipment;
- the expected width of the mature plants.
Your aim is to cover the growing area efficiently once the plants mature, not to fill every gap with another pot on day one.
Step 3: Germinate and establish the seedlings
You can start autoflowers in their final containers, which removes the need for a later transplant. If you want a more detailed look at getting seedlings established, read our guide on how to germinate autoflower seeds.
Once the seedlings emerge, concentrate on steady early development and avoid unnecessary stress. If this is your first auto grow, our week-by-week autoflower growing guide explains what to expect as the plant moves from seedling through flowering and harvest.
Autoflowers do not require a switch to 12/12 to flower. They can continue growing under a longer photoperiod because their flowering response is not dependent on the short-day trigger used for conventional photoperiod cannabis. There is no need to treat one particular long-day schedule as universally optimal for every cultivar and environment.
During this stage, look for healthy leaves, steady new growth and broadly similar development between plants rather than expecting every seedling to grow at exactly the same rate.
Step 4: Start building an even canopy
As the plants become established, look at the SOG as a whole rather than concentrating on one plant at a time.
Check the canopy from above. Ideally, the plants should gradually fill the gaps between pots without heavily overlapping each other. If movable containers are becoming unevenly distributed, small spacing adjustments can help maintain better canopy coverage.
Also compare plant height. Some variation is normal, particularly when growing from seed, but you don't want one or two plants towering above the rest.
This matters because light availability changes considerably through a cannabis canopy. Research has found that heavily shaded lower flowers can perform differently from better-lit flowers higher in the canopy, demonstrating why light distribution is an important part of canopy management.
Step 5: Decide whether any training is necessary
Low-stress training is optional in an autoflower SOG and is not what defines the method. If you need to control uneven height, our guide to low stress training autoflowers explains how LST can be used to reshape the canopy.
If the plants are naturally compact and the canopy is already reasonably level, you may have no reason to train them at all.
If an individual plant starts rising well above its neighbours while it is still flexible and developing strongly, gentle LST can be used to reposition the taller shoot and bring it closer to the rest of the canopy.
Avoid using a rule such as "LST on day 28." Different autoflower cultivars develop at different rates, so decisions should be based on the plant in front of you rather than the calendar.
Keep any intervention measured. Because you cannot deliberately extend an autoflower's vegetative period by delaying the switch to 12/12, there is less flexibility to compensate for a major setback before flowering continues.
Step 6: Tuck leaves before reaching for the scissors
As neighbouring plants begin filling the canopy, large fan leaves may shade developing growth or reduce the open space between plants.
Leaf tucking is a simple first option. Repositioning a leaf can expose the growth underneath without removing healthy foliage.
Selective leaf removal can help where foliage is causing genuine congestion, but heavy defoliation should not be treated as compulsory. Our guide to defoliating autoflowers explains when leaf removal can be useful and when it is better to leave the plant alone.
Cannabis studies have shown that canopy architecture and defoliation can change light penetration and flower uniformity. However, those results do not establish a universal defoliation programme for autoflowers, so new growers are better served by removing foliage only when there is a clear reason to do so.
Step 7: Manage the flowering stretch and light across the canopy
As the plants move into flowering, some will continue gaining height. Our guide to autoflower stretching during flowering explains why this happens and what to expect as plants transition into bloom. Watch how this affects the distance between the canopy and the grow light.
The objective is to keep useful light distributed across as much of the canopy as possible rather than allowing the centre of the grow to receive strong light while plants around the edges are heavily shaded.
Research on indoor cannabis has demonstrated a clear relationship between canopy light intensity and flower production, although the amount of useful light depends on the cultivar and growing environment.
This is another reason an even canopy is valuable: when the tops sit at similar heights, it becomes easier to position the light for the crop as a whole.
Step 8: Pay close attention to airflow as flowers develop
A SOG canopy becomes denser as plants mature, so airflow deserves more attention during flowering.
Position circulating fans so air moves around and through the plants rather than only across the very top of the canopy. Check the spaces between neighbouring plants and around dense flowers for stagnant areas.
This isn't just general grow-room advice. Research on cannabis flowers has found that humidity inside inflorescences can be considerably higher than the surrounding air. In the same research, increased air circulation reduced temperature and humidity within flowers and was associated with lower yeast and mould levels.
That makes airflow especially relevant in SOG, where multiple plants and flowers occupy a relatively small area.
Inspect the crop regularly as flowering progresses. Dense areas that are difficult to see from above deserve particular attention.
Step 9: Keep conditions steady through late flowering
Once the canopy has been established, avoid making major changes simply because you feel you should still be "doing something."
At this stage, concentrate on maintaining the crop you have built.
Regularly check:
- canopy height and light coverage;
- airflow through crowded areas;
- temperature and humidity;
- plants for signs of stress;
- developing flowers for signs of mould or damage;
- access between plants for routine maintenance.
If one plant finishes shorter than the rest, that does not mean the SOG has failed. The goal is efficient overall canopy coverage, not a row of genetically identical plants.
Continue monitoring temperature and humidity as the canopy becomes denser. Our guide to the best temperature and humidity for autoflowers covers suitable conditions through the different stages of growth.
Step 10: Harvest according to plant maturity, not a fixed day
Autoflowering does not mean every cultivar finishes on the same schedule. Genetics influence flowering behaviour and maturity, so use the characteristics of the plants themselves rather than treating a breeder's estimated harvest date as an exact deadline.
Plants grown together may also reach maturity at slightly different times. Check each one rather than assuming the entire SOG must be harvested on the same day.
A successful autoflower Sea of Green should leave you with a relatively even area of compact flowering plants that makes good use of the available growing space without becoming excessively crowded.
For a new grower, the most important point to remember is that SOG is about managing the canopy, not maximising the number of plants. Start with suitable genetics, give each plant enough space, avoid unnecessary stress and keep light and airflow consistent as the canopy develops.
Drawbacks to be aware of when growing SOG autoflowers
| Potential Problem | Why It Happens | What to Do |
| Uneven canopy | Seed-grown autos can differ in height and structure | Choose consistent genetics and maintain even spacing |
| Crowded plants | Too many plants or excessive side growth can reduce space between them | Plan the layout around expected mature plant size rather than simply fitting in as many pots as possible |
| Poor airflow | Dense foliage can restrict movement of air through the canopy | Use circulating fans and maintain space between neighbouring plants |
| High humidity around flowers | Closely packed foliage and buds can create humid pockets | Monitor humidity and maintain consistent air exchange |
| Mold risk | Dense flowers combined with poor airflow or excessive humidity increase risk | Inspect flowers regularly and correct environmental problems early |
| Training stress | Autoflowers have limited vegetative time in which to recover | Keep training conservative and avoid unnecessary stress |
| One plant falling behind | A smaller or stressed plant may leave an unused section of canopy | Focus on healthy, uniform early growth rather than forcing every plant to match |
Autos and photoperiods do have different characteristics, and when growing autos using the SOG method, there are a few potential drawbacks to consider. Below covers the risk of mold and why recovery time from plant stress is so important when growing autoflowers in a Sea of Green.
The risk of mold
In the past, I have grown autos in a SOG, and the colas were so huge that they unfortunately suffered from mold. I ended up losing a large amount of the crop, and it taught me the dangers of having enormous buds without adequate airflow or humidity levels.
- Check your buds daily for mold during the final 3 weeks of flowering
- Humidity levels below 40% prevent mold from spreading
- The biggest and most compact buds will be most at risk of mold
- Remove any moldy buds using sharp scissors and latex gloves
Recovery time from plant stress
Anyone who has grown autos before knows that you are limited to what you can and cannot do during the first 4-5 weeks with autos. The reason is that they have such a short vegetative period before naturally switching to flower production; you must be extra considerate of recovery time.
Recovery time from any cannabis plant training is essential for optimal plant health and development, and to avoid stunted growth and low yields. With autos, plant training should be applied from weeks 3–5; however, with caution and great care.
Conclusion
The Sea of Green method can work well with autoflowers when the grow is planned around their naturally short lifecycle. Rather than relying on a light-cycle change to trigger flowering, autoflower SOG focuses on filling the available canopy with several compact, similarly sized plants and keeping light, spacing and airflow consistent across the grow.
The key is not simply fitting as many plants as possible into the space. Choosing suitable genetics, giving each plant enough room to develop and avoiding unnecessary stress all help create a more manageable canopy. Because autoflowers have limited time to recover before flowering progresses, a simple approach usually makes the most sense.
When those fundamentals are in place, SOG can be a practical way to make efficient use of an indoor growing area while keeping plant height and canopy coverage relatively uniform.
Frequently Asked Questions
How many autoflowers should I grow per square metre in a SOG?
There is no single plant count that works for every Sea of Green setup. The right number depends on pot size, the expected width of the plants and how much access you need for watering and maintenance. The aim is to create good canopy coverage without packing plants so tightly that airflow and access become difficult.
Does Sea of Green increase autoflower yields?
Sea of Green is primarily designed to make efficient use of the available growing area rather than guarantee a higher yield from each individual plant. By spreading several smaller plants across the canopy, more of the available light can reach productive flowering sites. Final results will still depend on genetics, lighting, environment and overall plant health.
What light schedule should I use for autoflowers in a SOG?
Unlike photoperiod plants, autoflowers do not need a switch to 12 hours of light to begin flowering. A consistent schedule such as 18/6 or 20/4 can be maintained throughout the grow. Whichever schedule you use, concentrate on providing suitable light intensity and an even spread across the entire canopy.
Should I use LST on autoflowers in a Sea of Green?
Low-stress training can be used, but it is not what defines the Sea of Green method. With autoflowers, any training should be kept conservative because the plants have limited vegetative time in which to recover. If plants already have the compact, upright structure you want for SOG, extensive training may not be necessary.
What is the biggest drawback of growing autoflowers in a SOG?
Managing a densely filled canopy is one of the main challenges. Closely spaced plants can restrict airflow and make humidity harder to control, particularly once flowers become larger. Regularly checking the canopy, maintaining good air movement and leaving enough space between plants can help reduce the risk of mould and other problems associated with stagnant conditions.


