




Learning how to cure cannabis is one of the most important skills you can develop after harvesting your plants. While growing healthy cannabis takes time and effort, curing is the final stage that transforms dried buds into smooth, aromatic, high-quality flower. When done correctly, curing enhances flavour, preserves terpenes, improves the smoking experience and helps your harvest stay fresh for longer. In this beginner's guide, you'll learn what cannabis curing is, why it's important and how to cure cannabis step by step. You'll also discover how to burp your jars correctly, how long to cure cannabis and how to store your cured cannabis properly.
- What Is Cannabis Curing and Why Is It Important?
- Cannabis Drying vs Cannabis Curing
- What You Need Before You Cure Cannabis
- Step-by-Step Guide on How to Cure Cannabis
- Step-by-Step Guide on How to Burp Cannabis
- Common Cannabis Curing Mistakes
- Cannabis Curing Troubleshooting Guide
- How Long to Cure Cannabis and How to Store It Afterwards
- Conclusion
- Frequently Asked Questions
What Is Cannabis Curing and Why Is It Important?
Before you learn how to cure cannabis, it's important to understand what curing is and why experienced growers treat it as a critical stage of the harvest. After your plants have been harvested, trimmed, and properly dried, curing is the process that transforms those dried flowers into high-quality cannabis.. While drying removes excess moisture, curing allows the buds to mature under controlled conditions, improving their aroma, flavor, texture and overall smoking experience.
Many beginner growers spend months growing healthy plants but rush this final step. The result is cannabis that looks good but still tastes grassy or burns harshly. A proper cure gives your harvest the time it needs to reach its full potential, making the difference between average flower and premium cured cannabis.
What is cannabis curing?
Cannabis curing is the controlled process of storing dried cannabis flowers in airtight containers at the correct temperature and relative humidity. During this stage, moisture trapped inside the buds gradually redistributes throughout each flower, creating a balanced moisture level that supports natural maturation.
Unlike drying, curing isn't about removing more moisture. Instead, it stabilizes the flower while preserving cannabinoids and terpenes, which are responsible for the strain's aroma, flavor and effects. This is why properly cured cannabis delivers a noticeably better experience than flower that has only been dried.
Why is cannabis cured?
Cannabis is cured to improve quality, preserve freshness and prepare the flower for long-term storage. Freshly dried buds often contain residual chlorophyll and plant compounds that can produce a harsh, grassy taste. As curing progresses, these compounds naturally break down, allowing the true characteristics of the cultivar to emerge.
From a grower's perspective, curing is one of the simplest ways to improve the final product without changing how the plant was grown. Even high-quality genetics can be let down by poor curing. Taking the time to cure cannabis correctly helps protect the effort invested throughout the growing cycle.
What happens during curing?
Once dried buds are sealed inside curing jars, several natural processes continue. Moisture slowly moves from the center of each bud towards the outer layers, creating a more consistent moisture level throughout the flower. At the same time, residual enzymes break down chlorophyll and other unwanted compounds.
These changes gradually replace the fresh-cut, hay-like smell of newly dried cannabis with the distinct aroma of the cultivar. The flower also becomes more stable for storage while retaining more of its terpene profile when kept under the right conditions.
Why does curing improve the flower?
The benefits of curing become noticeable within a few weeks. Properly cured cannabis develops a richer aroma, cleaner flavor and smoother smoke than uncured flower. The buds also develop a slightly sticky, springy texture that makes them easier to handle and grind.
While curing doesn't significantly increase THC levels, it allows the flower to mature naturally and preserve the qualities developed by high THC cannabis strains during cultivation. If you're wondering how do you cure cannabis successfully, understanding why the process matters is the first step.
Cannabis Drying vs Cannabis Curing
Although many people use the terms interchangeably, drying and curing are two separate stages of the post-harvest process.
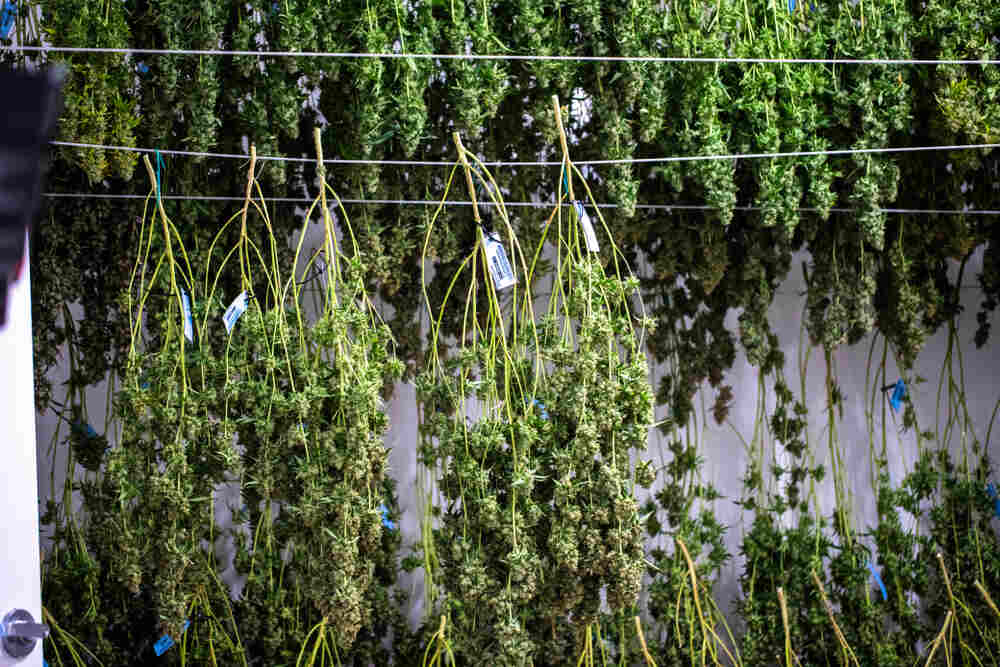
Drying removes excess moisture from freshly harvested cannabis so it can be stored safely. Curing begins after drying has finished and allows the flower to mature under controlled conditions, improving flavour, aroma and smoothness.
| Drying | Curing |
| Removes excess moisture | Equalises remaining moisture |
| Usually takes 7–14 days | Usually takes 2–8 weeks |
| Prevents mould | Improves flavour and aroma |
| Happens immediately after harvest | Begins once buds are properly dried |
| Uses hanging branches or drying racks | Uses airtight glass jars |
Think of drying as preparing the flower for storage, while curing is what transforms a good harvest into premium-quality cannabis.
Skipping drying makes curing impossible, while skipping curing usually results in harsh, grassy-tasting flower that never reaches its full potential.
What You Need Before You Cure Cannabis
Knowing how to cure cannabis starts with proper preparation. Even if you've grown healthy plants and dried them correctly, your cure can quickly go wrong if the flowers are stored in poor conditions. Before I begin curing any harvest, I always check three things: the buds are fully dried, I have clean airtight jars ready, and I can maintain the correct temperature and humidity. Getting these basics right gives your cannabis the best chance of becoming high-quality cured cannabis.
| Preparation Step | Why It Matters | Key Tip |
| Proper Drying | Prevents mold and uneven curing | Use the stem snap test |
| Airtight Containers | Maintains a stable curing environment | Use glass mason jars |
| Controlled Environment | Supports a consistent cure | Monitor temperature and humidity |
Make sure your cannabis is properly dried
Cannabis should never be placed into curing jars while it's still too wet. Excess moisture trapped inside an airtight container creates ideal conditions for mold, which can ruin an entire harvest.
A properly dried bud should feel dry on the outside while remaining slightly soft in the center. One of the most reliable methods I use is the small stem snap test. If smaller stems snap cleanly instead of bending, the buds are usually ready to cure. It's also worth checking flowers from different parts of the plant, as larger colas often take longer to dry than smaller buds.
| Drying Indicator | What to Look For | Action |
| Outer Texture | Dry but not brittle | Ready for curing |
| Inner Moisture | Slightly soft center | Ideal condition |
| Stem Test | Small stems snap cleanly | Begin curing |
| Uneven Drying | Larger buds feel wetter | Continue drying |
Choosing the best jars and curing equipment
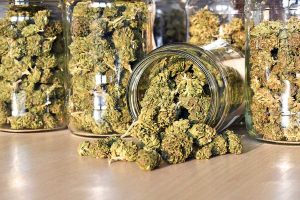
Glass mason jars are the preferred choice for curing cannabis because they're airtight, non-porous, and won't affect the flavor or aroma of your flower. Fill each jar to around 70–75% capacity, leaving enough space for air to circulate around the buds.
Alongside your jars, I recommend using a digital hygrometer to monitor humidity and labels to record the strain and curing date.
| Equipment | Purpose | Recommendation |
| Glass Mason Jars | Airtight curing container | Fill 70–75% full |
| Digital Hygrometer | Measures relative humidity | One per jar |
| Humidity Packs | Adjusts moisture if required | Use when needed |
| Labels | Track strain and curing date | Label every jar |
The ideal temperature and humidity for curing cannabis
Maintaining the correct environment is just as important as choosing the right container. Store your curing jars in a cool, dark location with temperatures between 15–21°C (60–70°F). Inside the jars, aim for a relative humidity of 58–62% RH, which provides the ideal conditions for curing.
| Condition | Ideal Range | Too High | Too Low |
| Temperature | 15–21°C (60–70°F) | Terpene loss | Slower curing |
| Humidity (RH) | 58–62% | Mold risk (>65%) | Overdry (<55%) |
Check your hygrometer regularly during the first few days. If humidity rises above 65% RH, allow the buds to dry a little longer before continuing. If it falls below 55% RH, consider using a humidity control pack. Once these conditions are stable, you're ready to begin the cannabis curing process.
Step-by-Step Guide on How to Cure Cannabis
Once your cannabis has been properly dried and you've prepared your curing jars, you're ready to begin the curing process. If you're wondering how do you cure cannabis, the process is surprisingly straightforward. The key is to make small, consistent adjustments over several weeks rather than trying to speed things up. In my experience, growers who are patient during curing are almost always rewarded with better-quality flower than those who rush to smoke their harvest.
Follow these steps to cure cannabis successfully.
Step 1: Place your dried buds into clean curing jars
Carefully place your dried cannabis buds into clean, airtight glass mason jars. Handle each flower gently to avoid knocking off the trichomes, as these tiny resin glands contain the cannabinoids and terpenes that give cannabis its potency, flavor and aroma.
As you fill each jar, inspect every bud individually. Remove any remaining sugar leaves that were missed during trimming and look closely for signs of mold, pests or unusually damp flowers. If one bud feels noticeably wetter than the others, set it aside and allow it to dry for a little longer before curing.
If you've harvested more than one cultivar, keep each strain in separate jars and clearly label them with the strain name and the date curing began. Good record keeping makes it much easier to monitor your progress and compare different genetics over time.
Step 2: Fill each jar to around 70–75% and seal it
Avoid filling your jars to the top. Instead, fill each container to approximately 70–75% capacity, leaving enough empty space for air to move around the flowers.
Once filled, seal the jars with their airtight lids. At this stage, the buds begin naturally redistributing their remaining internal moisture. You don't need to do anything else immediately—simply allow the flowers to settle inside the sealed jars for the first 24 hours.
This first day is one of the most important parts of the entire curing process because it reveals whether your cannabis was dried correctly before curing.
Step 3: Store the jars in a cool, dark place
Place your sealed jars somewhere cool, dry and out of direct sunlight. I prefer using a cupboard or dedicated curing cabinet where temperatures remain fairly consistent throughout the day.
Avoid storing curing jars near windows, radiators, loft spaces or anywhere temperatures fluctuate significantly. Stable environmental conditions help the flowers mature gradually while protecting delicate terpenes from unnecessary degradation.
Once the jars have been stored correctly, resist the temptation to move them around constantly. Leave them undisturbed until it's time to perform your first inspection.
Step 4: Check the jars after the first 24 hours
After the jars have remained sealed for approximately 24 hours, inspect them carefully before continuing the cure. This initial inspection tells you whether the flowers were dried to the correct moisture level.
Start by checking the hygrometer reading if you've placed one inside the jar. Then gently feel a few buds and pay attention to how they smell and look.
Here are the three outcomes you're most likely to encounter:
| What You Notice | What It Means | What To Do |
| Relative humidity between 58–62% RH | Buds are curing correctly | Continue the curing process. |
| Relative humidity above 65% RH or buds feel damp | Buds still contain too much moisture | Remove the buds from the jars and allow them to dry for several hours before returning them. |
| Relative humidity below 55% RH or buds feel brittle | Buds have become too dry | Continue curing, or use a humidity control pack if necessary. |
Don't panic if your first reading isn't perfect. Small adjustments during the early stages are completely normal and are part of producing consistently high-quality cured cannabis.
Step 5: Continue curing until the buds mature
Once the initial moisture level has stabilized, your role becomes much simpler. Continue storing the jars under the same stable conditions while regularly checking their progress. Over the coming weeks, you'll notice gradual improvements in the appearance, aroma and texture of your flowers.
The grassy smell associated with freshly dried cannabis slowly fades, allowing the strain's natural terpene profile to become much more pronounced. Depending on the genetics you've grown, you may notice stronger citrus, pine, fuel, earthy or fruity aromas developing as the cure progresses.
The buds should also become slightly sticky while remaining firm and springy to the touch. This is usually a good indication that moisture has equalized throughout the flower and the curing process is progressing as expected.
At this stage, your cannabis is curing exactly as it should. The only remaining task is to maintain the ideal environment while periodically releasing excess moisture from the jars. I'll cover this next, with a complete step-by-step guide on how to burp cannabis, including how often to burp your jars and the signs that tell you when to reduce the frequency.
Step-by-Step Guide on How to Burp Cannabis
Once your cannabis has been sealed in curing jars, the next stage is burping. Burping is the process of briefly opening your curing jars to release excess moisture and stale air while introducing fresh oxygen. This simple routine helps maintain the ideal curing environment and significantly reduces the risk of mold developing inside the jars.
Many beginner growers assume curing simply means sealing cannabis in a jar and leaving it alone for a month. In reality, burping is an essential part of the curing process. As moisture continues moving from the center of the buds toward the outside, humidity inside the jar naturally rises. Burping allows you to control this moisture while giving you the opportunity to inspect your cannabis regularly.
Over the years, I've found that consistency is far more important than constantly opening the jars. Burp your cannabis on a schedule, observe how the buds respond, and make small adjustments when necessary.
Step 1: Start burping after the first 24 hours
After your cannabis has remained sealed for approximately 24 hours, it's time to open each jar for the first time. This initial burp allows trapped moisture and stale air to escape while giving you your first opportunity to assess how the cure is progressing.
Remove the lid and allow the jar to remain open for approximately 5 to 15 minutes. During this time, gently smell the buds and inspect them closely.
Healthy curing cannabis should smell fresh and increasingly aromatic. If you detect a strong ammonia smell or notice any fuzzy white or gray growth, the humidity is too high and mold may be developing. Remove the affected buds immediately and allow the remaining flowers to dry further before continuing the cure.
Before replacing the lid, gently rotate or lightly shake the jar so the buds settle into a slightly different position. This helps prevent flowers from sitting against each other in exactly the same place throughout the curing process.
Step 2: Follow a burping schedule during the curing process
One of the questions I hear most often is how frequently cannabis should be burped. While every harvest is slightly different, following a simple schedule provides a reliable starting point for most growers.
I generally recommend the following routine:
| Curing Stage | Burping Frequency | Time Jar Remains Open |
| Week 1 | Once or twice each day | 5–15 minutes |
| Week 2 | Once each day | 5–10 minutes |
| Weeks 3–4 | Every two to three days | Around 5 minutes |
| After Week 4 | Once each week if continuing a long cure | Around 5 minutes |
Remember that this is only a guide. Your hygrometer readings and the condition of your buds should always determine whether you need to burp more or less frequently.
As curing progresses, you'll notice humidity becoming much more stable inside the jars. This is a good indication that the flowers are approaching a fully cured state.
Step 3: Check your buds during every burp
Every time you open a curing jar, take a few moments to inspect the buds rather than simply removing the lid and closing it again. These regular inspections help you identify small problems before they become serious.
During each inspection, check for:
- A pleasant, strain-specific aroma rather than a grassy or ammonia smell.
- Buds that feel slightly sticky and spring back when gently squeezed.
- Relative humidity remaining within the ideal curing range.
- Any signs of mold, unusual moisture, or condensation inside the jar.
If the buds begin sticking together or feel noticeably damp, they still contain excess moisture. Remove them from the jar and allow them to air dry for several hours before continuing the cure.
If the buds feel dry and brittle, don't panic. Continue monitoring them and consider adding a humidity control pack if relative humidity remains below the ideal range.
These regular inspections quickly become second nature, and they're one of the easiest ways to produce consistently high-quality cured cannabis.
Step 4: Know when to reduce burping frequency
As the curing process continues, you'll notice the need for burping gradually decreases. The humidity inside the jars becomes more stable, the buds maintain a consistent texture, and the aroma continues improving without dramatic daily changes.
This is your signal to reduce how often you open the jars. Opening them unnecessarily once the cure has stabilized can actually cause the flowers to lose moisture faster than intended.
I usually reduce burping to every few days after the first couple of weeks, eventually opening the jars only once a week if I'm continuing a longer cure. By this point, the cannabis is largely maintaining its own stable environment inside the container.
Knowing when to reduce burping comes with experience, but your hygrometer remains your best guide. If humidity stays consistent between 58% and 62% RH and the buds continue smelling rich and feeling slightly sticky, your cure is progressing exactly as it should.
With regular burping complete, all that's left is allowing time to do the rest. In the next section, we'll look at how long to cure cannabis, how to recognize when it's fully cured, and the best way to store your finished flower for long-term freshness.
Common Cannabis Curing Mistakes
Even experienced growers occasionally make mistakes during the curing process. Fortunately, most problems can be avoided by paying close attention to humidity, temperature and the condition of your buds throughout the first few weeks. Here are the mistakes I see most often and how to avoid them.
Placing Buds Into Jars Too Early
This is by far the most common mistake beginners make.
If cannabis hasn't dried properly before being sealed inside airtight jars, excess moisture becomes trapped inside the flowers. This rapidly increases humidity and creates ideal conditions for bud rot and other forms of mold. If you're growing in humid environments, choosing mold resistant strains can also help reduce problems before harvest.
If your hygrometer reads above 65% RH after the first 24 hours, remove the buds and allow them to air dry for several hours before returning them to the jars.
Overfilling Your Curing Jars
Packing jars completely full restricts airflow around the buds, preventing moisture from redistributing evenly.
Aim to fill jars to around 70–75% capacity. This leaves enough room for air circulation while still maintaining a stable curing environment.
Forgetting to Burp Your Jars
Burping removes stale, moisture-rich air from inside the jar and replaces it with fresh air.
Skipping this step during the first couple of weeks can allow humidity to climb high enough for mould to develop.
If you ever notice condensation inside the jar, open it immediately and allow the buds to dry slightly before resealing.
Storing Cannabis Somewhere Too Warm
Heat is one of the biggest enemies of cured cannabis.
High temperatures gradually degrade cannabinoids and terpenes, reducing both flavour and potency.
Store your curing jars somewhere cool and dark where temperatures remain between 15–21°C (60–70°F).
Ignoring Hygrometer Readings
Many growers rely only on how the buds feel.
While experience certainly helps, a digital hygrometer provides far more reliable information.
Keeping relative humidity between 58–62% gives your cannabis the best chance of curing correctly while greatly reducing the risk of mould.
Fortunately, most curing mistakes can be corrected early if they're spotted quickly. Regular inspections during the first few weeks are the easiest way to keep your harvest on track.
Cannabis Curing Troubleshooting Guide
Even when you follow every step correctly, every harvest behaves slightly differently. Bud density, drying speed and environmental conditions can all affect the curing process. Here's how to solve the most common problems growers encounter.
| Problem | Likely Cause | Solution |
| Buds smell like hay | Cure still in its early stages | Continue curing for another 2–4 weeks |
| Strong ammonia smell | Buds were jarred too wet | Remove buds immediately and dry further |
| Relative humidity above 65% | Excess internal moisture | Leave buds out for several hours before returning to jars |
| Relative humidity below 55% | Buds dried too much | Add a humidity control pack if necessary |
| Condensation inside the jar | Excess moisture | Remove buds and allow additional drying |
| Buds feel brittle | Environment too dry | Continue curing and monitor RH closely |
| Buds stick together | Moisture is uneven | Separate buds and extend drying slightly |
Most curing problems are caused by moisture rather than anything else. That's why checking your jars regularly during the first couple of weeks is so important.
If you're ever unsure, it's generally safer for cannabis to be slightly too dry than too wet. Overly moist buds create the conditions needed for mould, whereas slightly dry cannabis can often be improved with careful humidity management.
How Long to Cure Cannabis and How to Store It Afterwards
One of the most common questions new growers ask is how long to cure cannabis. The honest answer is that there isn't a single timeline that applies to every harvest. Different cannabis cultivars, bud density, drying conditions and storage environments all influence how quickly the curing process develops.
Rather than focusing solely on the calendar, it's better to monitor how your buds change over time. A properly cured flower develops a richer aroma, smoother smoke and more balanced moisture content. While patience can be difficult after months of growing, allowing your cannabis to finish curing is one of the best investments you can make in the quality of your harvest.
How long to cure cannabis for the best results
Cannabis begins improving almost immediately after curing starts, but reaching its full potential takes time. Although some growers sample their flower after the first couple of weeks, most experienced cultivators agree that a longer cure produces noticeably better results.
As a general guide, you can expect the curing timeline to look something like this:
| Curing Time | What to Expect |
| 2 Weeks | Buds become smoother than freshly dried cannabis, although flavours are still developing. |
| 4 Weeks | Most cannabis reaches a very good cure, with improved aroma, flavour and burn quality. |
| 6–8 Weeks | Many cultivars reach their peak, producing a noticeably richer terpene profile and smoother smoke. |
| 3–6 Months | Some premium genetics continue improving when stored under ideal conditions, developing even greater complexity. |
Every harvest is different, so don't feel pressured to stop curing after a fixed number of weeks. Dense indica flowers often require a little longer than lighter, airier sativa buds, while some terpene-rich cultivars continue developing subtle improvements over several months.
From my own experience, I usually consider four to eight weeks to be the sweet spot for most home-grown cannabis. At this stage, the flower has had enough time to mature without unnecessarily delaying your enjoyment of the harvest.
How to tell when your cannabis is fully cured
Knowing when your cannabis has finished curing becomes easier with experience, but there are several reliable signs that indicate the process is complete.
Properly cured cannabis should have a strong, strain-specific aroma without any grassy, hay-like or ammonia smells. Instead, the natural terpene profile should dominate, whether that's citrus, pine, diesel, berry, earthy or floral notes.
The buds should also feel firm with a slight springiness when gently squeezed. They shouldn't feel damp, and they shouldn't crumble into dust. A light stickiness is often a sign that the flowers have retained enough moisture while preserving their resin production.
When smoked, properly cured cannabis should burn evenly with a clean flavour and a much smoother finish than freshly dried flower. While ash colour alone isn't a reliable indicator of quality, well-cured cannabis generally burns more consistently than uncured buds.
Here's a quick checklist I use before considering a harvest fully cured:
- Rich, strain-specific aroma with no grassy smell.
- Buds feel slightly sticky and spring back when squeezed.
- Relative humidity remains stable inside the curing jar.
- Flowers burn evenly with a smooth, enjoyable smoke.
- No visible mould, excess moisture or unusual odours.
If your cannabis meets all of these criteria, you've successfully completed the curing process.
The best way to store cured cannabis for long-term freshness
Once your cannabis has finished curing, proper storage helps preserve all the improvements you've worked so hard to achieve.
Glass airtight jars remain one of the best storage options because they protect the flowers from excess air while preventing unwanted odours from affecting the cannabis. Continue storing your jars in a cool, dark location away from direct sunlight, heaters and large temperature fluctuations.
Avoid storing cannabis in warm environments such as cars, conservatories or near radiators. Excessive heat accelerates the breakdown of cannabinoids and terpenes, gradually reducing both potency and flavour. Likewise, prolonged exposure to light can degrade cannabinoids over time.
If you plan to store your harvest for several months, periodically inspect your jars to confirm the buds remain in good condition. There's no need to burp fully cured cannabis regularly, but occasional inspections allow you to confirm humidity remains stable and no unexpected issues have developed.
When stored correctly, properly cured cannabis can maintain excellent quality for six to twelve months. For more tips on preserving flavor and potency, read our guide on how to keep weed fresh for longer.
Conclusion
Learning how to cure cannabis is one of the most valuable skills any grower can develop, especially if you're starting with beginner-friendly cannabis strains. While growing healthy plants requires months of care and attention, the curing process is what allows your harvest to reach its full potential. By drying your flowers correctly, curing them under stable environmental conditions and following a consistent burping routine, you'll produce cannabis with better flavor, richer aromas and a much smoother smoking experience.
Don't be tempted to rush the process. Every extra week of careful curing allows your flower to mature naturally while preserving the cannabinoids and terpenes you've worked so hard to produce throughout the growing cycle.
Like every stage of cannabis cultivation, curing becomes easier with experience. Each harvest teaches you something new about your chosen genetics, your drying environment and your curing routine. Before long, you'll develop the confidence to recognise exactly when your cannabis has reached its peak, allowing you to enjoy consistently high-quality, cured cannabis every time you harvest.
Frequently Asked Questions
How long should you cure cannabis?
Most cannabis should be cured for at least 2 to 4 weeks, although many experienced growers continue curing for 6 to 8 weeks to achieve the best flavor, aroma, and smoothness. Some premium cultivars can continue improving for several months when stored under the correct conditions.
Can you cure cannabis for too long?
Yes, although it's uncommon when cannabis is stored correctly. If cured cannabis is kept in airtight jars at the proper humidity and away from heat and light, it can remain in excellent condition for many months. However, poor storage conditions can gradually reduce terpene content, flavor, and potency over time.
How do you know when cannabis is fully cured?
Properly cured cannabis has a strong, strain-specific aroma, feels slightly sticky with a springy texture, and burns smoothly when smoked. The grassy smell associated with freshly dried cannabis should be gone, and the humidity inside the curing jar should remain stable.
Do you need to burp cannabis every day?
Yes, during the early stages of curing. Most growers burp their jars once or twice a day during the first week before gradually reducing the frequency as the humidity stabilizes. Regular burping releases excess moisture and helps prevent mold from developing.
What happens if you don't cure cannabis?
Skipping the curing process usually results in cannabis that tastes grassy, burns harshly, and doesn't fully express its natural terpene profile. While the flower may still be usable, it won't have the smooth smoke, rich aroma, or refined flavor of properly cured cannabis.
Can you cure cannabis in plastic containers?
Glass mason jars are the preferred choice because they're airtight, non-porous, and don't affect the flavor or aroma of the flower. While some food-grade plastic containers can be used temporarily, glass provides the most stable environment for producing high-quality cured cannabis.


