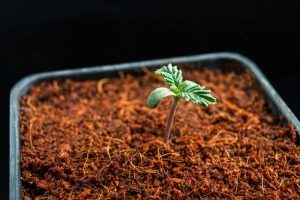
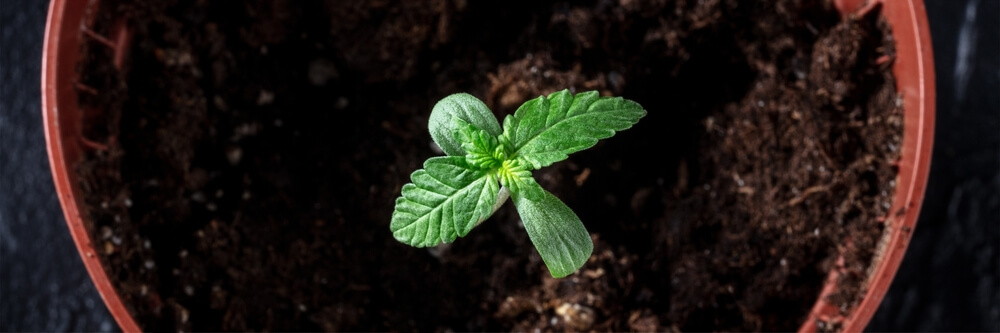
Cannabis seedlings are at their most fragile during the first two weeks of growth, and small mistakes with watering, lighting, temperature, or soil can quickly slow development or kill young plants. This stage begins immediately after germination and sets the foundation for healthy vegetative growth later on. By maintaining stable humidity, using a light and well-draining growing medium, avoiding overfeeding, and providing gentle lighting, growers can help seedlings establish strong roots and sturdy stems. Understanding common problems like stretching, damping off, and overwatering early can make the seedling stage far easier to manage and improve overall plant health moving forward.
Key Takeaways
- The cannabis seedling stage typically begins after germination and lasts around 10–14 days.
- Seedlings commonly perform best at temperatures between 68–77°F with humidity levels around 60–70%.
- Overwatering is one of the most common seedling problems and often causes drooping leaves, yellowing, and root issues.
- Seedlings usually do not require added nutrients until they develop 3–4 nodes and begin vegetative growth.
- Light, airy growing mediums with good drainage, such as coco coir and perlite mixes, help prevent root stress and damping off.
- Stretching seedlings are commonly caused by insufficient light and can often be corrected by lowering the light source and improving airflow.
- Key Takeaways
- When does the seedling stage start?
- Choosing the correct soil and pots
- Creating the perfect climate for your seedlings
- Watering and feeding your seedlings
- How to Water Properly Without Overwatering
- How to Know If You Overwatered or Underwatered Seedlings
- Should I Give My Seedlings Nutrients?
- How to fix stretching seedlings
- How to avoid seedlings damping off
When does the seedling stage start?
The seedling stage of a cannabis plant begins as soon as germination is complete and lasts for 14 days. Germination can be achieved through a variety of methods, but the three most popular and commonly used techniques are covered below.
Paper Towel Method: Place your seeds between two damp kitchen paper towels, ensuring they are not soaked but well saturated, and place them on a plate. Cover them with a second plate to help maintain moisture and keep the germinating seeds in darkness.
This creates a mini greenhouse effect, which speeds up the process and provides the seeds with the optimal conditions. Within 24-72 hours, the taproot should emerge, signaling the next step. Some seeds may take longer to split open and produce a tap root.
Germinating In Water: Another popular method for germinating cannabis seeds is to leave the seeds in water. This method is simple and you only need either a cup or glass of water, fresh soft water with a low EC (electric conductivity) and some cannabis seeds. Once the seeds are inside the water, they typically sink to the bottom within 24-36 hours, and will begin to crack and reveal a tap root within 3-5 days.
A great tip when using this method, is to buy a small bottle of drinking water, allow the water to become room temperature and then insert the seeds and screw the top securely. Keep the cup or bottle of water containing the seeds inside a dark area, such as a kitchen cupboard and keep away from sunlight.
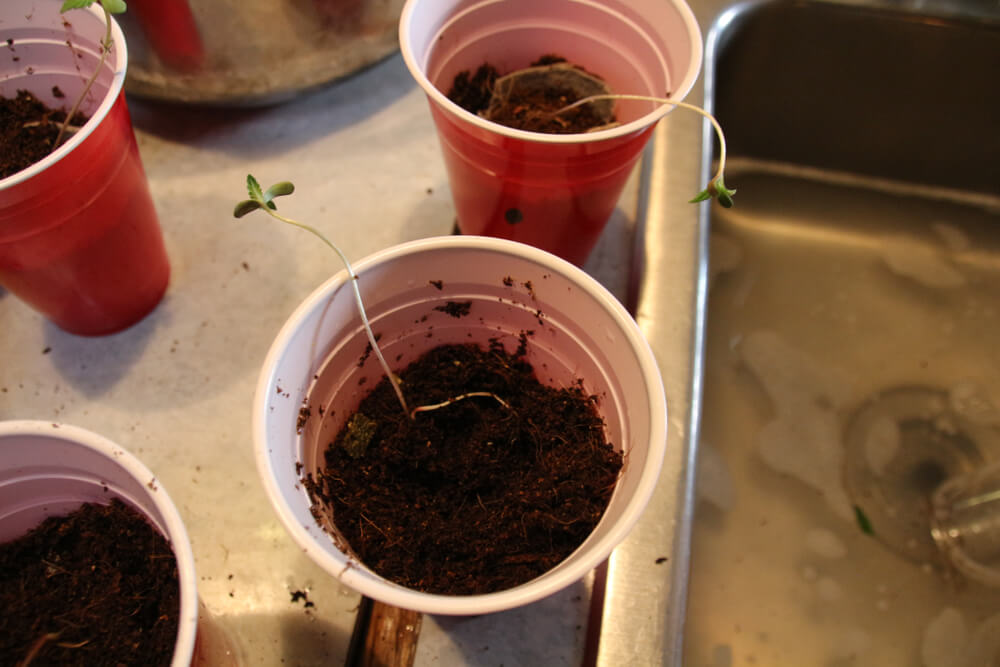
Direct Planting: For growers who prefer a more direct approach, seeds can be placed directly into the growing medium (such as soil or coco coir) at a shallow depth of 1cm deep.
This method can be more natural and practical for home growers and is often the preferred method for outdoor planting, though it may take slightly longer for the taproot to emerge. Within 5-7 days, the seedling will sprout out of the soil.
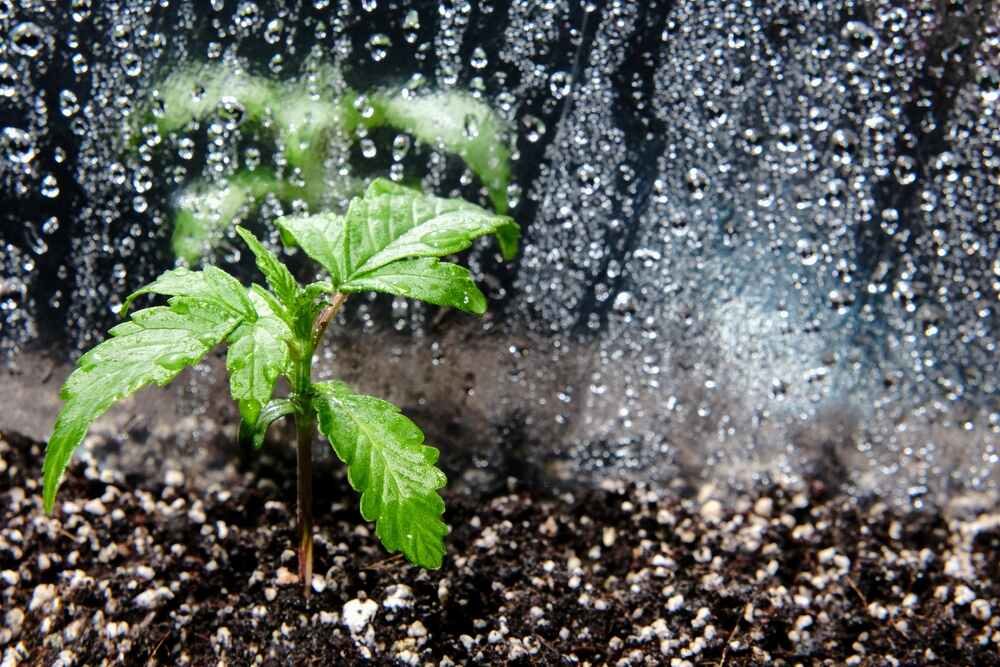
Once the taproot has developed and the seedling starts to push through the medium, your cannabis plant is officially in the seedling stage! This marks the beginning of the journey, but it’s just the start. At this stage, seedlings are particularly fragile and need specific care to thrive.
Actionable Tips:
- Ensure Proper Moisture Levels: Avoid soaking your seeds; keep the paper towels damp but not overly wet. Allow drops of water to drain out of the tissue. This ensures the right environment for the taproot to emerge.
- Choose the Best Germination Method: If you're starting indoors, the paper towel or cup of water method offers more control. If you're planting outdoors or prefer a more natural process, direct planting is a good option.
- Handle with Care: Once the taproot has emerged, gently transplant your seedlings using a pair of tweezers into their growing medium. Be cautious not to damage the fragile roots during the transfer.
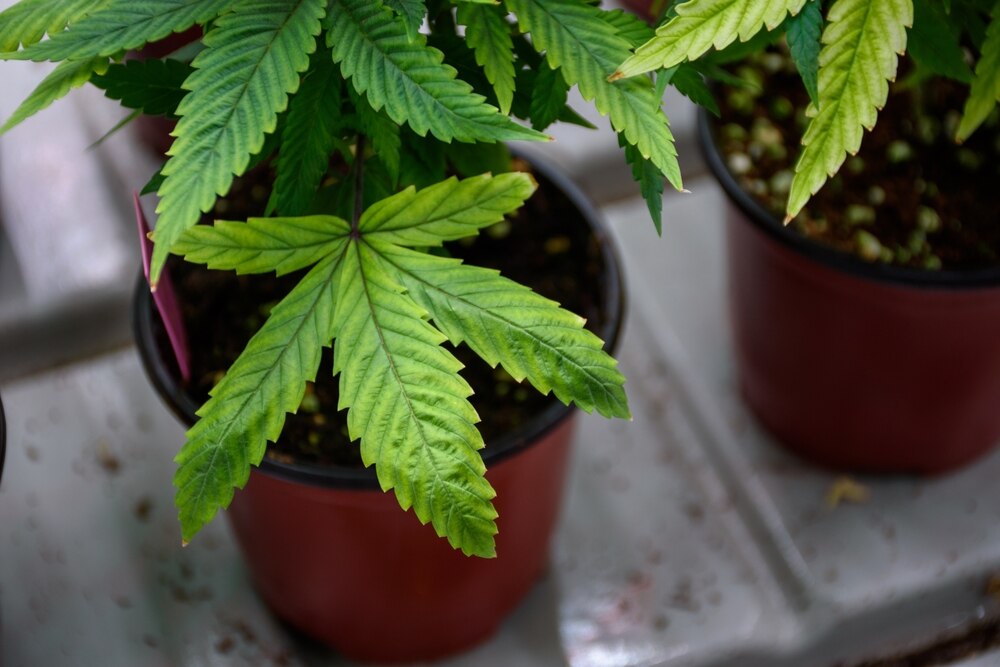
Choosing the correct soil and pots
When it comes to cannabis seedlings, selecting the right soil and pots is crucial for healthy growth. At this early stage, the soil should be well-aerated, not contain too much nutrient and light and airy, allowing moisture to drain easily while providing oxygen to the roots. Here’s how to get it right:
What is the Best Soil for Seedlings?
For the best results, cannabis seedlings need a growing medium that is not too nutrient-rich, as over-fertilizing can lead to nutrient burn. Look for a light, well-draining mix that is designed for young plants, or be prepared to create your own!
A common option is a seed-starting mix that is often lighter and less dense than standard potting soil, allowing better aeration. A good choice would be a mix of coco coir, perlite, and vermiculite, which ensures proper drainage and oxygen flow to the roots.
We would recommend making a mix of coco coir, worm castings and compost at a 50/50 ratio of perlite. This mix will provide the roots with an oxygen rich substrate and eliminates the risk of nutrient burn or over fertilization.Avoid heavily fertilized soils that are best suited for mature , as these can overwhelm seedlings, causing them to become stunted or experience nutrient lockout. Instead, choose a neutral or lightly amended medium and add nutrients gradually as the plant enters the vegetative phase.
Choosing the Right Pot for Seedlings
The type and size of pot you use for seedlings can have a big impact on their development. Seedlings grow best in smaller pots, typically 8 oz (0.25 l) containers for the first 7-10 days. After this, they can be transplanted into slightly larger pots to allow their roots to expand.
Pot Material: Fabric pots are the best option for seedlings. The breathable fabric helps prevent overwatering and ensures good air circulation around the roots. This is important to prevent root rot and allows seedlings to grow strong and healthy.
Re-potting fabric pots inside another may be costly, so it is advised to consider transplanting into a large final pot that is between 25-50L in size.
Pot Size: Avoid starting seedlings in pots that are too large, as this can lead to overwatering and stress. If you’re planning on transplanting seedlings, start with small pots and increase their size gradually as they grow. Check the root development on a daily basis, and monitor to see if the plant needs to be repotted
For non-autoflowering strains, it’s best to transplant once or twice as seedlings grow.
Pro Tip: If you’re starting autoflower seeds, transplanting is best avoided. Since autoflowers have a short life cycle and low tolerance for stress, it’s best to start them in their final pot. A 3 to 4-gallon (11-15 liter) pot is ideal for autoflowers, providing plenty of room for their roots to expand without causing stress.
Actionable Tips:
- Choose Fabric Pots: These are breathable, reduce the risk of overwatering, and promote healthy root growth, but may be costly.
Avoid Stress on Autoflowers: For autoflowers, transplanting should be kept to a minimum. Start them directly in their final pot for the best results. - Use a Light, Well-Draining Soil: Avoid nutrient-rich mixes to prevent seedling burn. A mix of coco coir and perlite is ideal for drainage and aeration.
- Start Small: Use 8 oz pots for the first 10 days and gradually move up to larger containers as seedlings grow.
Creating the perfect climate for your seedlings
Maintaining the ideal climate for your cannabis seedlings is essential for healthy growth. Cannabis seedlings require specific conditions to thrive in the early stages. Here's how to create the perfect environment and grow the healthiest and most vibrant seedlings
Temperature
Seedlings prefer a temperate daytime climate of around 68-77°F (20-25°C). At night, it’s important to lower the temperature slightly to around 60-66°F (16-20°C) to simulate natural conditions and help the plants rest.
Avoid exposing seedlings to temperatures above 80°F (27°C), as high heat can cause stress and stunt growth. Similarly, temperatures below 55°F (13°C) can cause growth to slow dramatically, and seedlings can become weak or die in a worst case scenario.
Actionable Tips:
- Maintain a consistent temperature during the day and night for optimal growth.
- Use a hygrometer in your grow space to monitor the temperature
Humidity
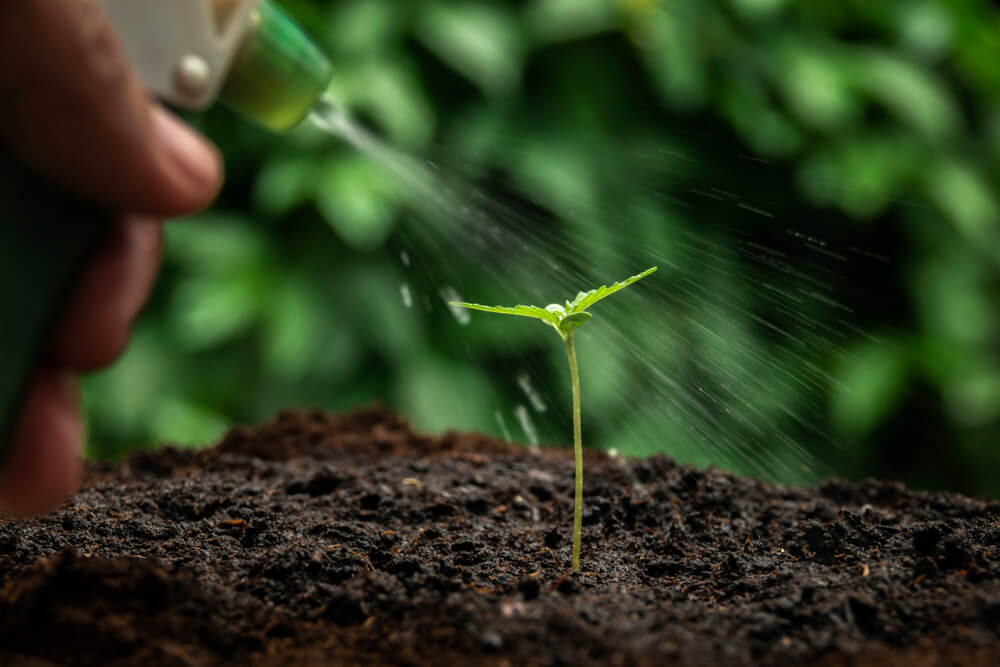
Cannabis seedlings need the right humidity level to stay healthy. Ideally, the relative humidity should be 60% during the seedling stage. If the humidity is too high, fungus and rot can set in, leading to unhealthy seedlings. On the other hand, if the humidity is too low, seedlings may dry out, and their growth will be stunted.
For best results, use a humidifier to maintain the proper humidity in a grow tent or room. You can also cover your seedlings with a plastic dome or humidity dome to keep moisture in, but ensure there is some airflow to prevent mold growth. Foliar spraying with bottled water will also help keep humidity levels within the optimal range.
Light
Seedlings don’t need as much light as fully-grown cannabis plants, but they still need proper lighting to thrive. Artificial light should be placed around 6-12 inches (15-30 cm) above the seedlings to provide sufficient energy while avoiding heat stress.
Since seedlings are sensitive to intense light, fluorescent lights (T5, T8, or CFL) are the best choice, as they provide adequate light without generating too much heat. Alternatively, you can use a low powered LED or reduce the PPFD output using a dimmer device.
For seedlings, a light cycle of 18 hours of light and 6 hours of darkness is ideal. A few hours of darkness allows the seedlings to rest and recover, promoting healthy growth. Darkness is important for cannabis plants, as it is during the lights off period when they do most of their work!
Actionable Tips:
- Monitor temperature and humidity closely to ensure they stay within the optimal range.
- Use a hygrometer to measure humidity levels, adjusting with a humidifier if needed.
- Use fluorescent lights, or LED and keep them 6-12 inches above your seedlings to provide a gentle but effective light source.
Watering and feeding your seedlings
Proper watering and feeding are essential for healthy seedling development. At this stage, the plants are very delicate, and both overwatering and underwatering can have negative effects. Here’s how to manage their water and nutrient needs, so you will find the perfect balance
How Often Should I Water My Seedlings?
Cannabis seedlings require regular watering, but it’s crucial not to overdo it. The key is to water when the pot feels light to pick up, the soil looks and feels dry. It is a good idea to insert your smallest finger down the side of the soil to see if your finger is wet or dry. Overwatering can deprive seedlings of oxygen, leading to root rot or fungal infections.
Signs of Overwatering:
- Drooping or wilting seedlings, even though the soil is wet
- Yellowing leaves or a soggy appearance
- Mold or fungus developing on the surface of the soil
Signs of Underwatering:
- Dry, crispy leaves
- Wilting seedlings, but the soil feels dry and dusty
- A droopy appearance, indicating the plant is thirsty
- Paper thin leaves and a dry and brittle texture
You could also try and water your seedlings directly at the base of the plant rather than soaking the entire surface. Bottom feeding using a saucer helps ensure that water reaches the root zone, is drawn upwards into the pot.
Actionable Tip: Use a spray bottle or watering can with a fine nozzle for gentle watering, especially in the early stages. A spray bottle mist will increase humidity levels helping maintain a consistent humidity level.
What Nutrients Should I Give My Seedlings?
Seedlings come equipped with enough nutrients from the seed to get them through the first few weeks of growth. During this time, there is no need to add additional nutrients. Seedlings do not require much food or light, until they begin to vegetate after 14 days. Overfeeding seedlings can lead to nutrient burn, which can stunt their growth or cause severe damage. Below are the signs of nutrient burn and what to look out for.
Signs of Nutrient Burn:
- Yellow or brown tips on leaves
- Curling leaves that look “crispy” around the edges
- Slowed or halted growth
Instead of adding fertilizers, it’s best to wait until your seedlings have at least 3-4 nodes and are showing healthy growth, and a strong and well developed root zone. At that point, you can introduce a light feeding schedule starting with 1ml per litre. A mild organic nutrient solution such as compost tea is ideal, as it provides gentle nutrients and beneficial microorganisms that help the plant thrive.
Actionable Tip: Use organic or slow-release fertilizers such as compost and worm hummus, to prevent overfeeding, and always start with a diluted nutrient solution to avoid overwhelming your seedlings.
How to Water Properly Without Overwatering
Here’s a step-by-step guide for watering your cannabis seedlings:
- Check the Soil: Stick your finger about an inch into the soil at the sides of the pot. If it feels dry, it’s time to water.
- Water Gently: Use a spray bottle or watering can to apply water directly to the base of the plant. Aim for the root zone or spray the tops and undersides of the leaves.
- Ensure Proper Drainage: Make sure the pots have drainage holes so any excess water can escape. Avoid letting the seedlings sit in standing water.
- Monitor Watering Frequency: Adjust watering frequency depending on the humidity and temperature of your grow space. During high humidity, seedlings may need less frequent watering.
Actionable Tips:
- Water Slowly: Water using a measuring beaker gradually to allow it to absorb into the soil rather than running off the surface.
- Use pH-Balanced Water: If possible, use pH-neutral water (around 6.0-7.0) to prevent nutrient lockout.
- Ensure Drainage: Make sure excess water can escape from the pot to prevent root rot.
How to Know If You Overwatered or Underwatered Seedlings
Understanding how to properly water your seedlings and mature plants is one of the most critical aspects of cannabis cultivation. Both overwatering and underwatering can lead to stunted growth or even death of your seedlings. Here's how to tell the difference and fix the problem.
Signs of Overwatering
Overwatering is one of the most common mistakes that new cannabis growers make. When seedlings are overwatered, the roots are deprived of oxygen, leading to root rot and other issues. Here’s how to spot overwatering:
- Wilting Seedlings: The seedlings may appear to be wilting, despite the soil being wet.
- Yellowing Leaves: Overwatered seedlings often display yellowing leaves, particularly at the tips.
- Soggy Soil: The soil remains wet, dense and heavy for a long time after watering, indicating poor drainage.
- Mold or Fungus: Excess moisture can promote the growth of mold or fungi, especially on the surface of the soil.
- Root Rot: In more severe cases, the roots may begin to decay, which will cause the plant to collapse or die.
Actionable Tip: To avoid overwatering, use a measuring jug and ensure your pots have adequate drainage holes and use a soil mix that drains well. Check the moisture level regularly by sticking your finger about an inch into the soil, and lifting the pots up to feel how heavy or light they may be, to determine if watering is necessary.
Signs of Underwatering
Underwatering can also be problematic, as cannabis seedlings require consistent moisture to grow strong roots and foliage. Signs of underwatering include:
- Crispy, Dry Leaves: Leaves may become dry and brittle, particularly at the edges.
- Wilting or Drooping: If the soil is dry and the seedlings look limp, they need water.
Slow Growth: Underwatered plants may grow more slowly than healthy seedlings. - Curling Leaves: Leaves may curl up as they try to conserve moisture.
Actionable Tip: If you suspect underwatering, water the seedlings gently, allowing moisture to reach the root zone. Be sure to check the soil regularly to ensure it doesn't dry out completely between waterings. Familiar spraying the plant with a mist of water will be beneficial and help the plants bounce back much faster.
How to Fix Overwatered Seedlings
If you overwatered your seedlings, follow these steps to help them recover:
- Check Drainage: Make sure your pots have proper drainage holes, and remove any excess water from the tray.
- Allow the Soil to Dry: Let the soil dry out slightly before watering again. Avoid watering until the top inch of the soil is dry.
- Increase Air Circulation: Use a small fan to increase air circulation around your seedlings to help the soil dry out faster.
Transplant if Necessary: If the seedling is severely affected, you may need to transplant it into fresh, well-draining soil to encourage recovery.
How to Fix Underwatered Seedlings
If your seedlings are underwatered, they need immediate attention:
- Water Gently: Water slowly and gently using a measuring jug at the base of the plant, making sure the water reaches the roots.
Ensure Proper Drainage: After watering, ensure the excess water can escape through the drainage holes. This is known as run-off and usually lasts 20-30 seconds. - Increase Humidity: If your seedlings are extremely dry, consider placing a humidity dome or misting lightly to help them regain moisture.
- Monitor Regularly: After the initial watering, monitor the soil moisture regularly to prevent future underwatering.
Actionable Tips:
- Use a Moisture Meter: To help prevent overwatering or underwatering, consider using a soil moisture meter to measure moisture levels at different depths.
- Measuring Jug: Watering with the same amount of water each time will help you find the perfect balance. A measuring jug is advantageous for avoiding under or overwatering.
- Water in the Morning: Watering in the morning one hour after the lights turn on to help prevent overwatering by giving the soil time to drain and dry out during the day.
- Avoid Watering at Night: Avoid watering late in the day when evaporation is slower, as this could lead to excessive moisture around the roots overnight.
Should I Give My Seedlings Nutrients?
Cannabis seedlings are born with enough nutrients to carry them through the first stages of growth. In fact, adding nutrients too early can do more harm than good. Here’s why and when you should start feeding your seedlings.
Why Not Feed Seedlings Right Away?
When cannabis seeds germinate, they rely on the stored nutrients in the seed itself to fuel their initial growth. During the early seedling stage, they don’t need additional fertilizers. Adding large amounts of nutrients at this stage can overwhelm the seedlings, leading to nutrient burn and stunted growth. Signs of nutrient burn include:
- Yellowing or Browning Leaf Tips: This indicates that the plant is receiving too many nutrients.
- Curling Leaves: The edges of leaves curl upwards or become crispy, which is a clear sign of stress from overfeeding.
- Slowed Growth: Excess nutrients can slow the plant’s development, as it diverts energy to processing the overload.
When Should I Start Feeding Nutrients?
Once your cannabis seedlings have at least 3-4 nodes (the small leaf pairs), they’re ready to begin liquid nutrient solution feeding. At this point, their nutrient requirements will start to increase as they move into the vegetative stage. Here's how to proceed:
- Start Slowly: Begin with a light nutrient solution, about ¼ to ½ strength of what is recommended for mature plants. Organic nutrients, such as compost tea, are a great choice for seedlings because they provide a gentle, balanced supply of nutrients and beneficial microorganisms.
- Wait Until the Seedlings Are Stronger: If your seedlings are still small and fragile, avoid adding nutrients until they show steady growth with a healthy set of leaves.
Best Nutrient Options for Seedlings
For your seedlings, organic nutrients are the best option as they’re slower to release, reducing the risk of overfeeding. Some excellent choices include:
- Compost Tea: Rich in natural microorganisms, compost tea supports healthy root development, packed with microbes and provides a steady, gentle supply of nutrients.
- Fish Emulsion: This is a mild organic fertilizer that’s perfect for early-stage feeding, providing essential nitrogen for plant growth.
- Worm Castings: Adding worm castings to the soil will provide nutrients as the seedlings grow without overwhelming them. Worm castings are also rich in beneficial microorganisms and bacteria.
Actionable Tip: When feeding, always dilute your nutrients to half-strength at first and gradually increase the concentration as the seedlings mature. It’s better to underfeed than to overfeed at this stage. Start with 1ml per litre and see how the seedlings are after each feed.
Actionable Tips:
- Avoid Chemical Fertilizers: Stick to organic, gentle fertilizers to avoid shocking your seedlings.
- Use pH-Balanced Water: If you’re mixing nutrients into water, ensure that the water has a pH of 6.0-7.0, as this range is ideal for nutrient absorption.
- Observe the Seedlings: If your seedlings show any signs of distress, stop feeding nutrients and flush the soil with plain water to remove any excess nutrients.
How to fix stretching seedlings
Stretching is a common problem for cannabis seedlings, especially when they aren’t receiving enough light. When seedlings don’t get enough light, they tend to grow tall and lanky as they search for a better light source. Fortunately, this issue is relatively easy to fix.
What is Stretching?
Stretching occurs when a seedling grows long, thin, and weak stems, often with wide spaces between the leaves. This is typically a result of insufficient light. In an attempt to find more light, the seedling’s stem grows taller rather than thicker, which weakens the plant's structure and makes it harder for it to stay upright.
How to Fix Stretching Seedlings
If you notice that your seedlings are stretching, it’s important to act quickly to prevent permanent damage. Here’s how to fix the issue:
- Move the Light Closer: Bring your light source closer to the seedlings to ensure they get enough light. Keep fluorescent lights about 6-12 inches (15-30 cm) above the seedlings. If you’re using LEDs or other stronger lights, ensure that the light isn’t too intense, as this can cause heat stress.
- Increase Light Duration: Seedlings need at least 16-18 hours of light per day. If your seedlings are not receiving enough light, their stems will stretch further. Consider increasing the light duration for better development.
Support the Seedlings: If your seedlings have become too tall and are leaning or falling over, prop them up using small stakes, skewers, or toothpicks. Gently tie the stem to the support using a soft tie to prevent further bending. - Reduce Light Distance Gradually: If you have strong lights like HID or LED grow lights, reduce the light distance gradually over a few days, so as not to shock your seedlings with sudden changes in light intensity.
- Check for Light Strength: If you’re using high-powered lights, such as HID or LED lights, make sure your seedlings aren’t receiving too much light intensity. Adjusting the light intensity or distance can help control stretching.
- An Oscillating Fan: Allowing a fan to blow a light and gentle breeze at seedlings, will encourage them to become more sturdy and resilient.
Actionable Tips:
- Check Light Levels: If using fluorescent lights, ensure they are around 6-12 inches above the canopy. For LED lights, adjust the distance based on the manufacturer’s recommendations.
- Provide Support: Use soft plant ties or gentle supports like wooden skewers to prop up weak seedlings.
- Avoid Too Much Heat: Ensure the light isn’t too hot. If the seedlings are too close to the light, they may become heat-stressed, which can cause further issues.
How to avoid seedlings damping off
Damping off affects cannabis seedlings, causing the plant's stem to become weak, and fall over and then shrivel up and die. It's one of the most frustrating issues growers face, but with proper care and preventive measures, it can be avoided. Here's everything you need to know about preventing damping off:
What is Damping Off?
Damping off is a condition caused by soil-borne fungi, such as Pythium, Fusarium, and Rhizoctonia, which thrive in warm, moist environments. The fungi attack the stem at the soil line, causing it to rot and weaken. Eventually, the seedling will collapse and die.
Symptoms of Damping Off:
- Yellowing at the Soil Line: The base of the stem turns yellow or brown, becoming soft and mushy.
- Collapsed Seedlings: The stem may fall over or appear to be limp, even if the soil is wet.
- Fungal Growth: You may notice white or greyish fungal growth on the surface of the soil or near the base of the stem.
How to Prevent Damping Off
- Maintain Proper Airflow: Good ventilation and airflow are essential in preventing fungal growth. Ensure your grow space is well-ventilated, and consider using a small fan to increase air circulation. This helps keep the environment dry and reduces the humidity around seedlings, making it harder for fungi to thrive.
- Avoid Overwatering: Overwatering is a common cause of damping off because it creates a consistently wet environment in the soil. Let the top of the soil dry out and lift the pots to see how light the growing medium has become before watering again. This helps to prevent excess moisture around the roots, which is a perfect environment for fungi.
- Use Bacteria Rich Soil: Always use beneficial bacteria rich soil when starting your seedlings. This helps eliminate any harmful pathogens that could cause damping off. Avoid using soil that has been left outside, as it could contain fungi or other pests.
- Proper Humidity Control: Keep the humidity around 60-70% for seedlings. Too much moisture in the air can increase the likelihood of fungal growth. If you’re growing indoors, use a humidifier or dehumidifier to regulate the humidity in your grow space.
- Don’t Overcrowd Seedlings: If you’re growing multiple seedlings in the same area, make sure they have enough space to breathe and grow. Crowded seedlings are more likely to develop moisture retention, stretch and become lanky.
Actionable Tips:
Water Carefully: Do not over do it when watering your seedlings. Give them the same volume of water each feeding and watering.Check for Fungus: Regularly inspect your seedlings for signs of damping off. If you notice any yellowing or soft stems, remove the affected seedlings immediately to prevent the fungus from spreading.
Increase Air Circulation: Place a small oscillating fan near your seedlings to help reduce moisture and prevent fungal growth.

