




Growing healthy cannabis indoors starts with choosing the right cannabis light schedule for each stage of your plant's life. Whether you're growing photoperiod or autoflower cannabis, the correct lighting schedule for cannabis directly affects root development, vegetative growth, flowering, and ultimately the size and quality of your harvest. Using the wrong weed light cycle can slow growth, reduce yields, or stress plants, while a consistent schedule helps create the ideal conditions for healthy, vigorous development.
In this guide, you'll learn everything you need to know about choosing the right weed grow light schedule, from the ideal cannabis seedling light schedule through vegetative growth and flowering. We'll explain how photoperiod and autoflower plants respond to light, how to adjust your timers, understand PPFD and Daily Light Integral (DLI), avoid common lighting mistakes, and select the right grow lights for your indoor garden. Whether you're growing your first plant or looking to improve your harvests, this guide will help you build a lighting schedule that supports healthy growth from seed to harvest.
Key Takeaways
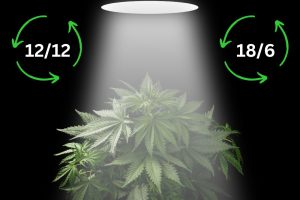
- Use an 18/6 cannabis light schedule for seedlings and vegetative photoperiod plants, then switch to 12/12 to trigger flowering once your plants reach the desired size.
- Autoflower cannabis doesn't require a change in the light cycle. Most growers keep autoflowers under an 18/6 weed grow light schedule from seed to harvest for healthy growth and energy efficiency.
- Light intensity is just as important as your lighting schedule. Match PPFD and Daily Light Integral (DLI) to each stage of growth to maximize photosynthesis while avoiding light stress.
- Consistency is critical for healthy plants. A reliable timer, uninterrupted darkness during flowering, and a stable growing environment help reduce stress and support better yields.
- Successful indoor growing combines the right cannabis light schedule with proper environmental conditions. Temperature, humidity, airflow, and a quality full-spectrum LED grow light all work together to produce healthy plants and abundant harvests.
- Why do cannabis plants need different light schedules?
- Cannabis light schedule cheat sheet
- Understanding PPFD and DLI
- Cannabis seedling light schedule
- Cannabis vegetative light schedule
- Cannabis flowering light schedule
- Autoflower cannabis light schedule
- How to adjust a cannabis light schedule
- Common cannabis lighting mistakes
- Choosing the right grow light
- Frequently asked questions
Why do cannabis plants need different light schedules?
Choosing the right cannabis light schedule is one of the most important parts of growing healthy indoor plants. Light does not just power photosynthesis. It also tells cannabis when to produce leaves, stems, and eventually flowers. By controlling the amount of light and darkness your plants receive each day, you can manage their growth from seedling to harvest.
However, not all cannabis plants respond to light in the same way. The correct light schedule for cannabis depends on whether you're growing autoflower cannabis seeds or photoperiod genetics, as each responds differently to changes in day length.
What is photoperiodism?
Photoperiodism is a plant's natural ability to measure the length of day and night. Photoperiod cannabis uses this seasonal change as a signal for when to begin flowering.
Outdoors, days gradually become shorter as summer turns to fall. Once nights become long enough, photoperiod cannabis naturally transitions from vegetative growth into flowering. Indoors, growers recreate this seasonal change by adjusting the cannabis light schedule, allowing plants to flower at any time of year regardless of the season.
Autoflower cannabis works differently. Rather than relying on changes in daylight, autoflowers begin flowering automatically once they reach maturity. If you're unsure which type is right for your grow, compare autoflowers vs. photoperiod cannabis before choosing your seeds.
Photoperiod vs. autoflower cannabis
Understanding the difference between these two types of cannabis is essential before choosing a lighting schedule.
| Feature | Photoperiod Cannabis | Autoflower Cannabis |
| Flowering trigger | Longer periods of uninterrupted darkness | Plant age and maturity |
| Typical vegetative light schedule | 18 hours on / 6 hours off (18/6) | 18 to 20 hours of light throughout the grow |
| Flowering light schedule | Requires 12 hours of light and 12 hours of uninterrupted darkness (12/12) | No schedule change required |
| Grower control | Full control over when flowering begins | Flowers automatically after several weeks |
| Best suited for | Larger plants, training techniques, maximizing yield | Faster harvests, smaller spaces, perpetual grows |
For most indoor growers, photoperiod strains remain under an 18/6 weed light cycle during the vegetative stage before switching to a 12/12 cannabis light schedule to trigger flowering. Autoflowers, on the other hand, can usually stay on the same lighting schedule from seed to harvest, making them a popular option for beginners and growers looking for a simpler setup.
Do feminized seeds always need a photoperiod light schedule?
Not necessarily. Feminized and photoperiod describe different characteristics of a cannabis plant.
- Feminized seeds are bred to produce female plants that develop cannabinoid-rich flowers.
- Photoperiod describes how a plant responds to light.
You can buy both feminized photoperiod seeds and feminized autoflower seeds, so it is important to check the genetics before deciding on your lighting schedule for cannabis.
Now that you understand how different cannabis plants respond to light, let’s look at the ideal cannabis seedling light schedule and how your lighting should change throughout each stage of growth.
Cannabis light schedule cheat sheet
If you're looking for a quick reference, the table below summarizes the recommended light schedule for cannabis throughout every stage of growth. While individual cultivars and growing environments may require minor adjustments, these lighting schedules are widely used by indoor growers and provide a reliable starting point for healthy plant development.
| Growth stage | Light schedule | PPFD | DLI | Primary goal | Notes |
| Seedling | 18/6 | 100–300 µmol/m²/s | 10–15 mol/m²/day | Develop healthy roots and true leaves | Keep light intensity low to prevent stretching or light stress. |
| Vegetative | 18/6 | 400–600 µmol/m²/s | 25–35 mol/m²/day | Build roots, branches, and canopy | Begin training techniques such as LST, topping, or SCROG. |
| Flowering (Photoperiod) | 12/12 | 600–900 µmol/m²/s* | 26–43 mol/m²/day | Trigger flowering and maximize bud development | Maintain 12 hours of uninterrupted darkness every day. |
| Autoflower (Seed to Harvest) | 18/6 (20/4 optional) | Increase PPFD with each growth stage | Varies by growth stage | Consistent growth from seed to harvest | No change in lighting schedule is required to initiate flowering. |
*PPFD above 900 µmol/m²/s is generally recommended only when environmental conditions, nutrition, irrigation, and CO₂ supplementation are fully optimized.
Which cannabis light schedule should you choose?
For most indoor growers, an 18/6 cannabis light schedule is ideal for seedlings and vegetative plants because it provides plenty of light for rapid growth while allowing equipment to cool during the dark period. Once photoperiod plants reach the desired size, switching to a 12/12 weed light cycle signals that it's time to begin flowering.
Autoflower cannabis follows a different growth pattern. Since flowering is controlled by age rather than changes in daylight, the same weed grow light schedule can be maintained from seed to harvest. Most growers choose 18/6 because it delivers excellent growth while remaining energy efficient, although some prefer 20/4 depending on their setup.
These recommendations provide a solid foundation for most indoor gardens. As your experience grows, you can fine-tune light intensity, environmental conditions, and plant training techniques to suit individual cultivars and maximize yield.
Understanding PPFD and DLI
Choosing the right cannabis light schedule is only part of growing healthy plants. Light intensity is just as important, which is why you'll often see the terms PPFD (Photosynthetic Photon Flux Density) and DLI (Daily Light Integral) used throughout this guide.
PPFD measures how much usable light reaches your plant every second and is expressed in micromoles per square meter per second (µmol/m²/s). As cannabis plants mature, they can use higher PPFD levels to support faster growth and heavier flower production. This is why seedlings require much lower PPFD than vegetative or flowering plants.
DLI measures the total amount of light your plants receive over an entire day. It combines both light intensity and the number of hours your grow lights remain on. For example, a plant receiving moderate light for 18 hours may achieve a similar DLI to one receiving higher light intensity for only 12 hours.
Rather than focusing on light schedule or intensity alone, successful growers consider both. Learning how PPFD and DLI work together makes it much easier to optimize indoor lighting. A consistent lighting schedule for cannabis, combined with the appropriate PPFD for each stage of growth, helps maximize photosynthesis while reducing the risk of stretching, light stress, or poor flower development. Think of PPFD as the strength of the light and DLI as the total daily dose your plants receive.
Cannabis seedling light schedule
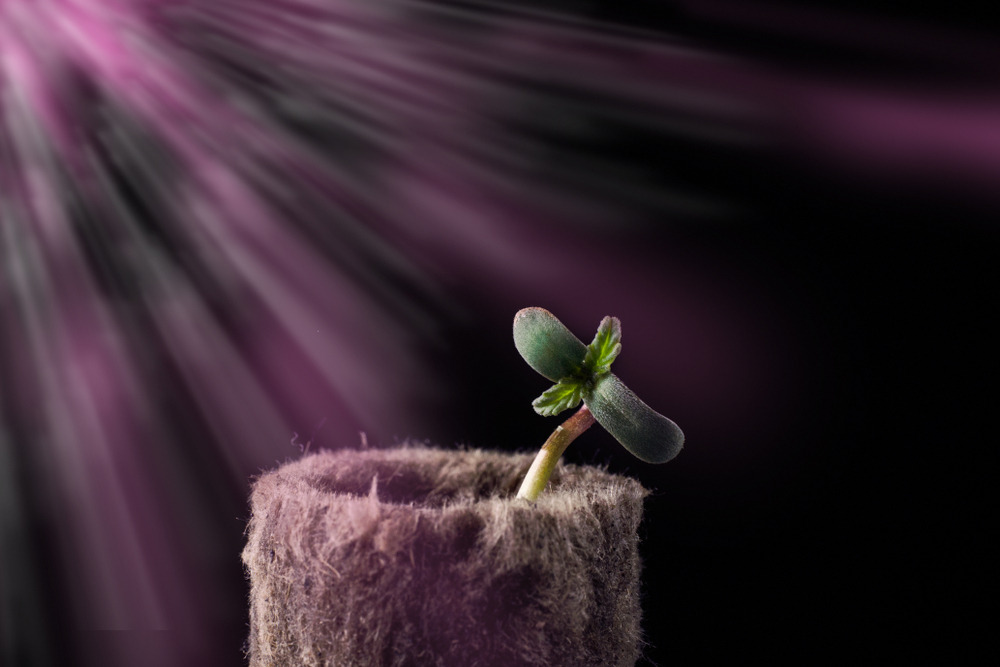
The seedling stage is one of the most important phases of a cannabis plant's life. It begins as soon as the seed emerges from the growing medium and its first rounded seed leaves, known as cotyledons, unfold. Over the next 10 to 14 days, the plant focuses on building a healthy root system and producing its first sets of true leaves. Providing the correct cannabis seedling light schedule during this period encourages compact, vigorous growth and sets the foundation for a successful vegetative stage.
For most indoor growers, an 18/6 light schedule, which means 18 hours of light followed by 6 hours of darkness, is the best choice for cannabis seedlings. This schedule provides enough light for steady photosynthesis while allowing the plant to complete important metabolic processes during the dark period. Some growers use 20/4 or even 24 hours of continuous light, but there is little evidence that seedlings grow significantly faster under these longer schedules. As a result, 18/6 remains the most practical and energy-efficient option.
Recommended seedling lighting
| Growing factor | Recommendation |
| Light schedule | 18 hours on / 6 hours off (18/6) |
| Light intensity (PPFD) | 100 to 300 µmol/m²/s |
| Temperature | 72 to 79°F (22 to 26°C) |
| Relative humidity | 65 to 75% |
| Lighting | Full-spectrum LED grow light |
While the light schedule stays consistent throughout the seedling stage, light intensity is just as important. Young cannabis plants have a small root system and limited leaf surface, so they cannot use high levels of light efficiently. Too much light can stress seedlings, while too little light often causes them to stretch as they reach for a stronger source.
Most modern full-spectrum LED grow lights provide an ideal spectrum for seedlings without requiring adjustments. If your light has a dimmer, reduce the output during the first week. If it does not, hang the light higher above the canopy until the seedlings develop several sets of true leaves.
Using a timer from the beginning of your grow is also recommended. Even though seedlings are not sensitive to day length like flowering plants, maintaining a consistent daily light cycle helps create a stable environment and makes it easier to manage later stages.
Environmental conditions play a key role in seedling health. Aim for warm temperatures, moderate humidity, and gentle airflow to support root development and strengthen stems. Avoid keeping the growing medium constantly wet, as overwatering is a common cause of slow growth and weak seedlings.
Common seedling lighting problems
| Symptom | Likely cause |
| Long, thin stems | Light intensity is too low or the grow light is too far away |
| Bleached or curled leaves | Light intensity is too high or the fixture is too close to the canopy |
| Slow or stunted growth | Often caused by overwatering, cool temperatures, or insufficient light |
| Uneven growth | Light is not evenly distributed or seedlings are not rotated regularly |
Once seedlings develop three to four sets of true leaves and a healthy root system, they are ready to enter the vegetative stage. At this point, the weed grow light schedule usually remains at 18/6, but light intensity should gradually increase to support faster growth.
Grower's Tip: Resist the urge to give seedlings more light than they need. One of the most common mistakes I see new growers make is running a powerful LED at full intensity from day one. Cannabis seedlings simply can't use that much light while their root system is still developing. Instead, start with lower light intensity (around 100–300 µmol/m²/s) and watch how the plant responds. Healthy seedlings stay short, develop thick stems, and produce broad green leaves. If they're stretching, gradually increase the light. If the leaves begin to curl upward or lose color, raise or dim the fixture. Learning to read your plants rather than relying solely on manufacturer hanging-height recommendations will produce healthier, more vigorous growth throughout the entire grow cycle.
Cannabis vegetative light schedule
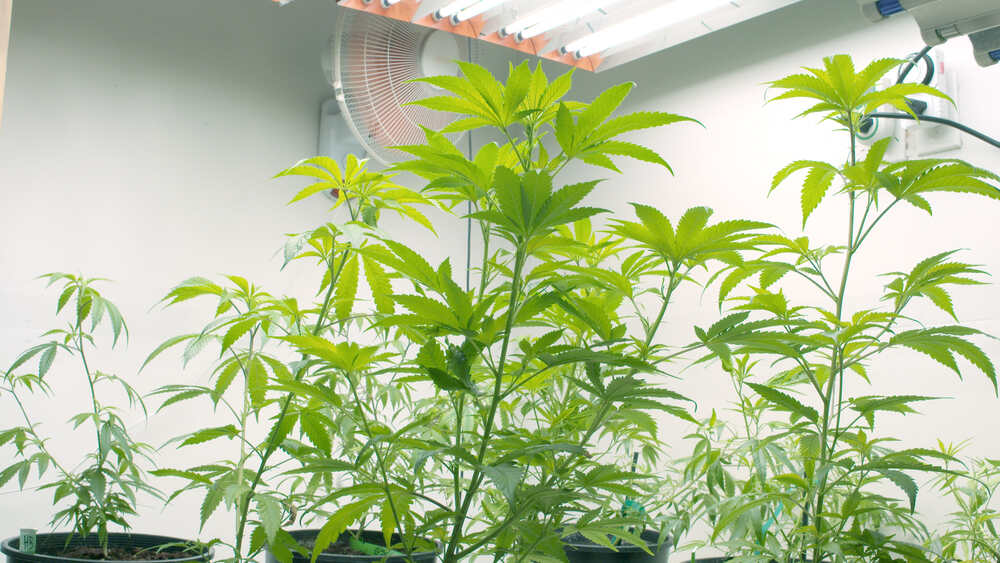
Once your cannabis seedlings develop three to four sets of true leaves and establish a healthy root system, they enter the vegetative stage. This is the period of fastest structural growth. The plant focuses on building roots, stems, branches, and large fan leaves that will support flower production later. Strong vegetative growth directly impacts final yield and overall plant health.
For photoperiod cannabis, the recommended weed grow light schedule remains 18 hours of light and 6 hours of darkness (18/6). Long daylight hours signal that it is still the growing season, allowing the plant to continue producing vegetative growth instead of flowering. By maintaining this cannabis light schedule, growers control how long plants stay in the vegetative stage before switching to flower.
Some growers use 20/4 or even 24 hours of continuous light, but most see little improvement compared to 18/6. In most home grow setups, 18/6 provides a strong balance between growth rate, energy use, and equipment lifespan.
Recommended vegetative lighting
| Growing factor | Recommendation |
| Light schedule | 18 hours on / 6 hours off (18/6) |
| Light intensity (PPFD) | 400 to 600 µmol/m²/s |
| Daily Light Integral (DLI) | 25 to 35 mol/m²/day |
| Temperature | 72 to 82°F (22 to 28°C) |
| Relative humidity | 55 to 70% |
| Lighting | Full-spectrum LED grow light |
As the canopy expands, the plant requires more light. Unlike seedlings, vegetating cannabis plants have a developed root system and enough leaf surface to use higher light intensity efficiently. Gradually increase LED output or lower the fixture based on manufacturer guidelines. Watch your plants closely to avoid light stress while encouraging strong growth.
Root development is just as important as what happens above the canopy. A healthy root system allows the plant to absorb more water and nutrients, which supports stronger stems, faster growth, and better flower production later in the cycle.
The vegetative stage is also the best time to begin plant training. Techniques such as low stress training (LST), topping, mainlining, and Screen of Green (SCROG) help create a wider, more even canopy. This allows light to reach more bud sites. Because stems are still flexible, plants recover quickly from training during this stage.
How long should you stay in the vegetative stage?
One of the main advantages of growing photoperiod cannabis is control over when flowering begins. By keeping your light schedule for cannabis at 18/6, plants will continue vegetative growth without transitioning to flower.
Most indoor growers switch to a 12/12 cannabis light schedule once plants reach about half of their desired final height. Many strains stretch significantly during the first two to three weeks of flowering and can double in size. Planning for this stretch helps maintain an even canopy and prevents overcrowding.
Grower's Tip: One common mistake is switching to 12/12 too early due to space concerns. Instead of focusing only on plant height, pay attention to canopy development. A plant with multiple strong branches, tight node spacing, and steady new growth will usually produce a better harvest than a taller plant with a single main stem. In many cases, allowing an extra week of vegetative growth leads to higher yields at harvest.
Cannabis flowering light schedule
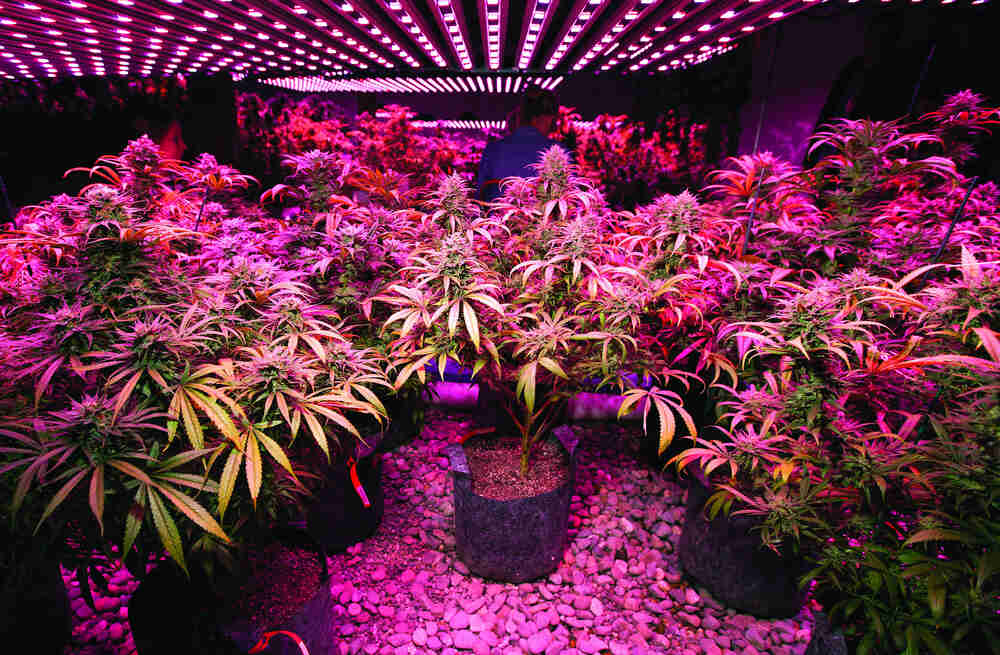
Once your plants have reached the desired size, it's time to switch your cannabis light schedule from vegetative growth to flowering. For photoperiod cannabis, this means changing the lighting schedule from 18 hours of light and 6 hours of darkness (18/6) to 12 hours of light and 12 hours of uninterrupted darkness (12/12).
Unlike the vegetative stage, flowering is triggered by longer periods of uninterrupted darkness rather than shorter daylight hours. By changing to a 12/12 light schedule, growers replicate the shorter days of late summer and early fall, signaling to the plant that it's time to reproduce. This hormonal change initiates flower development, allowing buds to form over the following weeks.
During the first one to two weeks after switching to 12/12, most photoperiod cultivars enter a transition period commonly known as the "flower stretch." Rather than producing dense flowers immediately, plants continue growing vertically while developing new flowering sites. Depending on the genetics, some cultivars may increase in height by 50% or more during this stage, so it's important to leave enough space between the canopy and your grow lights.
Recommended flowering lighting
| Growing factor | Recommendation |
| Light schedule | 12 hours on / 12 hours off (12/12) |
| Light intensity (PPFD) | 600–900 µmol/m²/s for most home grows |
| Daily Light Integral (DLI) | 26–43 mol/m²/day |
| Temperature | 68–79°F (20–26°C) |
| Relative humidity | 40–50% |
| Lighting | Full-spectrum LED grow light |
As flowering progresses, cannabis plants can utilize significantly more light than they could during the vegetative stage. Gradually increasing light intensity while maintaining the proper distance between the fixture and canopy encourages dense flower development without causing unnecessary light stress. Growers supplementing carbon dioxide (CO₂) under tightly controlled environmental conditions may successfully use higher PPFD levels, but most home growers will achieve excellent results within the recommended range above.
Modern full-spectrum LED grow lights provide an ideal spectrum throughout the flowering stage, so there's usually no need to switch to dedicated "bloom" fixtures. While flowering plants naturally receive warmer seasonal light outdoors, maintaining the correct weed grow light schedule, delivering adequate light intensity, and providing a stable growing environment have a much greater influence on flower quality than making small adjustments to light spectrum.
Why uninterrupted darkness matters
During the 12-hour dark period, photoperiod cannabis undergoes the hormonal processes that regulate flowering. Repeated interruptions to this dark cycle can delay flower development, trigger revegetation in some cases, or increase the risk of stress-related hermaphroditism in genetically susceptible cultivars.
To maintain a consistent light schedule for cannabis, make sure your grow tent or grow room is completely lightproof, use a reliable timer, and avoid opening the grow space during the dark period unless absolutely necessary.
Supporting healthy flowering
Flowering plants benefit from more than just the correct light schedule. As buds begin to develop, gradually lowering relative humidity and maintaining good airflow around the canopy helps reduce the risk of mold, powdery mildew, and bud rot.
Continue monitoring the distance between your grow light and the canopy throughout flowering, especially during the initial stretch. Even light distribution across the canopy helps maximize flower development while reducing the risk of light stress or shaded bud sites.
Grower's Tip: Before switching your plants to a 12/12 light schedule, check your grow space for light leaks. Turn the grow lights off, step inside the tent or grow room, close it completely, and allow your eyes a minute to adjust. Small gaps around zippers, duct ports, or equipment indicator lights are often easier to spot from the inside. Fixing these issues before flowering begins is much easier than troubleshooting stressed plants several weeks into bloom.
Autoflower cannabis light schedule
Unlike photoperiod cannabis, autoflowers don't require a change in the light cycle to begin flowering. Instead, they transition from vegetative growth into flowering automatically once they reach maturity, regardless of the number of daylight hours they receive. This makes choosing a weed grow light schedule much simpler, as the same schedule can be maintained from seed to harvest.
Most indoor growers keep autoflowers under 18 hours of light throughout the grow cycle. If it's your first grow, our week-by-week autoflower growing guide explains exactly what to expect from germination to harvest. Some prefer 20/4 or even 24 hours of continuous light, but for most home grows, there is little evidence that these longer schedules consistently produce larger yields. An 18/6 cannabis light schedule provides ample light for healthy growth while reducing electricity costs and giving equipment time to cool between light cycles.
Recommended autoflower lighting
| Growing factor | Recommendation |
| Light schedule | 18 hours on / 6 hours off (18/6) |
| Light intensity (PPFD) | Adjust according to the plant's growth stage |
| Lighting | Full-spectrum LED grow light |
Modern full-spectrum LED grow lights provide everything autoflowers need from seedling through harvest, so there's no need to change the light spectrum as plants begin flowering. Instead, focus on maintaining a consistent light schedule for cannabis while following an appropriate autoflower nutrient feeding schedule for each stage of growth, and keeping environmental conditions stable throughout the grow.
Grower's Tip: One of the biggest advantages of autoflowers is consistency. Once you've chosen your lighting schedule, avoid making unnecessary changes unless your plants show signs of stress. Keeping the same timer, stable environmental conditions, and gradually increasing light intensity as the plant matures usually produces better results than constantly adjusting the lighting throughout the grow.
How to adjust a cannabis light schedule
A reliable timer is the easiest way to maintain a consistent cannabis light schedule, automatically switching your grow lights on and off each day. Mechanical timers work well for most small grows, while digital or app-controlled timers offer more precision and may retain settings after power outages. Always ensure your timer can safely handle your lighting system’s electrical load.
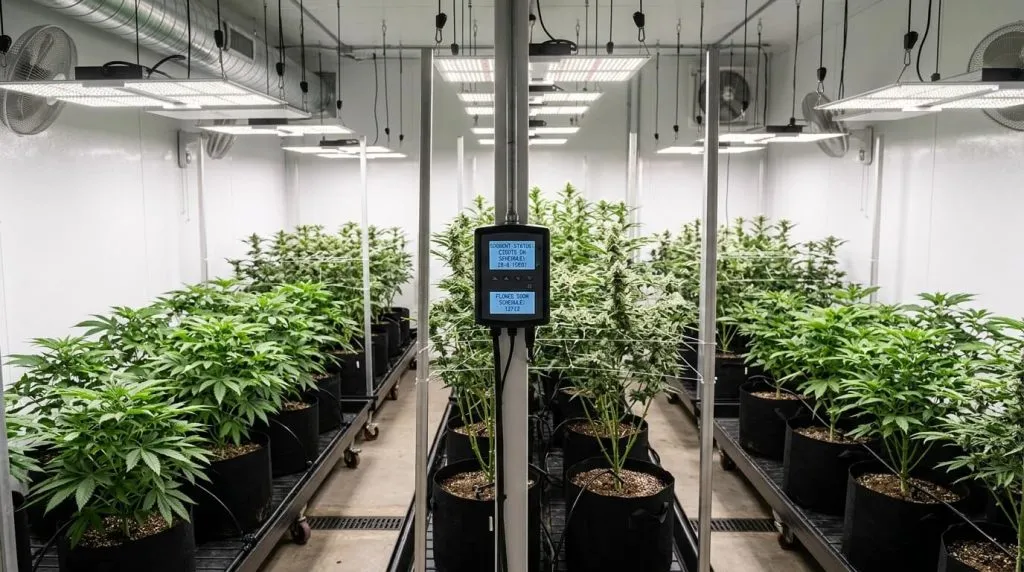
Step 1: Choose the correct light schedule
Decide your schedule before programming:
- Seedlings: 18/6
- Vegetative photoperiod plants: 18/6
- Flowering photoperiod plants: 12/12
- Autoflowers: Typically 18/6 from seed to harvest
Photoperiod plants require a switch to 12/12 to trigger flowering, while autoflowers do not.
Step 2: Select your lights-on period
Choose times that suit your environment. Many growers run lights at night to reduce heat and energy costs. For example, an 18/6 schedule might run from 6:00 p.m. to noon, while 12/12 could run from 7:00 p.m. to 7:00 a.m. Consistency matters more than exact timing.
Step 3: Program the timer
Set the current time, then input your on/off schedule. Double-check whether your timer uses a 12-hour or 24-hour format to avoid mistakes. Mechanical timers use dial segments, while digital timers require manual input or app setup.
Step 4: Connect safely
Plug the timer into a grounded outlet, then connect your grow light. Avoid exceeding the timer’s rated capacity. Keep all electrical components away from water and high humidity.
Step 5: Test the cycle
Run a full test cycle to confirm the light switches correctly. Check again at the next transition and ensure ventilation systems operate independently if needed.
Step 6: Switch to flowering
When ready, change photoperiod plants to a 12/12 schedule in one step. Maintain uninterrupted darkness and avoid frequent changes.
Common cannabis lighting mistakes
Even with the correct cannabis light schedule, small lighting mistakes can slow growth, reduce yields, or stress your plants. Fortunately, most issues are easy to avoid once you know what to look for.
| Mistake | Why it's a problem | How to avoid it |
| Using too much light on seedlings | Young plants have a limited root system and cannot efficiently use high light intensity, which can lead to light stress or slowed growth. | Start seedlings at 100–300 µmol/m²/s and gradually increase PPFD as they mature. |
| Placing grow lights too far away | Insufficient light causes seedlings and vegetative plants to stretch, producing weak stems and larger internodal spacing. | Adjust the fixture height or dimmer according to the manufacturer's recommendations and monitor plant growth. |
| Ignoring light leaks during flowering | Even small amounts of stray light can interrupt the dark period, delaying flowering or causing stress in photoperiod plants. | Check your grow tent for light leaks before switching to 12/12 and avoid opening it during the dark cycle. |
| Changing the light schedule too often | Frequent changes force plants to continually adapt, creating unnecessary stress. | Choose the appropriate weed grow light schedule and keep it consistent throughout each stage of growth. |
| Relying only on timer settings | The correct schedule alone won't compensate for poor light intensity or environmental conditions. | Match your PPFD, temperature, humidity, and airflow to each stage of growth. |
| Using inexpensive, low-quality grow lights | Poor light distribution can create uneven growth and lower yields, even if the schedule is correct. | Invest in a quality full-spectrum LED with verified PPFD coverage for your grow space. |
Remember that successful indoor cultivation depends on more than simply choosing an 18/6 or 12/12 light cycle. The best results come from combining a consistent lighting schedule for cannabis with appropriate light intensity, a stable environment, and regular observation of your plants. Healthy cannabis plants will often show early signs of stress before yields are affected, giving attentive growers plenty of time to make small adjustments before problems become serious.
Choosing the right grow light
The best cannabis light schedule is only effective if your grow light provides enough intensity to support healthy plant growth. If you're still selecting equipment, our guide to choosing the right cannabis grow lights explains what to look for. While indoor growers once relied heavily on high-intensity discharge (HID) lighting, modern full-spectrum LED grow lights have become the preferred choice for most home cultivation setups because they're more energy efficient, produce less heat, and offer excellent light distribution. Growing healthy cannabis indoors starts with choosing the right cannabis light schedule and selecting indoor cannabis seeds that are well suited to controlled growing environments.
HID systems, including high-pressure sodium (HPS) and metal halide (MH) fixtures, are still capable of producing excellent cannabis yields. However, they generate significantly more heat than LEDs, often requiring additional ventilation, ducting, or air conditioning to maintain ideal growing conditions.
For most growers, a quality full-spectrum LED fixture is the simplest and most cost-effective option. Modern LEDs provide suitable light for every stage of growth, from seedlings through flowering, so there's usually no need to change fixtures or bulbs as your plants mature. Instead, you can adjust light intensity by raising, lowering, or dimming the fixture to match each stage of growth.
When comparing grow lights, look beyond marketing claims. Consider factors such as actual power draw, PPFD maps, build quality, warranty, and the manufacturer's reputation. A well-built fixture from a reputable company will generally deliver more consistent performance and last much longer than an inexpensive, unbranded alternative.
Frequently asked questions
Is 18/6 or 24/0 better for cannabis?
For most indoor growers, an 18/6 cannabis light schedule provides an excellent balance between healthy growth, energy efficiency, and equipment lifespan. While some growers keep plants under 24 hours of continuous light, research and practical experience show that the additional electricity rarely results in significantly faster growth or higher yields. Most photoperiod and autoflower cannabis plants perform exceptionally well under an 18/6 schedule.
Can cannabis plants get too much light?
Yes. More light doesn't always mean better growth. Once a plant reaches its maximum ability to use light for photosynthesis, increasing light intensity can cause stress, leaf bleaching, or reduced growth. Providing the correct PPFD for each growth stage is generally more important than simply increasing the brightness of your grow lights.
Should grow lights stay on at the same time every day?
Yes. Consistency is one of the most important parts of maintaining a healthy weed grow light schedule. Using a timer ensures your lights switch on and off at the same time every day, reducing stress and helping photoperiod plants flower predictably.
Can I switch from 24/0 to 18/6?
Yes. Reducing the light schedule from 24 hours of continuous light to an 18/6 schedule won't harm healthy cannabis plants. Many growers make this adjustment to reduce electricity costs and heat without noticeably affecting plant growth.
Do cloudy days affect outdoor cannabis flowering?
Occasional cloudy weather won't usually affect flowering because photoperiod cannabis responds to the length of uninterrupted darkness rather than the brightness of daylight. Seasonal changes in day length remain the primary trigger for flowering outdoors.
Should I turn my grow lights off during a power outage?
No. If the power goes out unexpectedly, simply restore your normal lighting schedule once electricity returns. Avoid trying to "make up" for lost light by extending the next light cycle, as maintaining a consistent schedule is generally more important than replacing a few missed hours.
Does the light schedule affect cannabis yield?
Indirectly, yes. The correct lighting schedule for cannabis allows plants to develop properly at each stage of growth, while the combination of light intensity, genetics, nutrition, temperature, and environmental control ultimately determines yield. Even the best light schedule can't compensate for poor growing conditions.
Is a digital timer better than a mechanical timer?
Both work well when used correctly. Mechanical timers are inexpensive and reliable for most home grows, while digital timers often provide greater programming flexibility and may retain their settings after a power outage. The most important factor is choosing a timer that reliably maintains your cannabis light schedule every day.


