




A good autoflower nutrient schedule helps you provide balanced nutrition from the seedling stage through to harvest. Autoflowers develop quickly, so excessive feeding can damage roots and leaves, while insufficient nutrients may restrict healthy growth. Understanding what your plants need at each stage is the key to getting consistent results.
In this guide, I'll explain how to follow an autoflower feeding schedule using a practical week-by-week autoflower feeding chart. You'll learn which nutrients for autoflowers are essential, how feeding requirements differ between growing mediums, and how to identify common nutrient problems. You'll also find practical grower tips to help you make informed feeding decisions throughout the growing cycle.
Key Takeaways
- Follow an autoflower feeding schedule: Use a week-by-week feeding chart as a guide, adjusting nutrient requirements according to plant development rather than fixed dates.
- Choose nutrients for your growing medium: Nutrient-rich soil, coco coir and hydroponics differ in how they supply and retain essential minerals.
- Understand essential autoflower nutrients: Nitrogen, phosphorus and potassium support healthy growth, while calcium, magnesium and trace elements contribute to normal plant development.
- Monitor nutrient strength and pH: Check EC and pH to help maintain nutrient availability and reduce the risk of excess feeding or deficiencies.
- Identify feeding problems early: Learn to spot nutrient burn, yellowing leaves and poor growth before making changes to your feeding routine.

- Autoflower Feeding Schedule: Week-by-Week Chart
- What Nutrients Do Autoflowers Need?
- How Growing Medium Affects Autoflower Nutrition
- How Much and How Often Should You Feed Autoflowers?
- How to Mix and Apply Autoflower Nutrients
- Common Autoflower Nutrient Problems and Their Causes
- Conclusion
- Frequently Asked Questions
- References
Autoflower Feeding Schedule: Week-by-Week Chart
The best autoflower feeding schedule follows the plant's growth stage rather than fixed dates. Most autoflowers complete their life cycle in approximately 8–12 weeks, although some varieties take longer depending on their genetics and growing conditions.
The autoflower feeding chart below outlines how nutritional priorities change from seedling development through harvest. Use it as a general guide alongside the instructions for your nutrient products.
| Growth period | Development stage | Feeding recommendations | What to look for |
| Weeks 1–2 | Seedling | Rely on existing nutrients in enriched soil. In nutrient-free media, use an appropriate seedling feed. | First true leaves, healthy root development and steady growth |
| Weeks 3–4 | Vegetative growth | Introduce or adjust a balanced vegetative feed when the existing nutrient supply is insufficient. | Expanding leaves, new branches and increasing plant size |
| Weeks 5–6 | Early flowering | Adjust the nutrient balance as flower sites form, maintaining an adequate nitrogen supply. | Emerging pistils, developing bud sites and continued leaf growth |
| Weeks 7–9 | Flower development | Maintain balanced flowering nutrition to support ongoing growth and bud development. | Expanding flowers, healthy foliage and normal plant development |
| Week 10 onward | Late flowering | Assess nutrient requirements against maturity rather than automatically stopping all feeding. | Flower maturity, trichome development and overall plant condition |
These periods are approximate. Some autoflower seeds produce plants that begin flowering during weeks 3–4, while longer-growing varieties may continue developing beyond week 12.
How to Read and Adjust the Feeding Chart
Start counting your autoflower feeding schedule from germination, using the emergence of the seedling as a practical reference point. The chart provides expected development periods, but your plant's appearance determines which stage applies.
To interpret the schedule correctly:
- Identify the current growth stage. Check leaf development, branching and the appearance of pistils rather than relying entirely on the plant's age.
- Match the feeding stage to the plant. If flowers appear earlier than expected, reassess the nutrient balance instead of waiting for the next scheduled week.
- Account for genetic differences. Compact, fast-growing autoflowers may develop at a different rate from larger varieties with longer life cycles.
- Track development. Record the date, growth stage and feeding history so you can assess changes throughout the cycle.
Research by Toth et al. (2022), published in Frontiers in Plant Science, identified genetic regions associated with automatic flowering and earlier flowering time, including Autoflower1 and Early1. This supports the importance of accounting for genetic differences when planning your schedule.
For further guidance on identifying healthy early growth, see our cannabis seedling stage guide.
Grower tip: I recommend taking a photograph of your autoflower at the same point each week. Comparing images makes it easier to track changes in plant structure and recognise when development is moving faster or slower than the suggested schedule.

What Nutrients Do Autoflowers Need?
Autoflowers need a balanced supply of essential nutrients to develop healthy roots, leaves, stems and flowers. These include three primary macronutrients (NPK), secondary nutrients and micronutrients, each supporting specific plant functions.
The right nutrient balance matters because an excess of one element can interfere with the availability of another. Understanding their roles helps you assess nutrient products without assuming that higher concentrations produce better results.
Primary Macronutrients: Nitrogen, Phosphorus and Potassium
Nitrogen (N), phosphorus (P) and potassium (K) are the three main nutrients found in cannabis feed. Their proportions appear on product labels as an NPK ratio, such as 3-1-2.
| Nutrient | Function | Importance for autoflowers |
| Nitrogen (N) | Supports chlorophyll and protein production | Helps develop healthy leaves, branches and stems |
| Phosphorus (P) | Supports energy transfer, cell division and root development | Contributes to flower formation and normal plant metabolism |
| Potassium (K) | Regulates water balance and activates enzymes | Supports photosynthesis, plant function and flower development |
All three remain necessary throughout the autoflower life cycle. However, their relative demand changes as the plant develops.
Importantly, increasing phosphorus does not automatically produce larger buds. A 2025 study by Hershkowitz, Westmoreland and Bugbee, published in Frontiers in Plant Science, found that higher phosphorus concentrations did not improve yield or cannabinoid content under the tested hydroponic conditions.
Calcium, Magnesium and Micronutrients
Alongside NPK, autoflowers require secondary nutrients and trace elements to maintain healthy growth.
| Nutrient | Main function |
| Calcium (Ca) | Supports cell walls, membranes and new tissue |
| Magnesium (Mg) | Forms part of chlorophyll and supports enzyme activity |
| S | Supports amino acid and protein production |
| Iron (Fe) | Helps with chlorophyll formation and electron transport |
| Manganese (Mn) | Supports photosynthesis and enzyme activity |
| Zinc (Zn) | Contributes to enzyme activity and growth regulation |
| Boron (B) | Supports cell wall structure and developing tissue |
| Copper (Cu) and molybdenum (Mo) | Support important enzyme processes |
Other essential trace elements include chlorine and nickel, which plants need in very small amounts.
Most complete cannabis nutrient ranges contain these elements, although their proportions vary between products.
Grower tip: I recommend checking the full nutrient label, not just the NPK ratio. Two feeds with similar NPK values may contain different amounts of calcium, magnesium and trace elements. A complete nutrient profile is more useful than judging a product by its three main numbers alone.
How Growing Medium Affects Autoflower Nutrition
Your growing medium affects how autoflowers receive, retain and absorb nutrients. Soil contains varying amounts of available nutrition, while coco coir and hydroponic systems rely more heavily on nutrients supplied through water.
| Growing medium | Nutrient source | Main consideration |
| Nutrient-rich soil | Existing minerals and decomposing organic matter | Nutrient release and moisture retention |
| Coco coir | Applied nutrient solution | Mineral exchange, calcium and magnesium availability |
| Hydroponics | Nutrients dissolved in water | Reservoir conditions and dissolved oxygen |
A 2023 study published in Industrial Crops and Products found that growing media influenced water availability, nitrogen uptake and biomass development in cannabis. This highlights why nutrient management must account for the root environment.
Autoflowers in Nutrient-Rich Soil
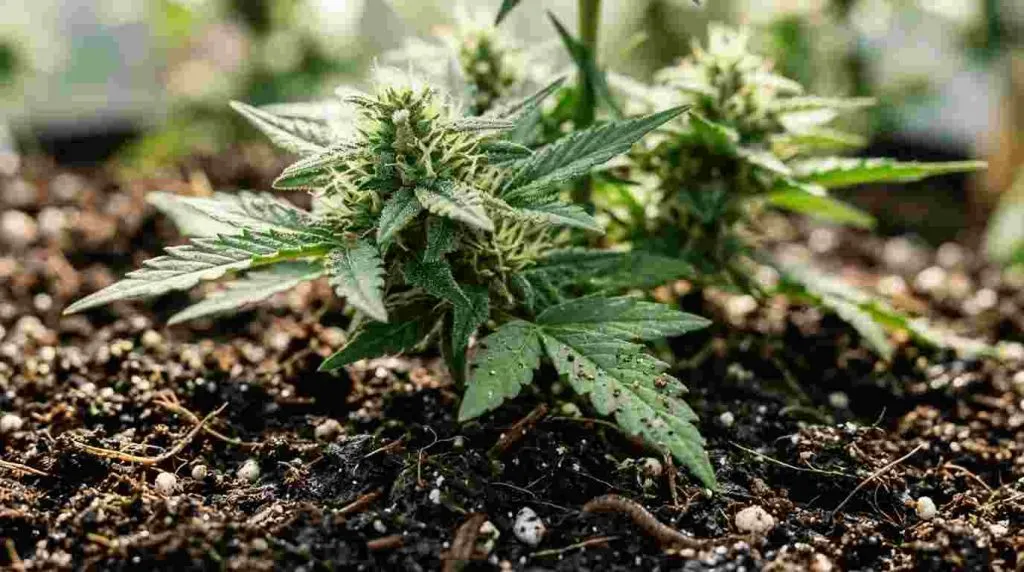
Nutrient-rich soil can supply much of an autoflower's nutrition through existing mineral reserves and the breakdown of organic matter.
Ingredients such as compost and worm castings contribute to soil fertility, while beneficial microorganisms help release nutrients into forms that roots can absorb.
However, nutrient availability depends on the soil's composition, moisture and biological activity. Heavily amended mixes may contain excessive soluble salts, while lightly enriched soil can run short of available nutrients as the plant grows.
For more information on soil composition and suitable ingredients, read our guide to the best soil for autoflowers.
Autoflowers in Coco Coir
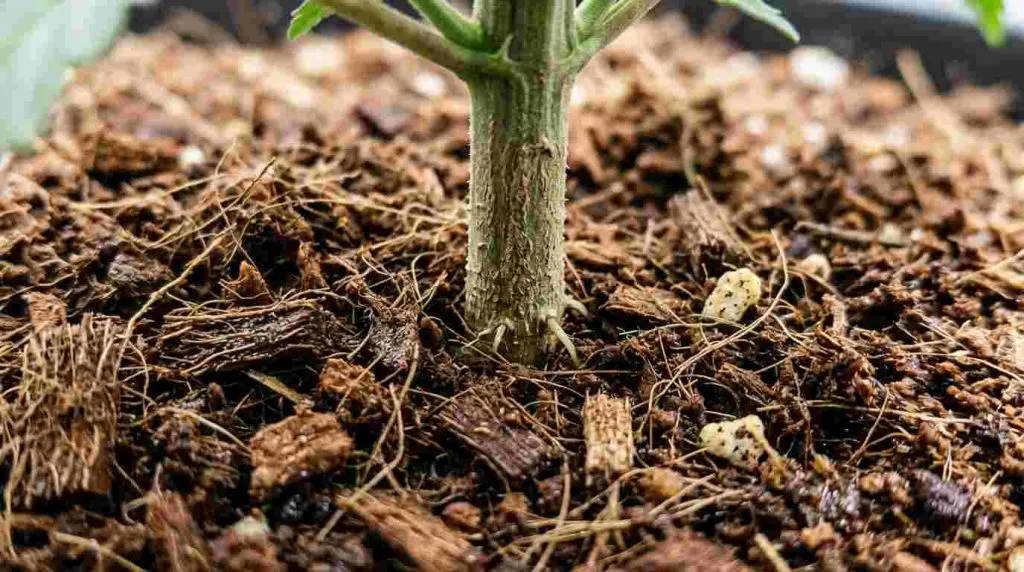
Coco coir is made from coconut husks and contains relatively little readily available plant nutrition. It holds moisture while allowing air to reach the roots, making it a popular medium for container cultivation.
Unlike a completely inert material, coco has a cation exchange capacity. This means it can hold and exchange positively charged minerals, including calcium, magnesium and potassium.
Untreated coco may contain excess sodium or potassium and can temporarily bind calcium and magnesium from the nutrient solution.
Grower tip: I recommend choosing washed, buffered coco rather than untreated material. Buffering helps manage mineral exchange before planting and reduces the risk of early nutrient imbalances.
Autoflowers in Hydroponics
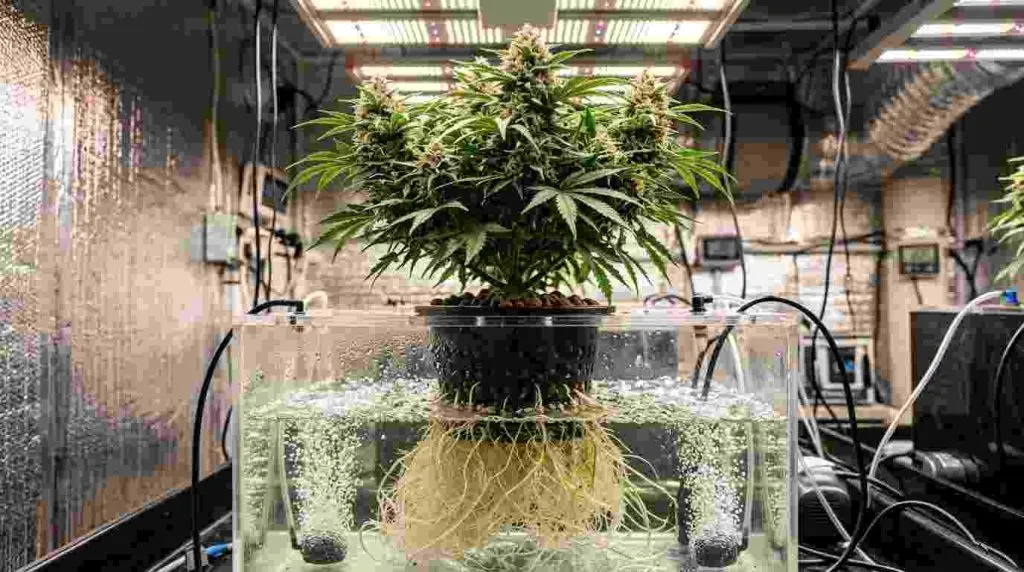
Hydroponic systems deliver dissolved nutrients directly to the root zone. Plants may grow in clay pebbles or rockwool, or have roots suspended in an oxygenated solution.
Because there is little or no nutrient reserve in these systems, root health depends on suitable water chemistry and oxygen availability.
In recirculating systems, water and minerals are absorbed at different rates. Consequently, the reservoir's composition can change even without additional nutrient products.
Our autoflower hydroponics guide explains the different systems and their equipment requirements.
How Much and How Often Should You Feed Autoflowers?
The correct feeding amount depends on the nutrient product, plant size and growing conditions. There is no single concentration or watering interval that works for every autoflower.
Instead of copying a fixed dose, use the manufacturer's instructions and assess the solution's concentration alongside the conditions around the roots.
Choosing the Right Nutrient Strength
Nutrient strength describes the concentration of dissolved mineral elements in your feeding solution.
Manufacturers provide doses in measurements such as millilitres per litre. However, these figures only apply to the specific formulation. For example, 2 mL/L of one product may supply considerably more nutrients than the same amount of another.
Check that the nutrient range suits your growing medium, and avoid combining several products without accounting for their total mineral content.
Grower tip: I recommend keeping measurements consistent and recording any adjustments. Changing several products or doses at once makes it difficult to determine what affected the plant.
Understanding pH and EC
pH and electrical conductivity (EC) help you assess the suitability of your nutrient solution.
| Measurement | What it tells you | General reference |
| pH | How acidic or alkaline the solution is | Soil: approximately 6.0–7.0; coco and hydro: approximately 5.5–6.5 |
| EC | The concentration of dissolved ions, measured in mS/cm | Depends on the nutrient formulation, source water and plant requirements |
An unsuitable pH can reduce nutrient availability even when the required minerals are present.
EC provides a useful indication of total dissolved salts, but it cannot identify individual nutrients or confirm that their proportions are correct.
Guidance from Oklahoma State University explains how both measurements influence nutrient management.
Grower tip: I recommend measuring your source water before mixing nutrients. If the water already contains dissolved minerals, these will contribute to the final EC reading.
Should You Feed Nutrients Every Time You Water?
No single feeding frequency suits every growing medium.
In nutrient-rich soil, existing minerals may continue supplying the roots between watering sessions. Additional feeding should account for this existing supply.
Coco typically benefits from a consistent supply of a suitable nutrient solution, rather than frequent changes between feed and plain water. In hydroponics, nutrients remain available through the solution, which must be maintained as plants absorb water and minerals.
Watering frequency is a separate consideration. It depends on moisture retention, container size, root development and environmental conditions.
Avoid watering solely because it is a scheduled feeding day. Check the condition of the medium first.

How to Mix and Apply Autoflower Nutrients
Preparing autoflower nutrients correctly involves more than adding feed to a watering can. You need to measure each ingredient, mix it in the correct order and check the finished solution before it reaches your plants.
I recommend using a clean mixing container, measuring syringe, stirring tool, EC meter and digital pH meter. Once you have everything ready, follow these steps.
Step 1: Measure Your Water and Nutrients
Fill a clean container with the amount of water you need. Use water close to room temperature and check that it is suitable for your growing system.
Read the nutrient label and calculate the amount required for your water volume.
For example, if a product specifies 1 mL/L and you prepare 5 L of water, you need 5 mL of that product. This is a calculation example, not a recommended feeding dose.
Use a graduated syringe or measuring cup for accuracy rather than estimating.
Step 2: Add Each Nutrient Separately
Add the first nutrient directly to the water and stir until it is evenly mixed. Repeat with the remaining products, following the manufacturer's mixing order.
If you use a two-part nutrient range, add Part A to the water first, mix thoroughly, then add Part B.
Never mix concentrated Part A and Part B together before dilution. Calcium can react with phosphates and sulfates in concentrated solutions, forming insoluble compounds that roots cannot absorb.
Step 3: Check EC and Adjust pH
Once everything is mixed, use your EC meter to check the solution's concentration against your intended target.
Next, measure the pH. If adjustment is necessary, add the appropriate pH product in small amounts, following its safety instructions. Stir, allow the reading to settle and test again.
Always make pH adjustments after adding the nutrients, as the finished mixture may differ from your starting water.
Step 4: Apply the Nutrient Solution
Apply the prepared feed according to your growing medium:
- Soil: Pour slowly around the root area, distributing the solution evenly without leaving the container waterlogged.
- Coco coir: Apply the solution evenly, allowing suitable drainage so excess salts do not accumulate.
- Hydroponics: Add the prepared solution to the reservoir with adequate circulation, then confirm the final readings.
Avoid pouring large amounts directly against the stem, particularly while your autoflower is young.
For guidance on moisture levels and watering amounts, read our autoflower watering guide.
Grower tip: I recommend using separate measuring syringes for each nutrient concentrate and rinsing your equipment after mixing. This prevents residue from contaminating other products and makes your measurements more consistent.

Common Autoflower Nutrient Problems and Their Causes
Yellowing leaves, brown tips and slow growth can indicate nutrient problems in autoflowers. However, similar symptoms may have different causes, so check the affected leaves and recent feeding history before making changes.
Nutrient Burn and Excess Feeding
Nutrient burn occurs when excessive mineral salts place stress on the roots, restricting water uptake. Common signs include brown leaf tips, scorched edges and unusually dark foliage.
If you suspect overfeeding:
- Inspect the damage. Look for burnt tips that appeared or worsened after feeding.
- Review recent feeds. Check for increased doses or additional supplements.
- Measure EC. Look for signs of excess dissolved salts in the nutrient solution or growing medium.
- Correct the cause. Reduce excessive nutrient input and address salt accumulation where necessary.
Damaged leaf tissue will not recover, so assess improvement through healthy new growth.
For further guidance, read our cannabis nutrient burn guide.
Nutrient Deficiencies and Poor Uptake
A nutrient deficiency develops when an essential element becomes unavailable to the plant. This may result from insufficient nutrition, unsuitable pH or unhealthy root conditions.
| Visible symptom | Possible deficiency | What to investigate |
| Older leaves turn uniformly yellow | Nitrogen | Nitrogen availability |
| Yellowing between veins on older leaves | Magnesium | Magnesium supply |
| Distorted or damaged new growth | Calcium | Calcium availability and root conditions |
| Brown edges on older leaves | Potassium | Potassium supply and salt stress |
| Pale new leaves with green veins | Iron | Iron availability and pH |
These symptoms are not exclusive to nutrient deficiencies. Environmental stress and natural leaf decline can produce similar changes.
A 2023 study by Llewellyn and colleagues, published in Plants, examined how individual nutrient deficiencies affected cannabis growth and leaf appearance. The findings highlight the importance of examining several indicators rather than relying on one symptom.
Grower tip: I recommend photographing affected leaves and noting whether symptoms begin on older or newer growth. This helps you monitor changes and narrow down potential causes.
When Is Epsom Salt Useful for Autoflowers?
Epsom salt contains magnesium sulfate and may help when your autoflower has a genuine magnesium shortage.
However, adding it without confirming the need can disrupt the balance between magnesium, calcium and potassium.
Check your existing nutrient formula and water composition before considering additional magnesium. If you suspect a shortage, our magnesium deficiency guide explains the symptoms in greater detail.
Conclusion
The best autoflower nutrient schedule is one that follows plant development while accounting for the growing medium, available nutrients and root conditions. A week-by-week feeding chart gives you a useful starting point, but it should never replace careful observation.
Understanding NPK, monitoring nutrient availability and identifying feeding problems can help you make informed decisions throughout the growing cycle.
Focus on balanced nutrition rather than maximum nutrient strength. A healthy autoflower needs the right nutrients at the right time, not the largest possible dose.
Frequently Asked Questions
Can You Use One-Part Nutrients for Autoflowers?
Yes. A suitable one-part nutrient product can provide essential minerals if its composition meets the plant's requirements. Check the formulation rather than assuming that a multi-part system is automatically better.
Do Autoflowers Need CalMag Supplements?
Not always. Calcium and magnesium may already be present in the water and base nutrient mixture. Additional supplements should address a demonstrated need rather than serve as an automatic addition.
Are Bloom Boosters Necessary for Autoflowers?
No. Bloom boosters are optional products, and additional phosphorus or potassium does not guarantee better flowers. A balanced nutrient supply remains the priority.
Does Pot Size Affect Autoflower Nutrient Requirements?
Pot size affects root space, moisture retention and the amount of growing medium available. A larger container may hold more existing nutrients, but it does not automatically mean the plant needs a stronger nutrient solution.
What If an Autoflower Starts Flowering Earlier Than Expected?
Early flowering may be normal for its genetics. Assess the plant's development and condition rather than making abrupt nutrient changes to match a calendar. An early flowering date alone does not indicate a nutritional problem.
References
- Toth, J. A., Stack, G. M., Carlson, C. H., & Smart, L. B. (2022). Identification and mapping of major-effect flowering time loci Autoflower1 and Early1 in Cannabis sativa L. Frontiers in Plant Science, 13, 991680. https://doi.org/10.3389/fpls.2022.991680
- Hershkowitz, J. A., Westmoreland, F. M., & Bugbee, B. (2025). Elevated root-zone P and nutrient concentration do not increase yield or cannabinoids in medical cannabis. Frontiers in Plant Science, 16, 1433985. https://doi.org/10.3389/fpls.2025.1433985
- Llewellyn, D., Golem, S., Jones, A. M. P., & Zheng, Y. (2023). Foliar Symptomology, Nutrient Content, Yield, and Secondary Metabolite Variability of Cannabis Grown Hydroponically with Different Single-Element Nutrient Deficiencies. Plants, 12(3), 422. https://doi.org/10.3390/plants12030422
- Saloner, A., Sade, Y., & Bernstein, N. (2024). To flush or not to flush: Does flushing the growing media affect cannabinoid and terpenoid production in cannabis? Industrial Crops and Products, 220, 119157. https://doi.org/10.1016/j.indcrop.2024.119157

