




Growing healthy cannabis plants is not just about providing the right light, nutrients, and water. A strong root system is the foundation of vigorous growth, and knowing when to transplant cannabis is one of the most important skills a grower can develop. Transplanting at the right time gives roots the space they need to expand, improving the plant’s ability to absorb water, oxygen, and nutrients while reducing the risk of becoming rootbound.
However, transplanting too early, too late, or using the wrong technique can slow growth and lead to unnecessary transplant shock. Understanding the signs that your plant is ready for a larger container and knowing how to transplant cannabis correctly helps minimise stress and supports steady growth throughout each stage of the life cycle.
In this guide, you will learn when to transplant cannabis, how to identify the right timing, and how to transplant cannabis plants step by step.
What Is Cannabis Transplanting?
Growing healthy cannabis starts below the surface. While lighting, nutrients, and watering all play an important role, a strong and healthy root system is the foundation of vigorous plant growth. That's why knowing when to transplant cannabis and how to do it correctly is an essential skill for every grower.
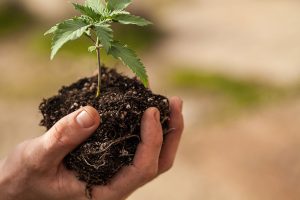
Cannabis transplanting, also known as repotting, is the process of moving a plant from a smaller container into a larger one as it grows. This gives the developing root system more space to expand, improving its ability to absorb water, nutrients, and oxygen. As the roots continue to grow, they support stronger stems, larger foliage, and ultimately healthier, more productive plants.
Most growers will transplant cannabis plants one or two times during the vegetative stage before placing them into their final container. The exact timing depends on factors such as plant size, container size, growing medium, and whether you're growing indoors or outdoors. Throughout this guide, we'll explain when to transplant cannabis, the signs that indicate it's time for a larger pot, and how to transplant cannabis safely to minimise stress and encourage rapid recovery.
Why Is Transplanting Cannabis Plants Important?
As a cannabis plant grows, its root system continually expands in search of moisture, nutrients, and oxygen. Eventually, those roots reach the walls of the container and begin circling the inside of the pot instead of spreading outward. If left too long, the plant becomes rootbound, limiting root development and restricting the plant's ability to take up the resources it needs to thrive.
Transplanting at the right time prevents this from happening by providing fresh growing medium and additional space for the roots to colonise. A larger, healthier root system allows the plant to continue growing without unnecessary stress or interruptions.
The benefits of transplanting cannabis plants include:
| Benefit | Explanation |
| Prevents Rootbound Plants | Rootbound plants often experience slowed growth, increased watering requirements, nutrient deficiencies, and reduced vigor. By transplanting before the roots become tightly compacted, you encourage healthy root expansion and reduce the risk of stunted development. |
| Encourages Stronger, Healthier Growth | Healthy roots support every stage of a cannabis plant's life cycle. When roots have room to grow, the plant can absorb water and nutrients more efficiently, resulting in stronger stems, faster vegetative growth, and improved resilience to environmental stress. |
| Supports Better Yields | While transplanting doesn't directly increase yields, it creates the conditions needed for larger, healthier plants capable of producing bigger harvests. A well-developed root system gives cannabis the foundation it needs to support vigorous flowering and maximise its genetic potential. |
Now that you understand why transplanting is such an important part of cultivation, the next step is learning when to transplant cannabis so your plants continue growing without becoming rootbound or stressed.
When to Transplant Cannabis at Each Growth Stage
Every cannabis plant follows the same basic life cycle, but there is no universal timeline for transplanting. Factors such as genetics, container size, lighting intensity, environmental conditions, and growing medium all influence how quickly a plant develops. Rather than transplanting based on age alone, experienced growers monitor root development and the overall health of the plant.
Understanding what to look for at each stage of growth makes it much easier to decide when to transplant cannabis and avoid unnecessary transplant shock.
Seedling Stage
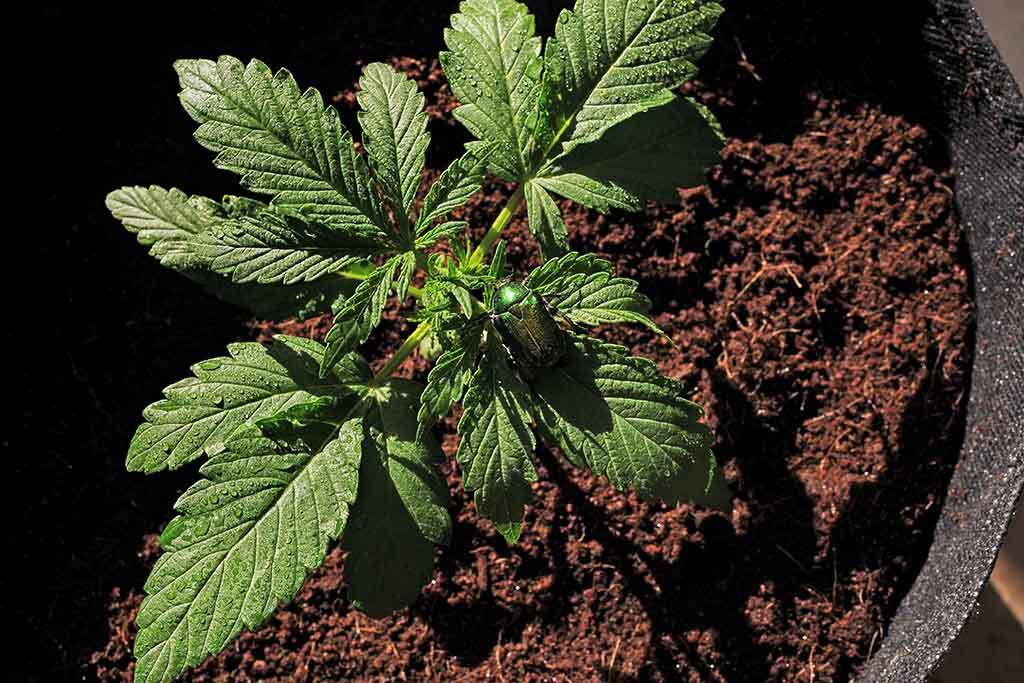
The seedling stage is when your cannabis plant develops its first true leaves and establishes a healthy root system. Although seedlings can grow quickly, transplanting too early can damage delicate roots and slow development.
Most seedlings are ready for their first transplant once they have developed 3 to 5 sets of true leaves and the roots have colonised the starter container. At this stage, the root ball should hold together when gently removed from the pot without the growing medium falling apart.
Signs your seedling is ready include:
- Roots are visible through the drainage holes.
- The growing medium dries out noticeably faster.
- The plant is actively producing new growth.
- The canopy is becoming wider than the starter container.
If the soil falls away from the roots when you remove the plant, wait a few more days before transplanting to allow the root system to establish further.
Vegetative Stage
The vegetative stage is the ideal time to transplant cannabis plants into their final container. During this period, the plant is focused on developing roots, stems, and foliage, allowing it to recover quickly after transplanting.
Most photoperiod cannabis plants require one final transplant before the flowering stage. Moving plants into their finishing container while they are still actively growing gives the roots time to establish before energy is redirected toward flower production.
Signs it is time to transplant during the vegetative stage include:
- The canopy extends beyond the edges of the pot.
- Watering frequency has increased significantly.
- Healthy roots are visible around the root ball or drainage holes.
- Growth begins slowing despite optimal lighting, watering, and nutrition.
Transplanting before the plant becomes rootbound helps maintain vigorous growth and reduces stress later in the grow cycle.
Flowering Stage
Whenever possible, avoid transplanting cannabis after flowering has begun.
During the flowering stage, cannabis plants prioritize bud production rather than root development. Disturbing the root system at this point can temporarily slow growth and reduce the plant's ability to focus on producing high quality flowers.
The best practice is to complete your final transplant one to two weeks before switching photoperiod plants to a 12/12 flowering light cycle. This provides enough time for the roots to establish in fresh growing medium before flowering begins.
If a flowering plant becomes severely rootbound or dries out multiple times a day, transplanting may still be necessary. In these situations, handle the root ball carefully and minimise disturbance to reduce transplant shock.
Autoflowering Cannabis
Autoflowering cannabis follows a much shorter vegetative period than photoperiod varieties, leaving very little time to recover from transplant shock.
For this reason, many experienced growers prefer to sow autoflower seeds directly into their final container. This eliminates the need for transplanting altogether and allows the plant to grow continuously without interruption.
If you choose to transplant an autoflower, it should only be done once and as early as possible, ideally shortly after the seedling has established a healthy root system. Delaying the transplant can reduce vegetative growth and ultimately affect final yields.
Cannabis Transplant Timeline
While every grow is unique, the following table provides a general guideline for when to transplant cannabis throughout each stage of growth.
| Growth Stage | When to Transplant | What to Look For | Recommended Container |
| Seedling | After developing 3 to 5 sets of true leaves | Root ball holds together, roots visible through drainage holes, faster water uptake | 1 to 3 gallon (4 to 11 L) pot |
| Early Vegetative | Once the starter container has been filled with healthy roots | Canopy wider than the pot, vigorous growth, increased watering frequency | 3 to 5 gallon (11 to 19 L) pot |
| Late Vegetative | Before switching to the flowering light cycle | Healthy root system, plant has reached its desired size, no signs of rootbound stress | Final container (5 to 10+ gallons depending on grow size) |
| Flowering | Avoid unless absolutely necessary | Only transplant if the plant is severely rootbound or experiencing significant stress | Final container only |
| Autoflowering Cannabis | Ideally, do not transplant | Start in the final container whenever possible. If necessary, transplant once during early vegetative growth | Final container from germination or after one early transplant |
By understanding how cannabis develops throughout each growth stage, you will be able to identify the ideal transplant window instead of relying on a fixed schedule. Timing your transplants correctly encourages stronger root development, minimises transplant shock, and gives your plants the best opportunity to reach their full genetic potential.
How to Transplant Cannabis: A Step-by-Step Guide
Once you've identified when to transplant cannabis, the next step is learning how to move your plant safely into its new container. While transplanting is relatively simple, careful handling of the root system can make the difference between continued vigorous growth and unnecessary transplant shock.
The goal is to move the plant into fresh growing medium while disturbing the roots as little as possible. A successful transplant allows roots to establish quickly and keeps growth on track.
Follow this step-by-step guide to transplant cannabis plants safely and effectively.
Before You Start: What You'll Need
Preparing everything in advance makes the process smoother and reduces how long roots are exposed to air.
Gather the following:
- A clean container two to three times larger than the current pot
- Fresh growing medium
- Clean water
- Mycorrhizal fungi or beneficial microbes (optional)
- Gardening gloves
- A small trowel or scoop
- A plant label or blunt knife (if needed to loosen roots)
Having everything ready helps you complete the transplant quickly and efficiently.
Step 1: Prepare the New Container
Choose a container with good drainage. Cannabis roots need oxygen as much as water, and poor drainage can lead to root problems.
Fill the pot with fresh growing medium, leaving a hole in the center that matches the size of the root ball. The plant should sit at the same soil level as before.
Lightly moisten the medium before transplanting. It should feel damp but should not release water when squeezed. This helps reduce air pockets and improves root contact.
If you're using living soil, adding mycorrhizal fungi to the planting hole can support root development and nutrient uptake.
Step 2: Water Before Transplanting
Avoid transplanting from dry or overly wet soil.
Water your plant 12 to 24 hours before transplanting so the medium is evenly moist. It should hold together without becoming muddy.
You can test moisture by pressing your finger into the soil. Proper moisture helps the root ball stay intact and makes removal easier.
Step 3: Remove the Plant Carefully
Support the base of the stem with your fingers and turn the container upside down.
Gently squeeze or tap the pot to loosen the root ball. Let gravity help slide the plant out. Never pull on the stem.
If the plant sticks, run a plant label or blunt knife around the inside edge.
A small amount of soil falling away is normal. However, if the root ball collapses completely, the plant may not have been ready for transplanting.
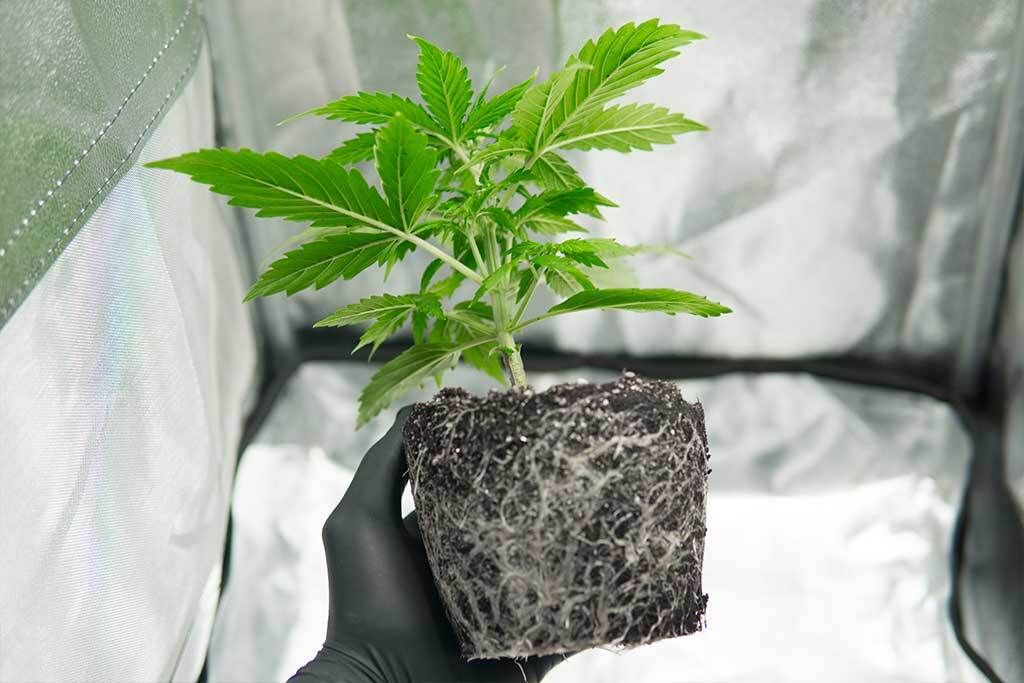
Step 4: Inspect the Roots
Take a moment to check the root system.
Healthy roots should be:
- White or cream-colored
- Firm and fibrous
- Evenly spread throughout the root ball
- Free from foul odors
A few circling roots are normal and indicate good timing. If roots are tightly packed with little soil remaining, the plant is rootbound and needs transplanting immediately.
Lightly loosening the outer roots can encourage outward growth, but avoid excessive disturbance.
Step 5: Position the Plant
Place the root ball into the prepared hole.
Check that:
- The plant is upright
- The stem is straight
- The root ball sits level with the surrounding soil
Planting too deep can cause stem issues, while planting too high may expose roots after watering.
Step 6: Backfill the Container
Fill around the root ball with fresh medium.
Lightly press the soil to remove large air pockets, but avoid compacting it. Roots need airflow to grow properly.
Gently shake the pot once or twice to help the soil settle naturally.
Step 7: Water After Transplanting
Water slowly until a small amount of runoff appears.
This helps:
- Settle the soil
- Remove air pockets
- Improve root contact
- Reduce transplant stress
Avoid overwatering afterward. Wait until the top layer begins to dry before watering again.
Step 8: Monitor Recovery
The first 24 to 72 hours are critical.
It is normal for plants to droop slightly after transplanting. If they recover within a day or two, the process was successful.
During recovery:
- Keep temperatures stable
- Maintain moderate humidity
- Avoid major environmental changes
- Do not prune or train
- Avoid increasing nutrients immediately
Healthy plants typically resume growth within a few days as roots expand into the new medium.
If severe wilting or yellowing continues, review watering and environmental conditions.
Cannabis Transplant Shock: Symptoms, Recovery and Prevention
Even when you know when to transplant cannabis and follow the correct transplanting technique, your plant may still experience a short period of adjustment known as transplant shock. This is a normal stress response that occurs whenever the root system is disturbed during transplanting.
The good news is that transplant shock is usually temporary. In our experience, healthy cannabis plants that are transplanted before they become rootbound and handled carefully often show very little visible stress. When symptoms do occur, they generally improve within a few days as the roots begin expanding into the fresh growing medium.
Understanding what transplant shock looks like—and more importantly, knowing when symptoms are part of normal recovery or indicate a larger problem—will help you avoid making unnecessary changes that could slow your plant's recovery.
What Is Cannabis Transplant Shock?
Cannabis transplant shock is a temporary interruption in normal plant growth caused by disturbance to the root system during transplanting.
Roots are responsible for absorbing water, oxygen, and nutrients from the growing medium. During a transplant, some of the tiny feeder roots responsible for water uptake can be disturbed or damaged. As a result, the plant temporarily directs more of its energy toward repairing and expanding the root system instead of producing new leaves and stems.
This is why recently transplanted cannabis plants may appear slightly droopy or grow more slowly for a short period. Once new roots establish themselves in the surrounding medium, normal growth usually resumes.
It's important to remember that transplant shock should be temporary. Healthy plants recover naturally when environmental conditions remain stable and the roots are allowed to establish themselves.
What Causes Transplant Shock?
While some adjustment after transplanting is perfectly normal, several factors can increase the severity of transplant shock.
The most common causes include:
- Transplanting after the plant has become severely rootbound.
- Allowing the roots to dry out while exposed to the air.
- Pulling the plant by the stem instead of supporting the root ball.
- Breaking apart the root ball unnecessarily.
- Transplanting into waterlogged or extremely dry growing medium.
- Overwatering immediately after transplanting.
- Performing heavy pruning, topping, or plant training immediately after transplanting.
- Transplanting during the flowering stage when the plant is focused on bud production rather than root development.
Most of these issues are avoidable with careful preparation and patience.
Symptoms of Cannabis Transplant Shock
Immediately after transplanting, it's normal for your plant to look slightly different while it adjusts to its new environment.
Common symptoms of mild transplant shock include:
- Slight drooping or soft leaves.
- Temporary wilting.
- Slower vegetative growth for several days.
- Reduced leaf turgor (leaves may feel less firm).
- Slight reduction in water uptake during the first few days.
These symptoms usually improve as new feeder roots develop throughout the fresh growing medium.
One important point many new growers overlook is that slower growth doesn't necessarily mean something is wrong. During the first few days after transplanting, much of the plant's energy is being invested below the surface as the root system establishes itself. Once root growth resumes, healthy above-ground growth typically follows.
Normal Recovery vs. Signs of a Problem
One of the biggest mistakes growers make is assuming every drooping leaf is transplant shock. While mild stress is normal, severe or worsening symptoms may indicate problems with watering, drainage, environmental conditions, or root health.
Use the table below as a general guide.
| Normal Recovery | Possible Cause for Concern |
| Slight drooping for 24–48 hours | Severe wilting lasting several days |
| Little or no new growth for a few days | No improvement after 5–7 days |
| Leaves gradually regain firmness | Yellowing continues to spread |
| Plant appears healthier each day | Leaves continue curling or dying |
| Healthy white roots if inspected | Brown, black, mushy, or foul-smelling roots |
If your plant shows signs in the right-hand column, investigate the growing environment before assuming transplant shock is the only issue.
How Long Does Cannabis Transplant Shock Last?
Recovery time depends on several factors, including the age of the plant, the condition of the root system, and how carefully the transplant was performed.
As a general guideline:
| Plant Condition | Typical Recovery Time |
| Healthy seedlings | 1–3 days |
| Healthy vegetative plants | 2–5 days |
| Large or slightly rootbound plants | 3–7 days |
| Plants with damaged or stressed roots | Recovery varies depending on the underlying issue |
Remember that these are only estimates. Every grow environment is different, and recovery can be influenced by lighting, temperature, humidity, watering practices, and the overall health of the plant before transplanting.
What to Do If Your Cannabis Plant Experiences Transplant Shock
If your plant shows mild signs of transplant shock, the best approach is usually to provide stable conditions and allow the roots time to recover.
We often see growers unintentionally prolong recovery by trying to solve every symptom immediately. In many cases, making multiple adjustments at once causes more stress than the transplant itself.
Instead, focus on creating a stable environment.
Do
- Keep temperatures and humidity consistent.
- Water only when the growing medium begins drying out.
- Maintain your normal lighting schedule.
- Allow the plant several days to establish new roots.
- Monitor new growth rather than focusing only on older leaves.
Don't
- Overwater the plant.
- Increase nutrient strength immediately after transplanting.
- Prune, top, or train the plant.
- Move the plant repeatedly between different environments.
- Continually disturb the root zone to check progress.
Healthy cannabis plants are remarkably resilient. In most cases, patience is one of the most effective ways to support recovery.
How to Prevent Cannabis Transplant Shock
While transplant shock cannot always be eliminated entirely, it can usually be minimised with good transplanting practices.
Experienced growers reduce transplant stress by:
- Transplanting before plants become rootbound.
- Watering 12–24 hours before transplanting.
- Preparing the new container before removing the plant.
- Supporting the root ball rather than pulling on the stem.
- Disturbing the roots as little as possible.
- Using fresh, well-draining growing medium.
- Returning the plant to stable environmental conditions immediately after transplanting.
In our experience, the healthiest transplants are often the least dramatic. When plants are moved at the right stage of development, handled carefully, and allowed to recover naturally, many show little more than a slight pause in growth before continuing to thrive.
By understanding what transplant shock is, recognising the difference between normal recovery and genuine problems, and resisting the urge to overcorrect, you'll give your cannabis plants the best opportunity to establish healthy roots and continue vigorous growth throughout the vegetative stage and into flowering.
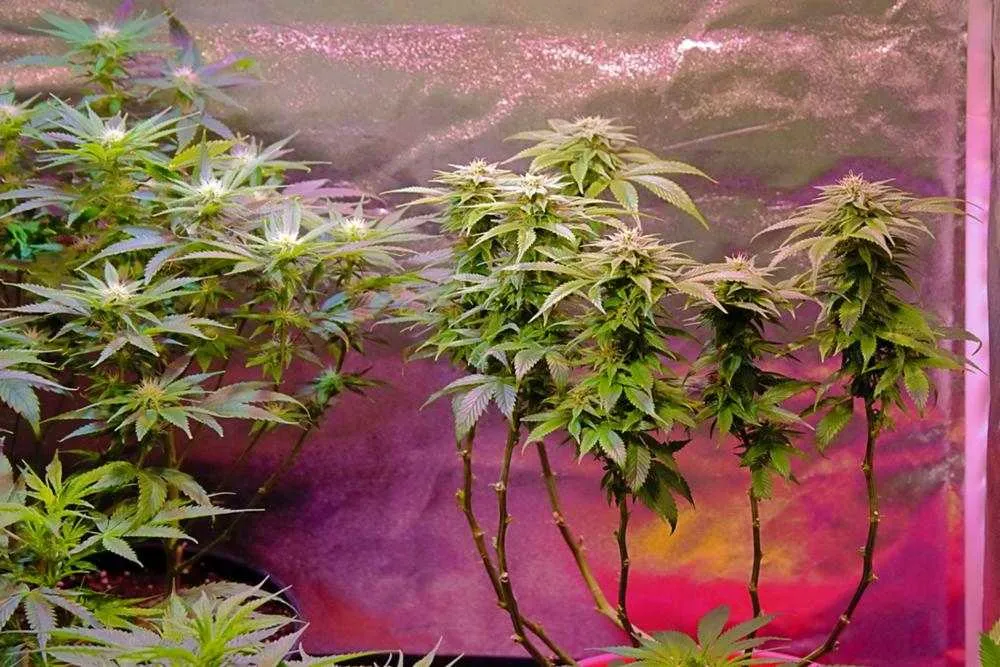
Caring for Cannabis After Transplanting
| Aspect | Guidance | Why It Matters |
| Root Establishment | Allow the plant time to focus on root growth during the first few days after transplanting. | The plant redirects energy below the surface to develop new roots, which supports future growth. |
| Watering | Water thoroughly after transplanting, then wait until the top layer of soil begins to dry before watering again. | Proper watering settles the soil and removes air pockets, while avoiding overwatering ensures roots receive enough oxygen. |
| Avoid Overwatering | Do not keep the soil constantly saturated. | Excess moisture reduces oxygen availability and can slow root development or cause root issues. |
| Environmental Stability | Maintain consistent temperature, humidity, and airflow. Avoid sudden environmental changes. | Stable conditions reduce stress and help the plant recover more quickly. |
| Light Management | Slightly reduce light intensity or raise grow lights for 24–48 hours (indoors). | Lower light stress allows the plant to focus on root recovery rather than rapid top growth. |
| Plant Handling | Avoid pruning, topping, training, or heavy feeding immediately after transplanting. | Additional stress can delay recovery and slow overall growth. |
| Monitoring Growth | Observe new growth over the following days rather than focusing on older leaves. | Healthy recovery is indicated by fresh, upright growth as roots establish. |
| Recovery Outcome | Expect gradual improvement in vigor and leaf posture within a few days. | Proper aftercare supports a smooth transition and continued vegetative growth. |
With proper aftercare, most transplanting cannabis plants recover quickly, allowing them to continue growing vigorously and preparing for a productive flowering stage.
Conclusion
Knowing when to transplant cannabis and how to transplant cannabis correctly are essential skills that can have a lasting impact on the health, growth, and productivity of your plants. By recognising the signs that a plant has outgrown its container, choosing the right time to transplant, and following proven transplanting techniques, you can encourage stronger root development while minimising the risk of transplant shock.
Remember that every grow is unique. Rather than relying on a fixed schedule, pay close attention to your plant's growth, root development, and overall health to determine the ideal time for transplanting cannabis plants. Careful handling during the transplant process, combined with consistent aftercare, will help your plants establish quickly and continue vigorous vegetative growth.
With patience and the right approach, transplanting becomes a routine part of cultivation, giving your cannabis plants the strong foundation they need to thrive and produce their best possible harvest.
Frequently Asked Questions
Can you transplant cannabis during flowering?
It’s generally best to avoid transplanting cannabis during the flowering stage. At this point, the plant is directing most of its energy toward bud development rather than root growth. Transplanting during flowering can increase stress and temporarily slow development. If a flowering plant becomes severely rootbound or dries out multiple times a day, transplanting may be necessary, but it should be done carefully to minimise root disturbance.
How many times should you transplant cannabis?
Most photoperiod cannabis plants are transplanted one or two times during their life cycle. A common progression is moving seedlings from a starter container into a small vegetative pot before transplanting into a final container prior to flowering. The exact number of transplants depends on your growing method, available space, and final plant size.
Should you water cannabis before or after transplanting?
Ideally, you should do both. Water the plant 12 to 24 hours before transplanting so the root ball stays intact during removal. After transplanting, water thoroughly until a small amount of runoff appears from the drainage holes. This helps settle the growing medium around the roots and removes large air pockets that could slow root establishment.
Can cannabis recover from transplant shock?
Yes. Healthy cannabis plants typically recover from mild transplant shock within a few days when they are transplanted correctly and kept in stable growing conditions. During this time, avoid overwatering, heavy feeding, pruning, or training, as additional stress can delay recovery. Most plants resume normal vegetative growth once their roots establish in the new growing medium.
What size pot should I transplant cannabis into?
A good rule of thumb is to move your cannabis plant into a container that is two to three times larger than its current pot. This provides enough fresh growing medium for the roots to expand while reducing the need for multiple transplants. Always choose a container with adequate drainage to support healthy root development and prevent waterlogging.


