Cannabis plants enter the flowering stage when they shift from vegetative growth to producing buds. For photoperiod plants, this begins after extended periods of darkness, either naturally outdoors or indoors under a 12/12 light cycle. This stage is critical, as flowers develop into resin-rich buds containing cannabinoids and terpenes.
Flowering typically lasts 8–13 weeks, depending on genetics and growing conditions. Maintaining stable temperature, humidity, light, and nutrition helps maximise bud development while reducing stress, pests, and mould.
This guide explains how flowering progresses week by week, how to identify early signs like white pistils, and how to determine the ideal harvest time using trichome maturity.
Key Takeaways
- The cannabis flowering stage typically lasts 8–13 weeks, although flowering time varies between cultivars and growing conditions.
- Photoperiod plants flower after switching to a 12/12 light cycle, while autoflowering strains begin flowering according to age rather than light schedule.
- The first signs of flowering include white pistils, increased stretching, and the development of early bud sites.
- Stable environmental conditions, balanced nutrition, and good airflow are essential for producing healthy, resin-rich flowers.
- Buds mature through predictable weekly stages, making it easier to monitor plant health and plan your harvest.
- Trichome maturity is the most reliable indicator of harvest readiness, with most growers harvesting when trichomes are predominantly milky with approximately 10–20% amber.
- Proper drying and curing after harvest are just as important as flowering for preserving flavour, aroma, cannabinoids, and terpene content.

- What is the cannabis flowering stage?
- What are the 6 keys to a successful flowering stage?
- Pre-Flowering & First Signs of the Flowering Stage
- How to Identify the First Signs of the Cannabis Flowering Stage
- What Do Cannabis Buds Look Like When They Start to Form?
- Cannabis Flowering Stage Week by Week
- Summary
- Frequently Asked Questions
What is the cannabis flowering stage?
The cannabis flowering stage is when a cannabis plant transitions from vegetative growth to producing flowers, commonly known as buds. During this phase, female plants redirect their energy from growing leaves and branches to developing cannabinoid- and terpene-rich flowers that determine the plant's potency, aroma, flavour, and final yield.
For photoperiod cannabis strains, flowering begins when they receive longer periods of uninterrupted darkness. Outdoors, this occurs naturally as daylight hours shorten towards the end of summer, while indoor growers trigger flowering by switching their lighting schedule to 12 hours of light and 12 hours of darkness (12/12). Autoflowering cannabis strains flower automatically according to age rather than changes in the light cycle.
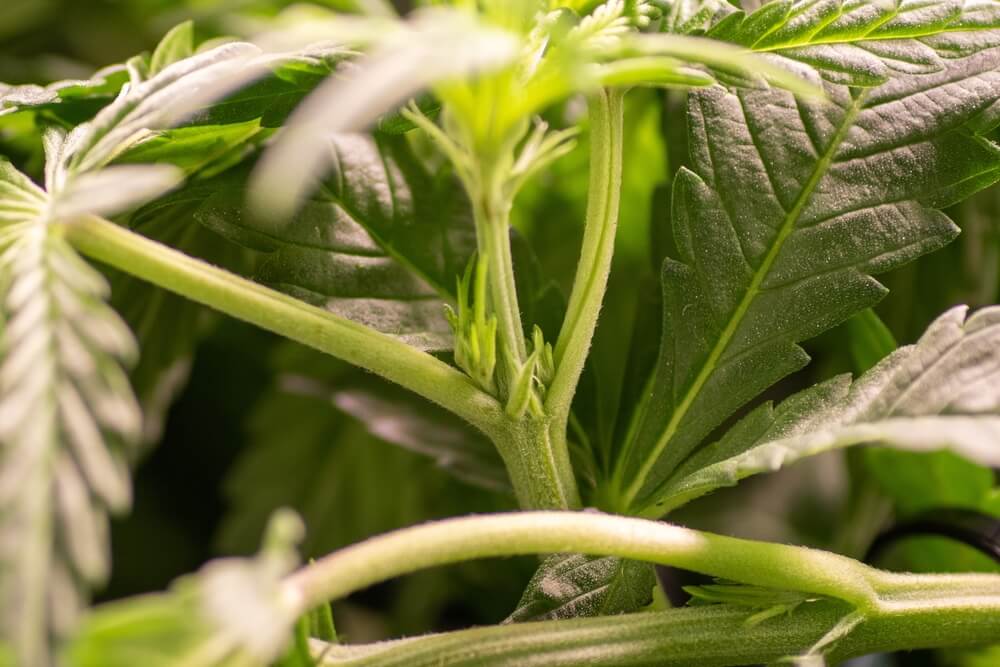
One of the first signs that your plant has entered the early flowering stage is the appearance of small white hairs, known as pistils, at the nodes where the branches meet the main stem. As flowering progresses, these early flower sites develop into dense, resin-covered buds.
The flowering stage is the most important part of the cannabis life cycle because environmental conditions such as temperature, humidity, light intensity, airflow, and nutrition have a direct impact on bud size, resin production, cannabinoid content, and overall yield. Understanding what happens during each week of flowering allows growers to optimise plant health, identify problems early, and harvest at the ideal stage of maturity.
How long does the cannabis flowering stage take?
One of the most common questions growers ask is, "How long is the cannabis flowering stage?" The answer depends primarily on the genetics of the strain being grown.
Most photoperiod cannabis plants complete flowering in 8 to 13 weeks, although some long-flowering sativa cultivars can take up to 14 weeks under ideal conditions. Autoflowering cannabis strains typically flower for 6 to 8 weeks, with most varieties completing their entire life cycle from seed to harvest in around 10 to 13 weeks.
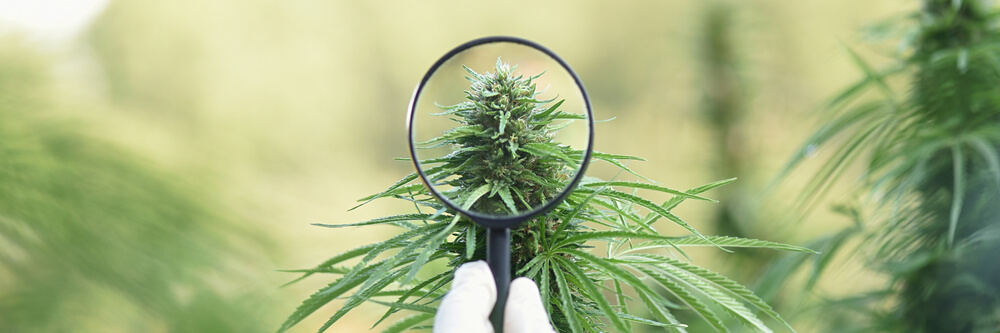
Rather than harvesting according to a fixed calendar, experienced growers monitor trichome maturity, as this provides the most reliable indication that the buds have reached peak ripeness. Most plants are harvested when the majority of trichomes appear milky or cloudy, with around 10–20% turning amber, although the ideal harvest window ultimately depends on the desired cannabinoid profile and growing preferences.
Typical cannabis flowering times
| Cannabis Type | Early Flowering | Mid Flowering | Late Flowering | Average Flowering Time |
| Indica | Week 1–2 | Week 3–5 | Week 6–8 | 7–9 weeks |
| Hybrid | Week 1–2 | Week 3–6 | Week 7–10 | 8–10 weeks |
| Sativa | Week 1–3 | Week 4–8 | Week 9–13+ | 10–13+ weeks |
| Autoflower | Week 1–2 | Week 3–5 | Week 6–8 | 6–8 weeks of flowering |
While flowering times vary between cultivars, the stages of flower development remain largely the same. During early flowering, plants stretch rapidly and begin producing white pistils. Mid flowering is characterised by vigorous bud formation, increased trichome production, and stronger aromas. In late flowering, buds swell, resin production peaks, pistils darken, and trichomes gradually change from clear to cloudy before developing amber heads, signalling that harvest is approaching.
What are the 6 keys to a successful flowering stage?
Producing dense, resin-rich cannabis buds depends on maintaining a stable environment throughout flowering. While each strain develops at its own pace, these six best practices will help maximize bud quality, resin production, and overall yield.
1. Minimize plant stress
Cannabis plants are sensitive during flowering. Sudden changes in light cycles, temperature, humidity, watering, or nutrients can slow growth and increase the risk of hermaphroditism. Keep conditions stable and avoid high-stress training or heavy pruning once flowering begins.
2. Adjust nutrients for flowering
As plants transition from vegetative growth, their nutrient needs shift. Understanding the correct NPK ratio for each growth stage will help support healthy flower development. Nitrogen demand decreases, while phosphorus and potassium become essential for bud development and energy production. Follow your nutrient schedule carefully and avoid overfeeding to prevent nutrient burn.
3. Maintain proper temperature and humidity
Consistent environmental conditions support healthy flower development and reduce the risk of mold. Aim for daytime temperatures of 20–26°C (68–79°F) with slightly cooler nights. Gradually lower humidity from 55–60% in early flowering to 40–45% in late flowering to prevent bud rot. Good grow room humidity control is one of the most effective ways to protect developing flowers.
4. Inspect plants regularly
Check plants several times a week for pests, deficiencies, mold, or stress. Early detection makes issues easier to manage and protects developing buds.
5. Harvest based on trichomes
Flowering timelines are only a guide. The best way to determine harvest readiness is by examining trichomes. Our guide on when to harvest cannabis explains exactly what to look for. Most growers harvest when they are milky or cloudy, with 10–20% amber, depending on the desired effect.
6. Provide sufficient light intensity
Adequate light is essential for bud growth. Ensure even canopy coverage and maintain proper distance from the light source to avoid stress while maximizing photosynthesis.
Pre-Flowering & First Signs of the Flowering Stage
One of the most common questions growers ask is, "How do you know when cannabis is in the flowering stage?" The earliest signs appear during the pre-flowering stage, when the plant begins transitioning from vegetative stage to bud production.
For photoperiod cannabis plants, pre-flowering typically begins 1–2 weeks after switching to a 12/12 light cycle indoors or as daylight hours naturally shorten outdoors. During this period, plants often experience a noticeable stretch, increasing in height while the spacing between nodes (internodal spacing) becomes more pronounced.
The first visible sign of a female plant entering the early flowering stage is the appearance of small white hairs called pistils. These emerge at the nodes where the branches meet the main stem and indicate that the first flower sites are beginning to develop. As flowering progresses, these sites gradually form into resin-rich buds.
Autoflowering cannabis strains develop differently. Rather than relying on changes in the light cycle, they begin flowering automatically after approximately 3–5 weeks of vegetative growth, depending on the cultivar and growing conditions.
Recognizing these early flowering signs allows growers to adjust nutrients, environmental conditions, and plant care to support healthy bud development throughout the weeks ahead.
Early signs of the cannabis flowering stage
| Sign | What to Look For | What It Means |
| White pistils | Fine white hairs emerging at the nodes where branches meet the main stem | The first sign of a female plant entering the flowering stage and beginning bud development. |
| Plant stretch | Rapid vertical growth and increased internodal spacing | The plant is transitioning from vegetative growth and preparing to produce flowers. |
| Developing flower sites | Small clusters forming around the nodes | Future buds are beginning to develop and will continue to expand throughout flowering. |
| Leaf growth slows | Fewer new fan leaves are produced as the plant matures | More energy is being redirected from vegetative growth into flower production. |
| Autoflower transition | Plants begin flowering after approximately 3–5 weeks from seed | Autoflowering strains flower according to age rather than changes in the light cycle. |
How to Identify the First Signs of the Cannabis Flowering Stage
Recognizing the first signs of the cannabis flowering stage allows you to adjust your growing environment, nutrients, and plant care at the right time. Whether you're growing photoperiod or autoflowering cannabis, identifying the shift from vegetative growth to flowering helps ensure optimal conditions for healthy bud development.
Although early flowering signs are similar for indoor and outdoor plants, the triggers differ. Indoor growers initiate flowering by switching to a 12/12 light cycle, while outdoor plants respond to naturally shorter daylight hours. Understanding these differences helps you monitor your plants more effectively and prepare for the rapid changes that occur during early flowering.
First Signs of the Flowering Stage Indoors
Indoor growers trigger flowering by switching their lighting schedule to 12 hours of light and 12 hours of darkness (12/12). If you're unsure how cannabis light cycles work throughout the grow, see our guide to light schedules for growing cannabis plants. Most plants begin showing the first visible signs of flowering within 7–14 days, although the timing varies slightly between cultivars.
The earliest signs of the cannabis early flowering stage include rapid vertical stretching, increased internodal spacing, and the appearance of small white pistils at the nodes where the branches meet the main stem. These pistils are the first indication that a female plant has entered the flowering stage and that bud sites are beginning to form.
Maintaining a consistent 12/12 light cycle is essential throughout flowering. Repeated or significant interruptions to the dark period can stress photoperiod cannabis plants, potentially delaying flower development or increasing the risk of hermaphroditism. Stable temperatures, good airflow, and appropriate humidity will help support healthy bud development from the beginning of flowering.
First Signs of the Flowering Stage Outdoors
If you're growing outdoors, understanding how to grow outdoor weed successfully will help prepare plants before flowering begins. As the days become shorter and nights grow longer towards the end of summer, photoperiod plants naturally transition from vegetative growth into the flowering stage. The exact timing varies depending on your latitude, local climate, and the genetics of the cultivar being grown.
The first signs of flowering outdoors are the same as those seen indoors. Plants begin to stretch, internodal spacing increases, and fine white pistils appear where the branches meet the main stem. Over the following weeks, these early flower sites gradually develop into dense, resin-rich buds.
Choosing a cultivar suited to your local growing season is one of the most important decisions for outdoor growers. Fast flowering cannabis seeds are often better suited to cooler or wetter climates, allowing plants to finish before autumn rain arrives. Allowing plants to finish before prolonged autumn rain, cold temperatures, or early frost increase the risk of mould and bud rot. In many Northern Hemisphere regions, outdoor cannabis is typically harvested between September and November, although harvest dates vary depending on location and genetics.
Indoor vs Outdoor Flowering
| Growing Method | What Triggers Flowering? | First Visible Signs |
| Indoor photoperiod | Switching to a 12/12 light cycle | Rapid stretch, increased internodal spacing, white pistils, developing bud sites |
| Outdoor photoperiod | Naturally shortening daylight hours | Rapid stretch, increased internodal spacing, white pistils, developing bud sites |
| Autoflower | Plant age (typically 3–5 weeks from seed) | Rapid stretch, white pistils, developing bud sites regardless of the light cycle |
What Do Cannabis Buds Look Like When They Start to Form?
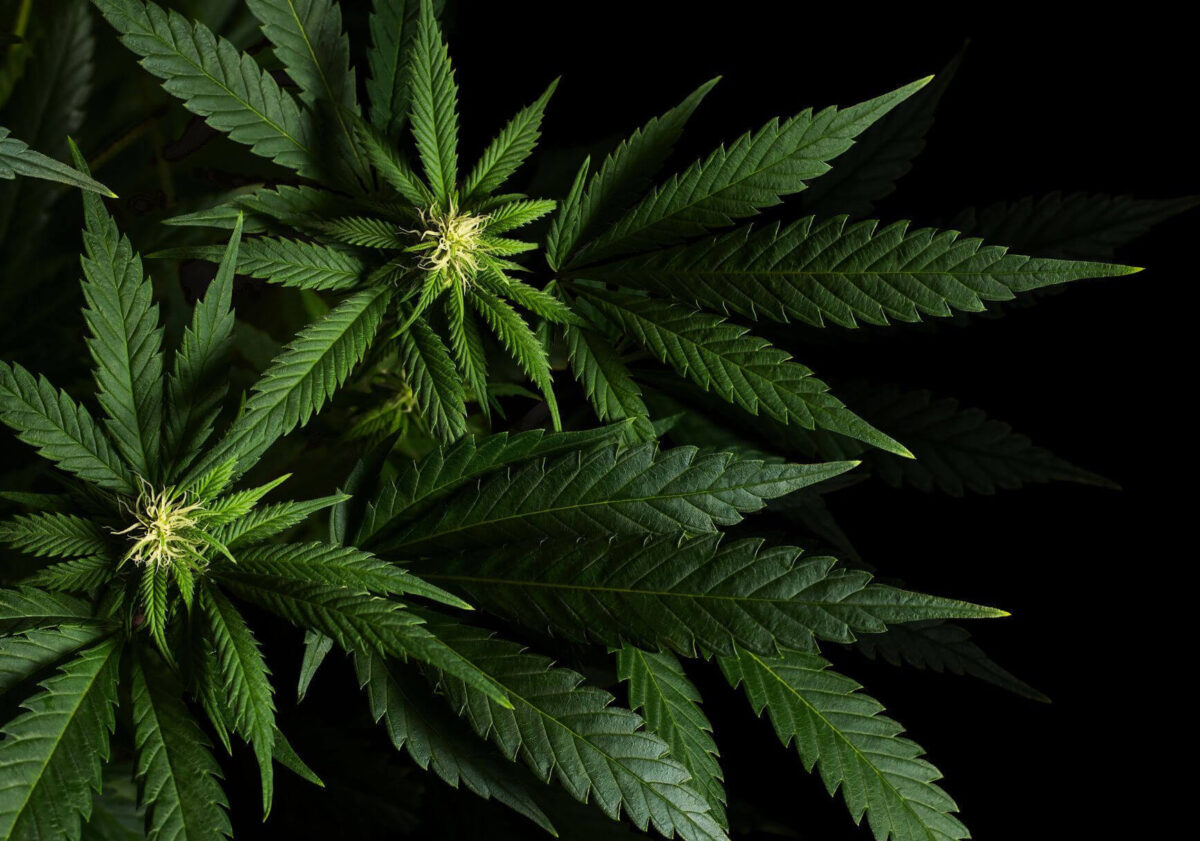
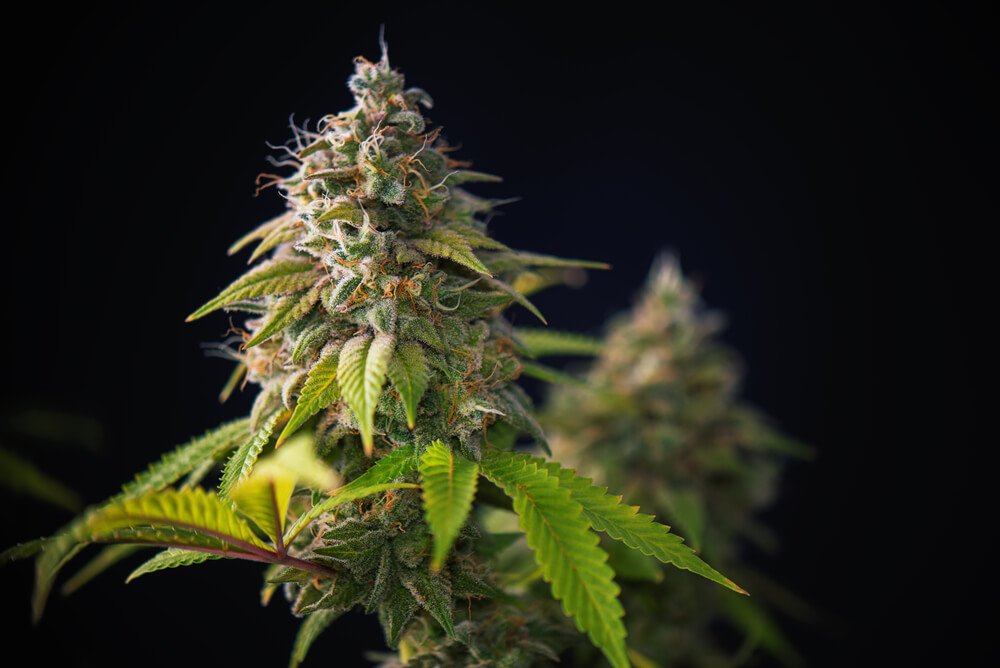
During the early flowering stage, small white pistils emerge from tiny, tear-shaped structures called bracts at the nodes of female cannabis plants. These are the first visible signs of bud development. As flowering progresses, more bracts form around each site, gradually developing into dense, resin-rich buds covered in trichomes.
It’s important to distinguish female flowers from male pollen sacs. Female plants produce white pistils, while male plants develop small, round sacs that grow in clusters without hairs. If male plants release pollen, female plants become fertilized and shift their energy toward producing seeds instead of high-quality buds.
Growers using regular cannabis seeds should inspect plants early and remove males before pollen is released. Alternatively, feminized seeds produce almost exclusively female plants, reducing the risk of accidental pollination.
Female Buds vs Male Pollen Sacs
| Female Flower | Male Flower |
| White pistils emerge from tear-shaped bracts | Small round pollen sacs develop in clusters |
| Develops into resin-rich buds | Produces pollen instead of buds |
| Suitable for harvesting flowers | Should be removed before pollen sacs open (unless breeding) |
| Commonly grown from feminized seeds | Found when growing regular seeds |
Cannabis Flowering Stage Week by Week
Every cannabis cultivar flowers at its own pace, so these weekly milestones should be used as a general guide rather than a strict timetable. Indica-dominant strains often mature more quickly than sativas, while autoflowering varieties may progress faster because of their shorter life cycle. Observing your plants throughout flowering is far more reliable than following a calendar alone.
Cannabis Flowering Stage at a Glance
| Flowering Week | What's Happening | What to Monitor |
| Week 1 | Flowering stretch begins as plants transition from vegetative growth. | Plant height, canopy shape, and complete any low-stress training (LST). |
| Week 2 | White pistils appear and the first flower sites begin to develop. | Confirm female flowers and remove any male or hermaphrodite plants if growing from regular seeds. |
| Week 3 | Bud sites become more defined and early resin production begins. | Watch for nutrient deficiencies, pests, and healthy leaf development. |
| Week 4 | Flower production accelerates and trichomes become increasingly visible. | Support branches if needed and ensure good airflow around developing buds. |
| Week 5 | Buds bulk up, resin production increases, and aromas become more pronounced. | Check branch support and begin monitoring trichome development. |
| Week 6 | Buds continue swelling as trichomes become mostly cloudy and pistils begin to darken. | Monitor trichome maturity and remove any dead or damaged foliage if necessary. |
| Week 7 | Many fast-flowering cultivars approach harvest, with buds reaching peak size and resin production. | Inspect for mould or bud rot and continue assessing trichome maturity. |
| Week 8+ | Fast-flowering cultivars may be ready to harvest, while longer-flowering genetics continue maturing. | Harvest when trichomes are predominantly milky with around 10–20% amber, according to your preferred effect. |
Week 1 The Transition Begins
After switching photoperiod plants to a 12/12 light cycle, they begin transitioning from vegetative growth into flowering. Although visible flowers are usually not present yet, rapid vertical growth, often called the flowering stretch, begins as the plant prepares to support future bud development.
Internodal spacing increases, branches elongate, and the canopy expands to capture more light. If you're growing indoors and have limited vertical space, this is the final opportunity to complete low-stress training (LST) or adjust plant support before stems become less flexible.
Actionable Tip: Finish any canopy training early in the stretch to improve light distribution without stressing the plant.
Week 2 First Flowers Appear
During the second week, the first white pistils become clearly visible at the nodes, confirming that female flowers are developing. Small flower sites begin forming across the plant, while vertical growth often continues.
If you're growing from regular seeds, inspect plants carefully for male pollen sacs or signs of hermaphroditism and remove affected plants before pollen is released.
Actionable Tip: Check developing flower sites every few days to ensure only healthy female flowers are present.
Week 3 Bud Sites Begin to Develop
By the third week, the flowering stretch begins to slow as the plant redirects more energy into flower production. Individual bud sites become more defined, additional pistils emerge, and early resin production may be visible on the bracts surrounding each flower.
This is also a good time to inspect leaves for signs of nutrient imbalance, discoloration, or pest activity. Identifying problems early gives plants the best chance to recover before buds begin gaining significant weight.
Actionable Tip: Monitor leaf color and growth regularly so any deficiencies or excesses can be corrected before they affect flower development.
Week 4 Flower Production Accelerates
Around the fourth week, most cultivars have completed the majority of their stretch and begin focusing almost entirely on flower production. Buds become noticeably larger as additional calyxes stack together, and trichome production increases across the flowers and nearby sugar leaves.
As resin production increases, aromas become much stronger. Indoor growers may notice the need for improved ventilation or odor control during this stage.
Actionable Tip: Support developing branches if necessary to prevent bending or breakage later in flowering.
Week 5 Buds Begin to Bulk Up
By week five, flowers become denser as calyxes continue stacking and resin glands develop rapidly. Trichomes are usually easy to see without magnification, while terpene production increases, producing the characteristic aroma of the cultivar.
Although flowering times vary between genetics, this is a good stage to begin monitoring trichome development rather than relying solely on the estimated flowering time.
Actionable Tip: Inspect heavy branches regularly and provide support where needed as buds continue gaining weight.
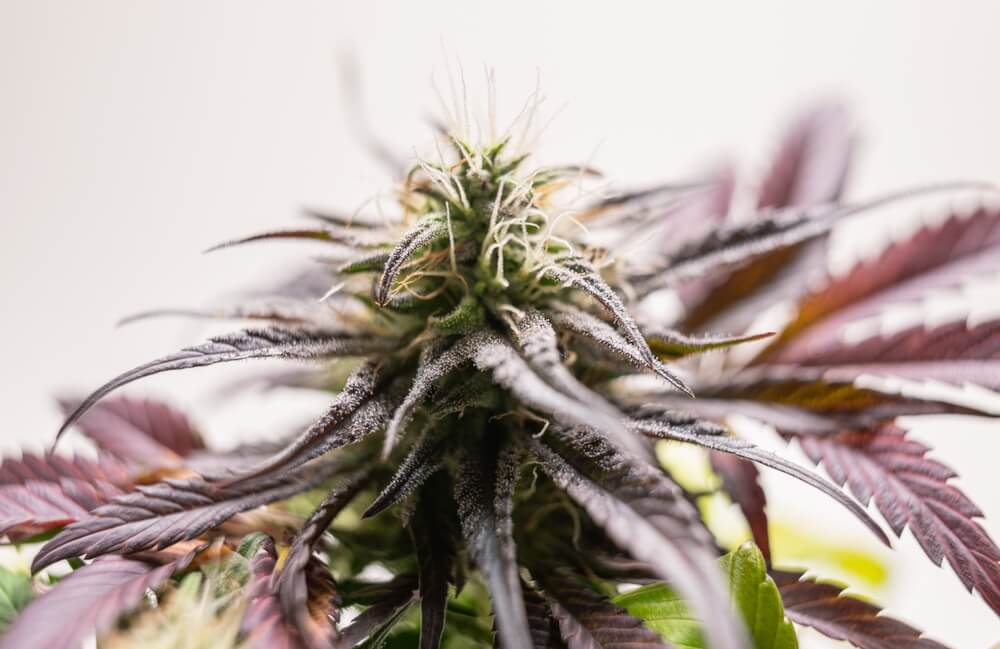
Week 6 Resin Production Increases
During week six, buds continue swelling and trichomes become increasingly cloudy, indicating that cannabinoids are approaching maturity. Some pistils begin changing from white to orange or brown, while older fan leaves may naturally fade as the plant reallocates resources toward flower development.
Some leaf yellowing during late flowering is normal, but rapid discoloration or widespread damage may indicate nutrient or environmental issues that require attention.
Actionable Tip: Use a jeweler's loupe or digital microscope to begin monitoring trichome color rather than relying on pistil color alone.
Week 7 Approaching Harvest
By the seventh week, many fast-flowering cultivars are nearing harvest. Buds appear swollen, resin production reaches its peak, and trichomes are predominantly cloudy with the first amber heads beginning to appear.
Some growers choose to reduce or stop feeding nutrients during the final weeks by flushing cannabis plants, although research remains mixed on its benefits. While this practice remains common, research has produced mixed findings on whether flushing significantly improves flavor, burn quality, or cannabinoid content.
Continue inspecting flowers carefully for signs of mold or bud rot, particularly if growing outdoors or in humid conditions.
Actionable Tip: Focus on trichome maturity and overall plant health rather than harvesting according to a fixed schedule.
Week 8 Peak Ripeness and Harvest
For many cultivars, week eight marks the ideal harvest window. Buds should feel firm and resinous, most trichomes will appear milky or cloudy, and approximately 10 to 20% may have turned amber, depending on the desired effect and the genetics of the cultivar.
Once the desired level of maturity has been reached, harvest the plant promptly to preserve cannabinoid and terpene quality. After harvesting, the drying and curing process becomes equally important for maximizing flavor, aroma, and overall flower quality.
Actionable Tip: Harvest based on trichome maturity rather than the calendar, as every cultivar reaches peak ripeness at a slightly different time.
Summary
The cannabis flowering stage is the most important phase of the growing cycle, where healthy plants develop into resin-rich, harvest-ready buds. While flowering times vary between cultivars, understanding the changes that occur each week allows you to make informed decisions about plant care, identify potential issues early, and optimise bud quality, potency, and yield.
Successful flowering depends on maintaining a stable environment, providing appropriate nutrition, and monitoring plant development rather than relying solely on a calendar. Observing pistil development, bud formation, and trichome maturity will help you determine the ideal harvest window for your chosen cultivar.
Once your plants have reached peak ripeness, the focus shifts to trimming, drying, and curing. These final steps are just as important as flowering and play a major role in preserving cannabinoids, terpenes, flavour, and aroma. With patience, careful observation, and experience, you'll continue refining your cultivation skills and producing consistently high-quality cannabis harvests.
Frequently Asked Questions
How long does the cannabis flowering stage last?
Most photoperiod cannabis plants flower for 8–13 weeks, depending on their genetics. Indica-dominant cultivars typically finish in 7–9 weeks, hybrids in 8–10 weeks, and sativas in 10–13 weeks or longer. Autoflowering cannabis strains usually flower for 6–8 weeks as part of their shorter overall life cycle.
Can cannabis flower under 18 hours of light?
Photoperiod cannabis plants require approximately 12 hours of uninterrupted darkness each day to initiate flowering. Autoflowering cannabis strains, however, flower according to age and can remain under 18–24 hours of light throughout their life cycle.
Why are my cannabis plants stretching during flowering?
Stretching is a normal part of the early flowering stage. During the first few weeks, plants rapidly increase in height to position developing flowers for better light exposure. Excessive stretching may also indicate insufficient light intensity or lights positioned too far from the canopy.
What happens if cannabis is pollinated during flowering?
If female flowers are pollinated, the plant redirects much of its energy toward producing seeds instead of continuing to develop dense, resin-rich buds. This usually reduces flower quality, potency, and overall yield.
Can I prune cannabis during flowering?
Heavy pruning is generally not recommended once flowering has begun, as it can stress the plant. However, removing damaged, diseased, or heavily shaded leaves to improve airflow is often beneficial, particularly during mid to late flowering.
What should I do after harvesting cannabis?
After harvest, trim the flowers and dry them slowly in a cool, well-ventilated environment before curing them in airtight containers. Proper drying and curing preserve cannabinoids, terpenes, flavour, and aroma while improving the overall quality of the finished flowers.

